Loading ...
Loading ...
Loading ...
21
*
When using the eyelet punch, place thick
paper or some other protective sheet under the
fabric before punching the hole in the fabric�
CAUTION
• When opening the buttonhole with the seam
ripper, do not place your hands in the cutting
direction, otherwise injuries may result if the
seam ripper slips�
• Do not use the seam ripper in any other way
than how it is intended�
n Sewing buttonholes on stretch fabrics ★
(Available on models with 35 or more stitches�)
When sewing buttonholes on stretch fabrics, use a
gimp thread�
1
Hook the gimp thread onto the part of
buttonhole foot “A” shown in the illustration�
2
It fits into the grooves, and then loosely tie it�
3
Attach buttonhole foot “A”�
4
Select a stitch�
*
Stitches may differ depending on the model� Check
stitch selections on the machine's body, and then
select the stitch number�
5
Adjust the stitch width to the thickness of the
gimp thread�
6
Lower the presser foot lever and the buttonhole
lever, and then start sewing�
7
When sewing is finished, gently pull the gimp
thread to remove any slack�
8
Use a handsewing needle to pull the gimp
thread to the wrong side of the fabric, and then
tie it�
Button sewing (
for models equipped
with the button fitting foot “M”)
Buttons can be sewn on with the machine� Buttons
with two or with four holes can be attached�
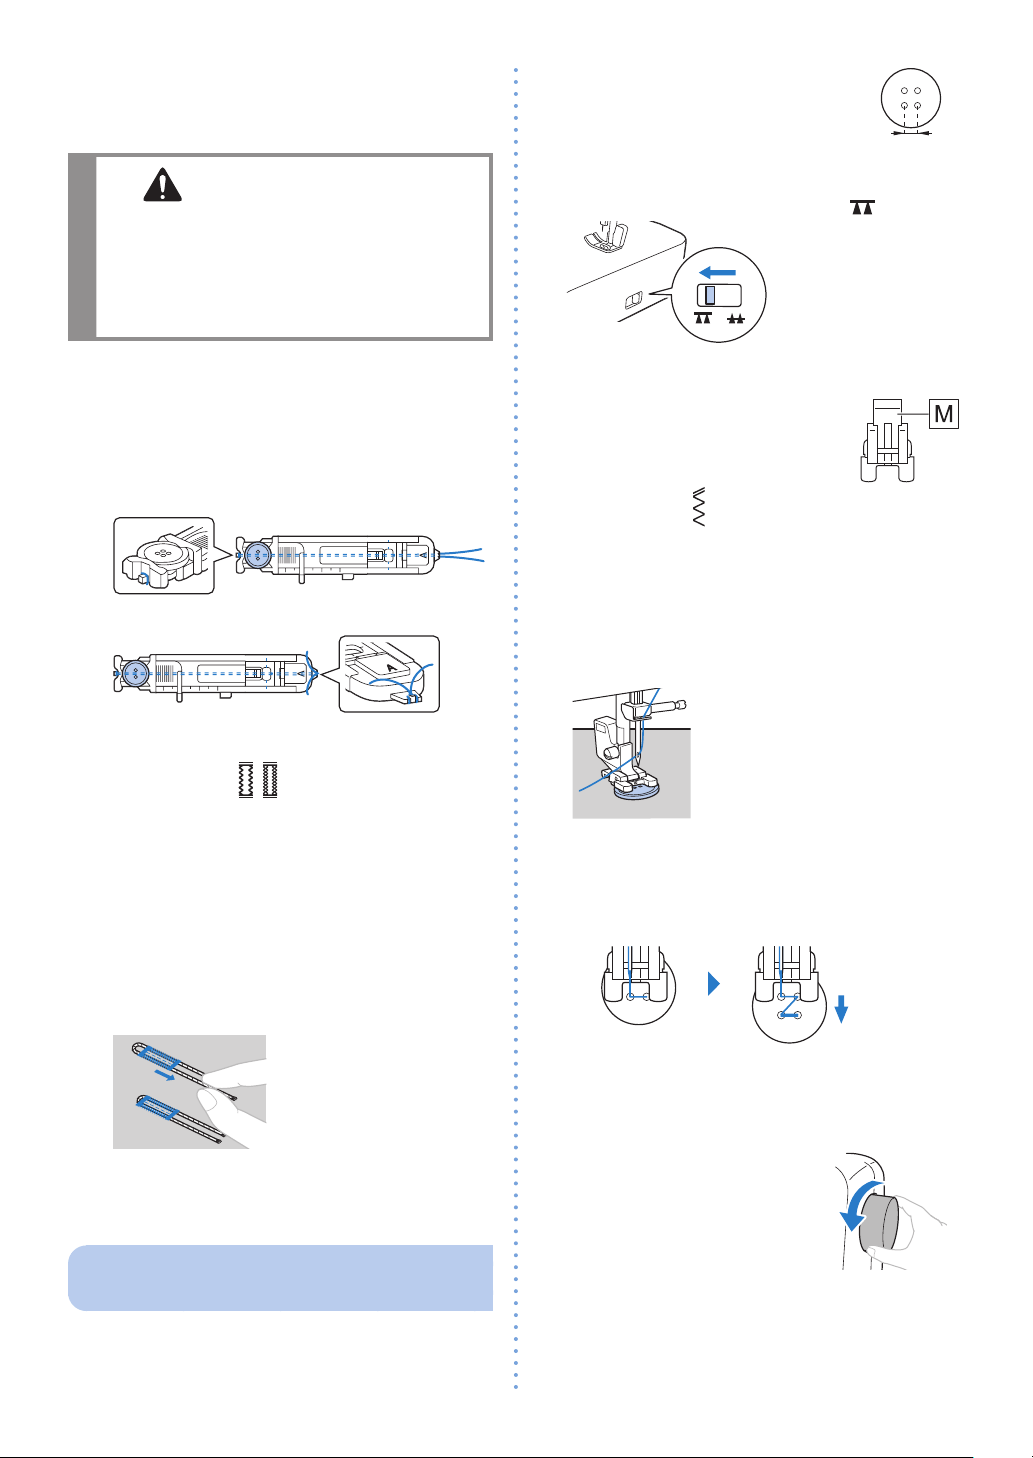
1
Measure the distance between the
holes in the button to be attached�
2
Raise the presser foot lever�
3
Slide the feed dog position switch, located at the
rear of the machine on the base, to
�
X
The feed dogs are lowered�
4
Attach button fitting foot “M”�
5
Select a stitch�
*
Check the stitch number on the machine’s body, and
set the machine for that stitch�
6
Adjust the stitch width so that it is the same as
the distance between the holes in the button�
7
Place the button in the position where it will be
sewn, and lower the presser foot lever�
• When attaching four-hole buttons, first sew the
two holes closest to you� Then, slide the button
so that the needle goes into the two holes
toward the rear of the machine, and then sew
them in the same way�
8
Turn the handwheel toward you
(counterclockwise) to check that the needle
correctly goes into the two holes of the button�
If it seems as if the needle
will hit the button, remeasure
the distance between the
holes in the button� Adjust
the stitch width to the
distance between the button
holes�
0
★: Only for some models�
Loading ...
Loading ...
Loading ...