Loading ...
Loading ...
Loading ...
18
CAUTION
• When using overcasting foot “G”, be sure
to select a stitch that can be used with
overcasting foot “G”� If you sew with the
incorrect stitch, the needle may hit the
presser foot, bending the needle or damaging
the presser foot�
3
Position the fabric with the edge of the fabric
against the presser foot guide, and then lower the
presser foot lever�
Presser foot guide
4
Rotate the handwheel toward you
(counterclockwise)� Check that the needle does
not touch the presser foot�
The needle should not touch
the presser foot center bar�
5
Sew with the edge of the fabric against the
presser foot guide�
Needle drop point
CAUTION
• Be sure to pull the fabric backward after
finished sewing� If you pull the fabric toward
side or forward, the presser foot pin may be
damaged�
• If thread is tangled on the presser foot,
remove the entangled thread, and then raise
the presser foot lever to remove the presser
foot� If the presser foot is raised while
entangled with thread, the presser foot may
be damaged�
6
Stop sewing when you are finished, and raise the
presser foot and needle to pull the fabric under
the presser foot towards the back of the machine�
Blind hem stitching
Secure the lower edge of skirts and pants with a blind
hem�
Memo
• When the size of cylindrical pieces is too small to
slide onto the arm or the length is too short, the
fabric will not feed and desired results may not be
achieved�
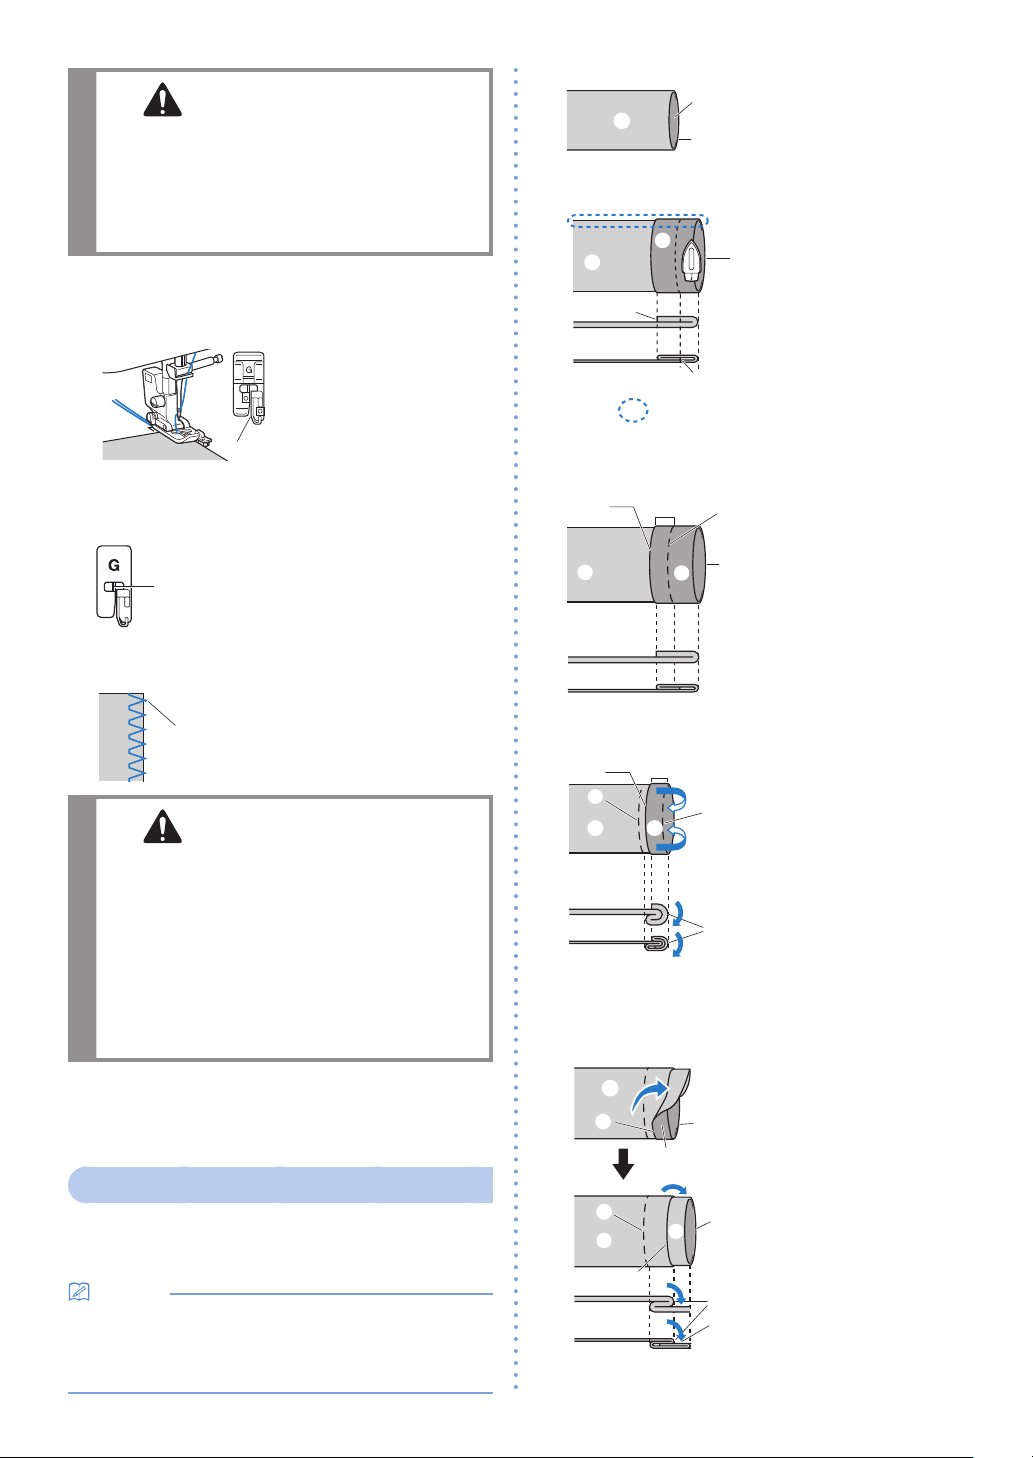
1
Turn the skirt or pants inside out�
a
b
c
1 Wrong side of fabric
2 Right side of fabric
3 Lower edge of fabric
2
Fold the lower edge of fabric to the desired length
to be hemmed and then press�
d
b
b
b
a
a
a
c
c
1 Wrong side of fabric
2 Right side of fabric
3 Lower edge of fabric
4 Desired length for hem
<Thick fabric>
<Normal fabric>
<Seen
from the side>
3
Using tailor’s chalk, mark the fabric about 5 mm
(3/16 inch) from the edge of the fabric, and then
baste it�
b
b
b
a
a
a
ce
f
d
1 Wrong side of fabric
2 Right side of fabric
3 Lower edge of fabric
4 Desired length for hem
5 5 mm (3/16 inch)
6 Basting
<Thick fabric>
<Normal fabric>
<Seen from the side>
4
Fold back the fabric inside along the basting�
a
c
f
e
a
a
b
g
d
1 Wrong side of fabric
2 Right side of fabric
3 Lower edge of fabric
4 Desired length for hem
5 5 mm (3/16 inch)
6 Basting
7 Basting point
<Thick fabric>
<Normal fabric>
<Seen from the side>
5
Unfold the edge of fabric, and position the fabric
with the wrong side facing up�
a
b
f
c
a
a
c
d
a
f
a
a
b
e
1 Wrong side of fabric
2 Right side of fabric
3 Edge of fabric
4 Desired edge of hem
5 Basting point
6 Basting
<Thick fabric>
<Normal fabric>
<Seen from the side>
Loading ...
Loading ...
Loading ...