Loading ...
Loading ...
Loading ...

42
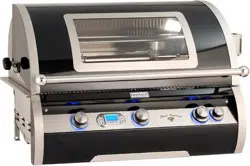
Fig. 42-1 Main burner removal
MAIN BURNER REMOVAL
1. Remove the cooking grid and flavor grid from above the
burner that is to be removed and set them aside.
2. Locate and remove the cotter pin from the left or right
rear burner anchoring peg by pulling it straight out of
the cotter pin hole using fingers or needle-nose pliers.
See Fig. 42-1.
3. Carefully lift the burner from the burner support and
out from the hole in the forward fire wall. See Fig. 42-2.
4. To replace the burner, slide the open cylindrical end of the
burner around the orifice, enveloping it and centering on
it. Then lower the back end anchor pegs into the burner
support anchor peg holes.
Note: It is critical to the continued safe functioning of
the burners that the orifices are centered and
completely inside the burner gas inlets.
5. Re-install the cotter pin into the rear burner anchor peg
using fingers or needle-nose pliers.
6. Replace the flavor grid and cooking grid.
7. Repeat these steps for the other burner(s), if needed.
INFRARED BURNER REMOVAL (if equipped)
To completely remove the infrared burner, follow the steps
above for the main burner removal with the addition of
disconnecting the infrared electrode assembly prior to lifting
the burner. See Fig. 42-3.
Remove
cotter pin
Main
burner
Fig. 42-2 Remove burners
Hole with
orifice
Burner
support
Forward
firewall
Disconnect igniter
electrode assembly
(Top view)
Fig. 42-3 Infrared burner removal
SERVICING AND CLEANING (Cont.)
Loading ...
Loading ...
Loading ...