Loading ...
Loading ...
Loading ...

27
BEFORE INITIAL USE
Ensure that:
• the unit has been properly installed and leak tested by a qualified professional service technician and as instructed in this manual.
• you have read and understand all of the information in this manual.
BEFORE EACH USE
Ensure that:
• you smell around the appliance area for gas. If you smell gas (and all control knobs are in the OFF position), immediately shut
off the gas supply and contact a qualified professional service technician or the gas supplier for inspection.
• the required vent openings and surrounding area of the enclosure are clear at all times.
• the cooking area and drip tray are clean, and the drip tray is properly installed.
• you inspect all piping and hoses for damage, cuts, wear, and tear. Replace any damaged components prior to use.
OPERATION
• The unit becomes HOT during use. NEVER touch any part of the cooking area or surrounding hot surfaces with bare
hands. Use long-handled insulated BBQ tools and wear an insulated glove / oven mitt.
• Always keep your face and body as far from the unit as possible during use. Avoid wearing loose-fitting clothing as
they could ignite.
• This appliance is designed as an attended appliance. DO NOT leave this appliance burning when unattended.
• NEVER cover more than 75% of the cooking surface with griddles or pans to prevent overheating.
• After each use, turn the control knob(s) to the OFF position and turn off the gas supply to the unit.
After reading and understanding all bullets above, follow these steps to light and use your grill:
1. Light the grill per the LIGHTING INSTRUCTIONS section.
2. Turn the control knobs to the HI-LIGHT position, close the hood, and allow the grill to preheat for 15 minutes or until desired
cooking temperature is reached.
3. Place the food on the grill and cook as desired. Monitor the flames and the temperature, and adjust the heat setting if necessary.
4. See the sections below and the following pages for all other information regarding use.
WIND CONSIDERATIONS
Proper airflow (front-to-back, Fig. 27-1) MUST be maintained for the unit to perform
as it was designed. See the INSTALLATION REQUIREMENTS section for details.
When using the unit in windy conditions, the wind can disrupt the airflow and cause
overheating. To prevent overheating during windy conditions, do not leave the hood
closed with the burners on high for more than 15 minutes.
WARMING RACK
The warming rack can be placed in two positions: the lower hooks are for use and
the upper hooks are for storage. Refer to the INSTALLATION section for information
on warming rack positioning.
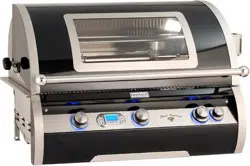
COOKING ZONES
Your grill is divided into three cooking zones, each corresponding to a burner. Burners
are numbered starting at one (1) on the left, going to three (3) on the right (see Fig.
27-2). The cooking zones are monitored by the digital thermometer - see DIGITAL
THERMOMETER section.
Each cooking zone is designed to be controlled individually by the burner control knob.
AFTER EACH USE
1. Operate on high with hood closed for 10-15 minutes to burn off all grease.
2. Turn off the grill and brush the cooking grids to remove all residue.
CAUTION: Use long-handled insulated BBQ tools and wear an insulated glove
/ oven mitt.
3. When the grill is cool, check and clean the drip tray. Then cover the grill.
Note: For additional cleaning information, refer to the SERVICING AND CLEANING section.
1
3
2
Fig. 27-2 Cooking zones detail
Fig. 27-1 Airflow diagram
USING THE GRILL
Loading ...
Loading ...
Loading ...