Loading ...
Loading ...
Loading ...
,
8.
9.
NOTE:
®
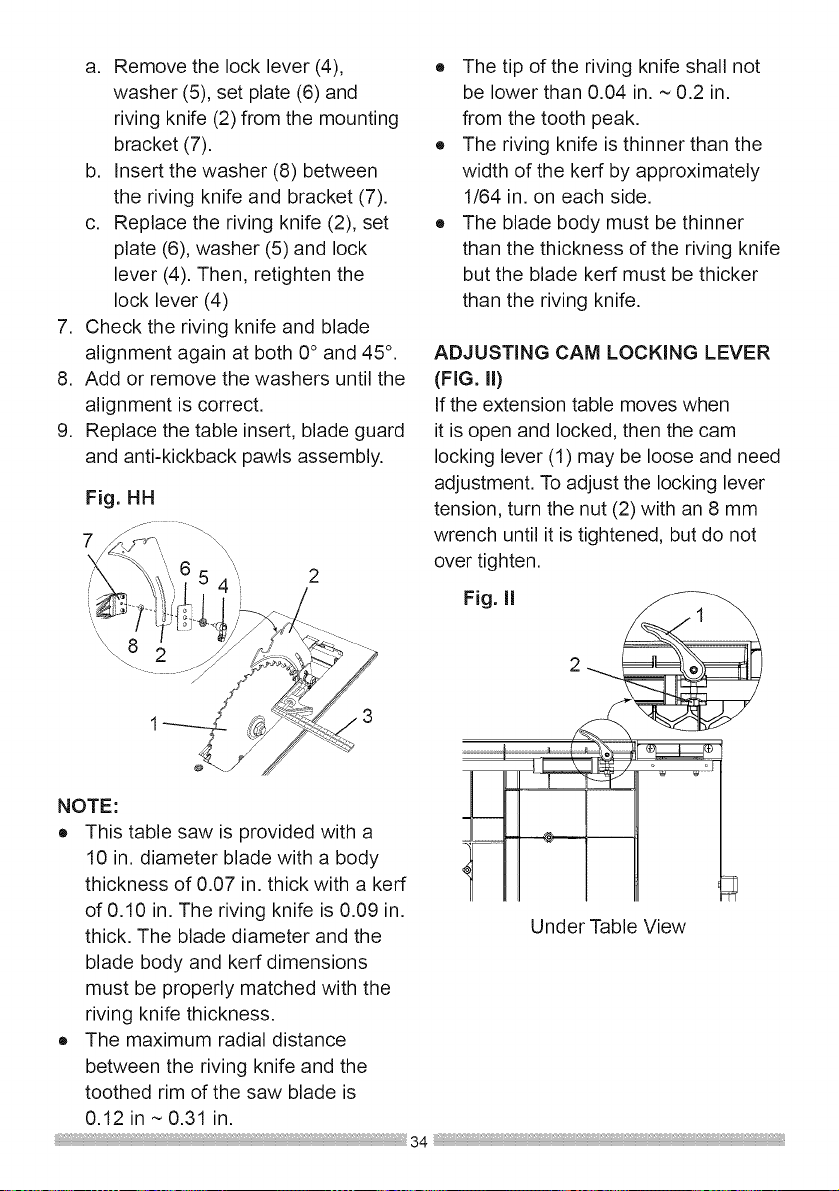
a. Remove the lock lever (4),
washer (5), set plate (6) and
riving knife (2) from the mounting
bracket (7).
b. Insert the washer (8) between
the riving knife and bracket (7).
c. Replace the riving knife (2), set
plate (6), washer (5) and lock
lever (4). Then, retighten the
lock lever (4)
Check the riving knife and blade
alignment again at both 0° and 45°.
Add or remove the washers until the
alignment is correct.
Replace the table insert, blade guard
and anti-kickback pawls assembly.
Fig. HH
This table saw is provided with a
10 in. diameter blade with a body
thickness of 0.07 in. thick with a kerf
of 0.10 in. The riving knife is 0.09 in.
thick. The blade diameter and the
blade body and kerr dimensions
must be properly matched with the
riving knife thickness.
The maximum radial distance
between the riving knife and the
toothed rim of the saw blade is
0.12 in ~ 0.31 in.
o The tip of the riving knife shall not
be lower than 0.04 in. ~ 0.2 in.
from the tooth peak.
o The riving knife is thinner than the
width of the kerf by approximately
1/64 in. on each side.
o The blade body must be thinner
than the thickness of the riving knife
but the blade kerf must be thicker
than the riving knife,
ADJUSTING CAM LOCKING LEVER
(FIG. II)
If the extension table moves when
it is open and locked, then the cam
locking lever (1) may be loose and need
adjustment, To adjust the locking lever
tension, turn the nut (2) with an 8 mm
wrench until it is tightened, but do not
over tighten,
Under Table View
Loading ...
Loading ...
Loading ...