Loading ...
Loading ...
Loading ...
5. Foldthestandslowlydownwardas
shownin Fig.F.
6. Movethesawtothedesired
locationforoperationorstorethe
sawin adryenvironmentbyusing
theleftsidestandhandles(10).
Fig.F
Transporting
8 _. _,10->_
Folding
STORAGE
Ripfenceandmitergauge(Fig.G)
Storagefortheripfence(1)andmiter
gauge(2)arelocatedontheleftsideof
thesawhousing.
Fig.G
2
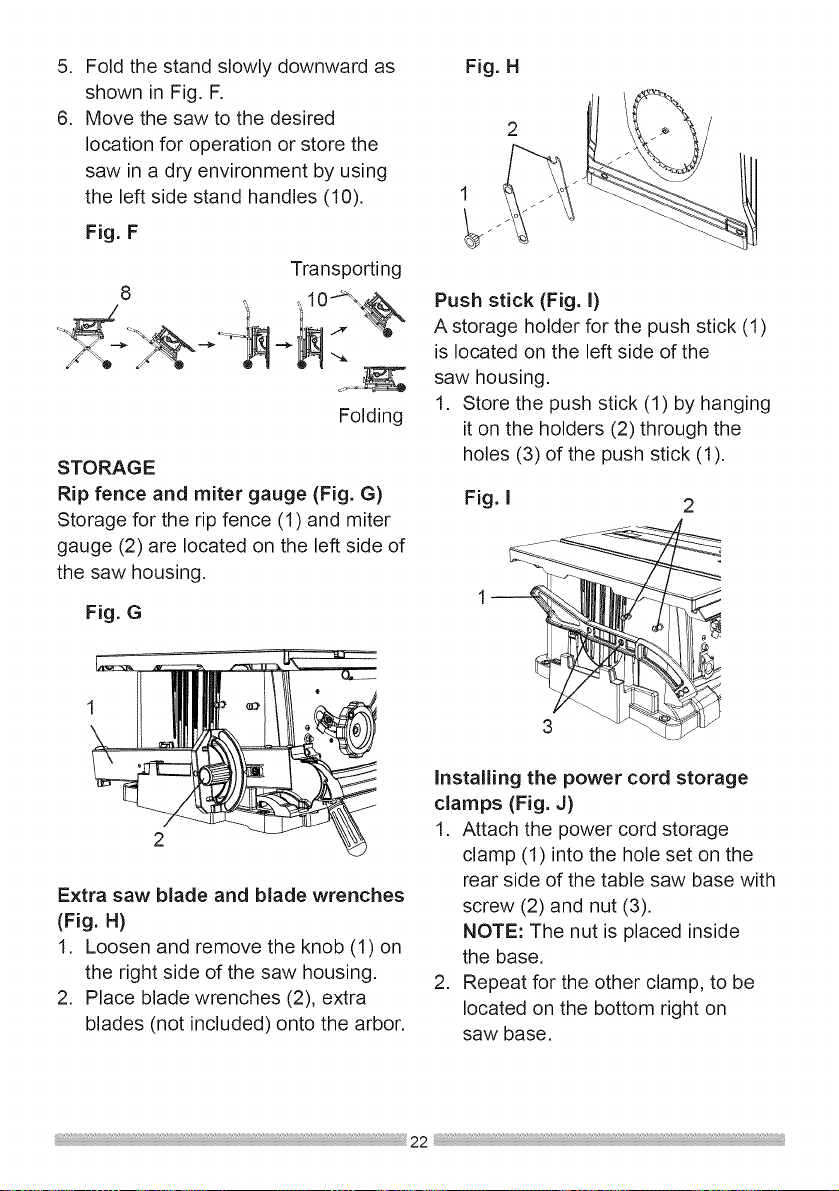
Extra saw blade and blade wrenches
(Fig. H)
1. Loosen and remove the knob (1) on
the right side of the saw housing.
2. Place blade wrenches (2), extra
blades (not included) onto the arbor.
Fig. H
1
Push stick (Fig. I)
A storage holder for the push stick (1)
is located on the left side of the
saw housing.
1. Store the push stick (1) by hanging
it on the holders (2) through the
holes (3)of the push stick (1).
Fig. I
Installing the power cord storage
clamps (Fig. J)
1. Attach the power cord storage
clamp (1) into the hole set on the
rear side of the table saw base with
screw (2) and nut (3).
NOTE: The nut is placed inside
the base.
2. Repeat for the other clamp, to be
located on the bottom right on
saw base.
Loading ...
Loading ...
Loading ...