Loading ...
Loading ...
Loading ...
.
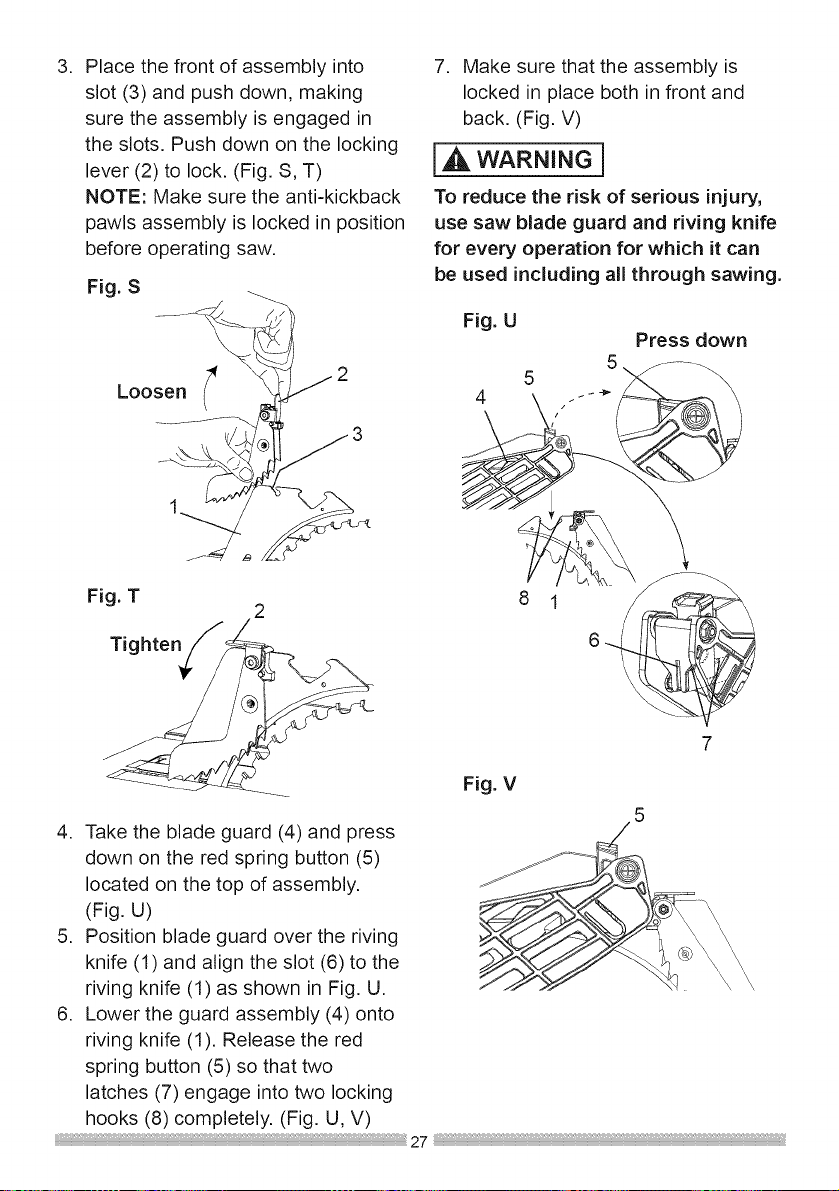
Place the front of assembly into
slot (3) and push down, making
sure the assembly is engaged in
the slots. Push down on the locking
lever (2) to lock. (Fig. S, T)
NOTE: Make sure the anti-kickback
pawls assembly is locked in position
before operating saw.
7. Make sure that the assembly is
locked in place both in front and
back. (Fig. V)
WAR.I.G1
To reduce the risk of serious injury,
use saw blade guard and riving knife
for every operation for which it can
be used including all through sawing.
Fig. U
Loosen 4
\
\
Press down
5
Fig. T
2
8 1
6
Fig. V
7
4. Take the blade guard (4) and press
down on the red spring button (5)
located on the top of assembly.
(Fig. U)
5. Position blade guard over the riving
knife (1) and align the slot (6) to the
riving knife (1) as shown in Fig. U.
6. Lower the guard assembly (4) onto
riving knife (1). Release the red
spring button (5) so that two
latches (7) engage into two locking
hooks (8) completely. (Fig. U, V)
27
Loading ...
Loading ...
Loading ...