Loading ...
Loading ...
Loading ...
To use MyNextbase Player to edit your recorded files, you need to ensure that the file you wish to edit is™
currently playing in the Playback Window. You can do this by double clicking the file as it appears in the File
List window. When the file is playing, click on the ‘Edit’ button to begin the 6 step editing process.
1. Join Videos (Optional)
The first step allows you to join multiple videos together. Please note that the videos you join together
must all be the same resolution. Your video will appear in the centre of the screen, with buttons on either
side to add additional videos before or after the chosen video file. Clicking either of these buttons will
open up the list of files in your library that can be added. Once added, these will appear next to your
original video file.
The order of the video files can be altered by clicking and dragging a video. To remove a video, hover
over the chosen file and a ‘Remove Video’ option will appear. Click to remove this video.
Once you are happy with the video(s) selected, click on the continue button to move to step 2.
2. Trim Video
Trimming the video allows you to shorten your selected clip to only include the incident or event that
you are interested in. To the left of the Playback Timeline is a green marker, indicating the beginning of
your video. To the right of the Playback Timelime is a red marker, indicating the end of your video. These
can be dragged to a point on the Timeline of your choosing; when exporting, MyNextbase Player will
create a single video file from the footage located between the markers. The white marker indicates your
current playback position.
3. Annotate Video (Optional)
During the video there may be an object or incident
that you wish to highlight, annotating you video will
allow you to do this. When you annotate a frame,
your video will pause at the specified frame and
display any annotations that you have added.
The video will resume after 4 seconds.
To begin adding annotations, find the frame you
wish to annotate (using the white marker, and
left/right arrows to scroll through frames), and click
on the ‘Add Annotation’ button to open the annotation
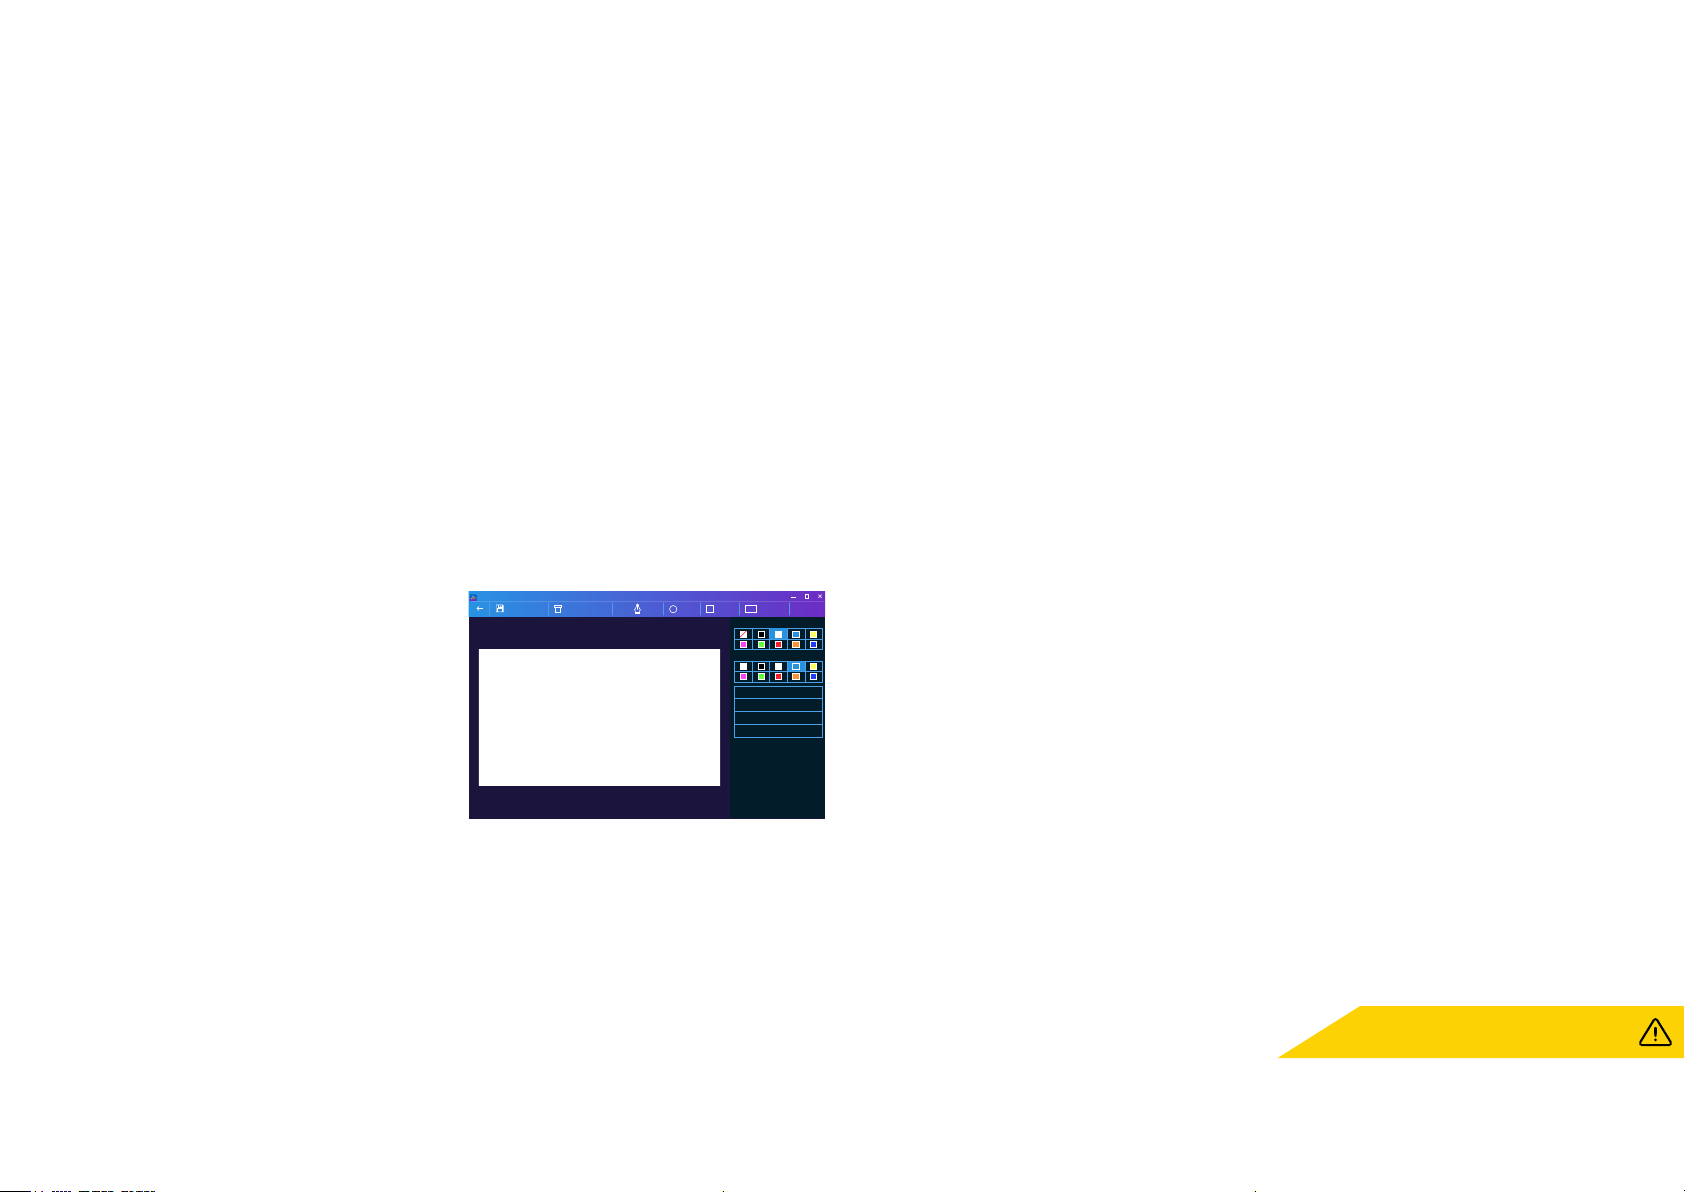
screen. Along the top of the annotation screen you will see the annotation tools; Draw, Circle, Square,
Rectangle, and Text. Clicking any of these options will add an editable annotation to that frame.
This shape/text can be moved, resized, and rotated using the handles on the sides and corners of the
selected annotation.
When you have finished your annotation, click ‘Save and Close’ to return to the Add Annotation screen,
where more annotations can be added. When you have finished adding annotations, press ‘Continue’
to proceed.
4. Add Title Screen (Optional)
Add a title screen to your video. The title will be displayed for 4 seconds at the start of your video. To add
a title, click inside the white rectangle and type the desired title. Press ‘Continue’ to proceed.
5. Output Settings (Optional)
The final step in the editing process allows you to specify the quality of your video file and the data
included.
The Video Resolution determines the quality of the video footage; by default the Video Resolution will
be set to output at the same quality as the original files. Lowering the Video Resolution will produce
lower resolution files but will also reduce the size of the file and lower the time it takes to produce the file.
Stamps for GPS, number plate, and time can also be removed, as well as the audio and GPS data from
the video by ticking the corresponding box. Once the data has been removed it cannot be added back
into the edited video. This will not affect the original file.
Lastly, you can specify the name of the file being created and the location that you would like it saved.
When you have chosen your output settings click on the ‘Confirm’ button and MyNextbase Player will
begin processing your video.
6. Process Video
During step 6, MyNextbase Player will process your video clip(s) and edits, and produce a single file in
the location specified. This can take some time and will depend on the number and length of video files
being joined and video resolution. Once the video has been processed, it will be added to your
MyNextbase Player file list.
Video Sharing
Videos can be shared to social media and insurers through the ‘Share Video’ button. When a destination
is selected (i.e Facebook), the target web page will open in your default browser. You will then be asked
to sign into your account, and once you are logged in, the browser will close and a pop up will show
your upload’s progress. When the file is finished uploading you will see an option to view your uploaded
file. Videos can also be upload to the Nextbase server; you will be e-mailed a secure link to view or™
download your video. This link can be sent to your insurer, without the need to transfer a large video file.
Videos will be automatically deleted 30 days after upload.
More Features
When a video is being played back in the Playback Window, press ‘Crtl + i’ to open a window displaying
all of the metadata for that video including information such as: file name and size, resolution and frame
rate, max and average speeds, GPS information, and more.
37
Some functions, such as GPS data, are available
only on select models.
MyNextbase Player - Editing Videos
Annotation window
MyNextbase Player
Bring to Front
Fill Colour
Text
Bring Forwards
Bring Backwards
Send to Back
Abc
RectangleSquareCircleDrawDelete AnnotationSave and Close
Stroke Colour
Loading ...
Loading ...
Loading ...