Loading ...
Loading ...
Loading ...
8 9
INSTALLATION INSTRUCTIONS INSTALLATION INSTRUCTIONS (continued)
ANTI-TIP BRACKET
TIP OVER HAZARD
• A child or adult can tip the range and be killed.
• Make sure the anti-tip bracket has been properly installed
and secured per the installation instructions.
• Slide range back so rear range foot is engaged in the slot
of the anti-tip bracket.
• Re-secure the anti-tip bracket if range is moved.
• DO NOT OPERATE THE RANGE WITHOUT THE ANTI-TIP
BRACKET INSTALLED AND SECURED.
• Failure to follow these instructions can result in death or
serious burns to adults and children.
HOW TO INSTALL ANTI-TIP BRACKET
1. Remove the anti-tip bracket from where
it is taped on Oven Rack inside the
Oven.
2. Determine which mounting method to
use: floor or wall. Ifyou have a stone
or masonry floor, you can use the wall
mounting method. If you are installing
the range in a mobile home, you must
secure the range to the floor.
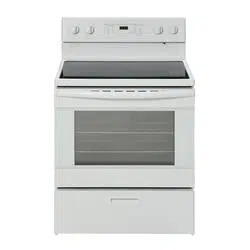
3. Determine and mark centerline of the
cutout space. The mounting can be
installed on either the left side or right
side of the cutout. Position mounting
bracket against the wall in the cutout
so that the V-notch of the bracket is
13-1/9" (33.3 cm) from centerline as
shown.
4. Drill two 1/8" (3 mm) holes that correspond to the
bracket holes of the determined mounting method.
See the following illustrations.
FLOOR / WALL MOUNTING:
Front / Floor Position Rear / Wall Position Diagonal (2 Options)
Centerline
14-2/3" (37.2 cm)
A
OVEN DOOR
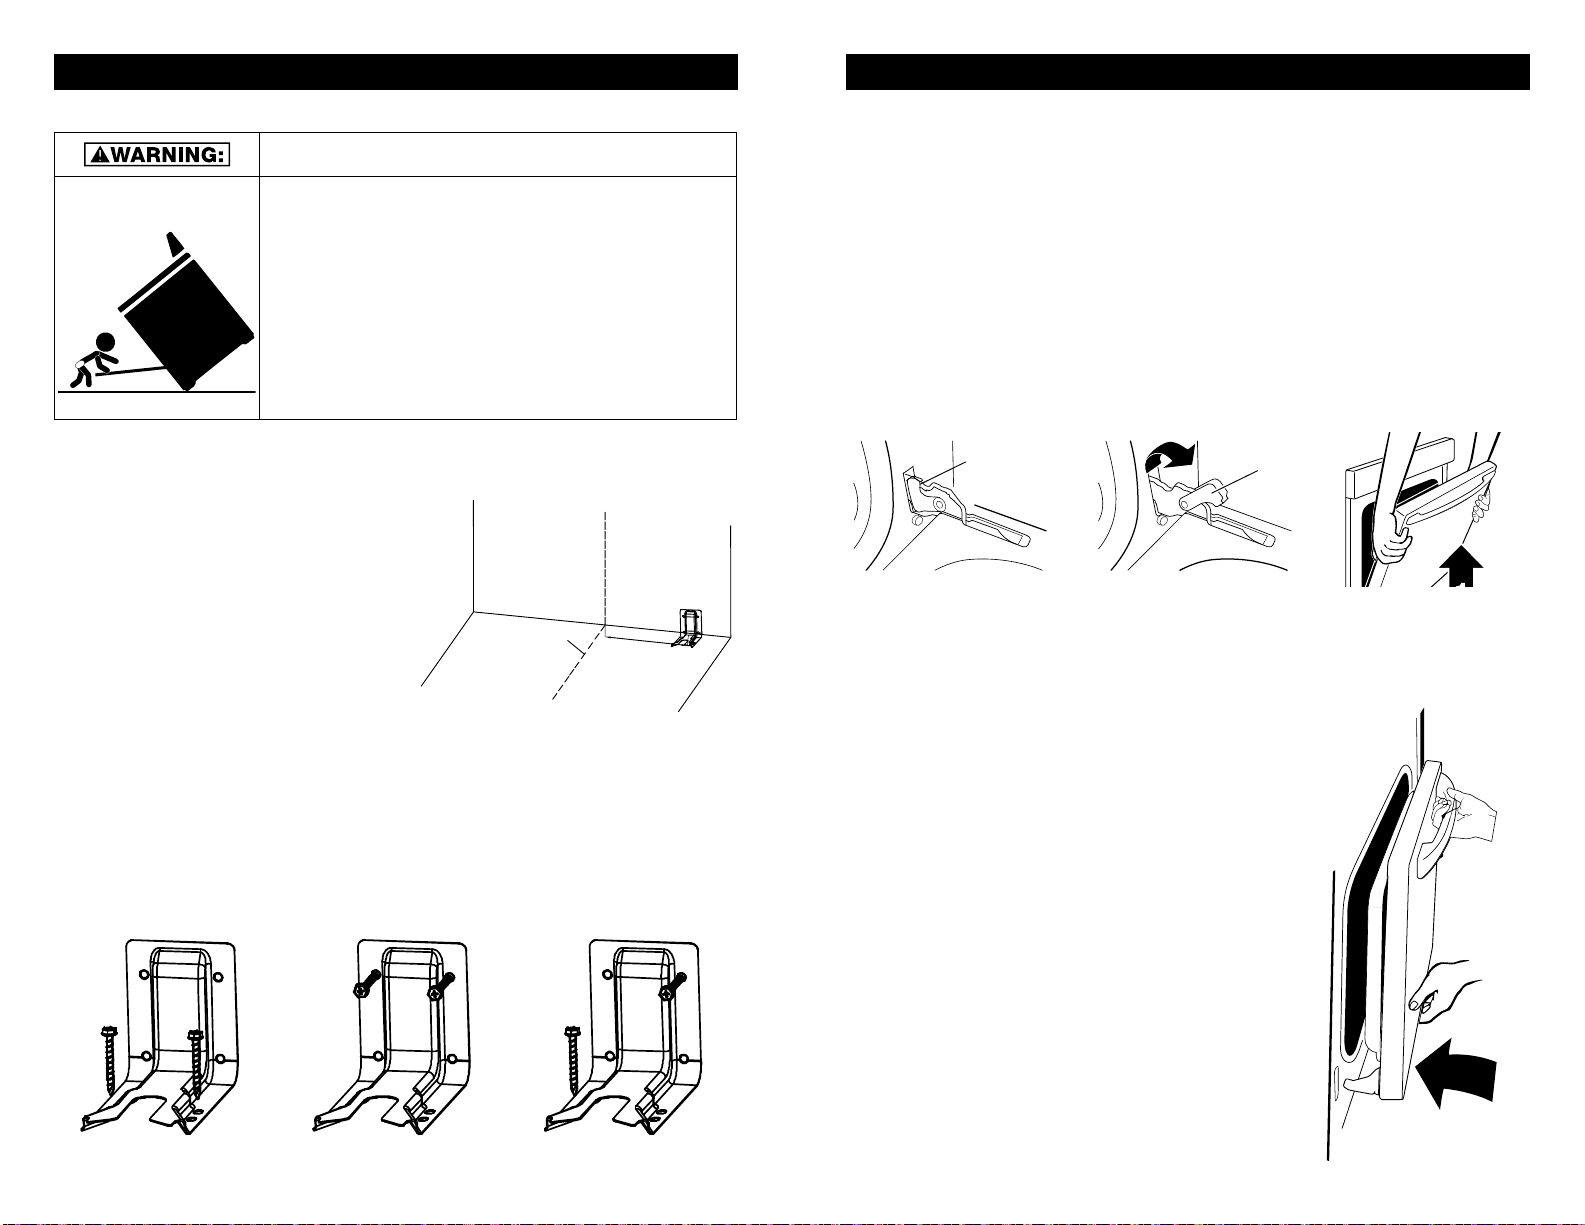
HOW TO REMOVE OVEN DOOR:
IMPORTANT: Use both hands to remove oven door(s).
1. Open the oven door fully so it is at a 90 degree angle.
2. Next, locate the oven door latches in both corners of the oven door, then flip up the
hinge latch on each side tothe unlocked position. (See diagram below). Pliers may be
required to unlock hinges.
3. Once the latch is in the unlocked position, grasp the oven door with both hands, and
then gently close the oven door to as far as it will shut.
4. Using both hands, lift and pull the oven door towards you and remove.
5. Set the oven door(s) aside on a covered work surface.
B
A
A. Oven door hinge latch
in locked position
B. Oven door hinge latch
in unlocked position
HOW TO REINSTALL THE OVEN DOOR:
1. To reinstall the oven door, insert both hanger arms of
the oven door into the range. The hinge latches on
both sides should be in the unlocked position before
inserting hanger arms into the range.
2. Once the hanger arms are placed into the range,
open the oven door fully.
3. Next, locate the hinge lever latches, move them back
to the locked position. It is recommended to use a
rubber mallet to ensure hinges are securely locked
into place.
4. Once the oven door levers are locked, gently close
the door and check that the door can open and close
with no issues.
5. Check to see if there are any gaps on both sides of
the oven door. If there are gaps, the door has not
been reinstalled correctly. Repeat the removal and
installation procedure.
Loading ...
Loading ...
Loading ...