User Manual
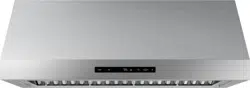
Modernist Range Hood
DHD30M967WM, DHD36M976WM, DHD48M987W
M
DHD30M967WS, DHD36M976WS, DHD48M987WS
Part No. 110453 RevC

English2
Contents
Contents
Important information 4
Safety information 5
What you need to know about safety instructions 5
State of California Proposition 65 warning (US only) 6
For your safety 6
General safety 7
Introducing your new hood 9
Overview 9
Dimensions 9
What’s included with your hood 10
Operations 11
Control panel 11
Things to do before you start 11
Using the fan 12
Important operating tips 12
Energy saving tips 12
Using the lights 13
Setting/Turning off the timer 13
Muting/Unmuting the control sound 14
Resetting the clean filter light 14
About the Auto-ON safety feature 15
About the ConnectOn™ 15
Before using the ConnectOn™ feature 16
Using the ConnectOn™ feature 16
Care and maintenance 17
Care and cleaning of the hood. 17
Removing the filters 18
Cleaning the filters and grease channel 19
Reinstalling the filters and grease channel 19
Replacing the light bulbs 20
Replacement parts 21
Troubleshooting 22
Warranty and Service 24
Getting Help 24
Warranty 24

English 3
To Our Valued Customer:
Congratulations on your purchase of the very latest in Dacor® products! Our unique
combination of features, style and performance make us The Life of the Kitchen™, and a
great addition to your home.
In order to familiarize yourself with the controls, functions and full potential of your new
Dacor Appliance, read this use and care manual thoroughly, beginning with the Important
Safety Instructions section.
All Dacor appliances are designed and manufactured with quality and pride, while working
within the framework of our company value. Should you ever experience a problem with
your product, please first check the Troubleshooting section of this manual for guidance. It
provides useful suggestions and remedies prior to calling for service.
Valuable customer input helps us to continuously improve our products and services, so
please feel free to contact our Customer Service Team for assistance with any of your
product support needs.
Dacor Customer Service Team
14425 Clark Avenue
City of Industry, CA 91745
Telephone: (800) 793-0093
Fax: (626) 403-3130
Hours of Operation: Monday through Friday 6:00 A.M. to 5:00 P.M. Pacific Time
Website: www.Dacor.com
Thank you for choosing Dacor for your home. We are a company built by families for
families, and we are dedicated to serving yours. We are confident that your new Dacor
product will deliver a high level of performance and enjoyment for many years to come.
Sincerely,

English4
Important information
Important information
Installer: Leave these instructions with the appliance.
Customer: Read this use and care manual completely before using yo ur Hood. Save it for
future reference. It contains important use and care information.
For service and warranty information see page 24.
If you have any questions (other than warranty questions), call:
Dacor Customer Service
(800) 793-0093 (U.S.A. and Canada)
Monday — Friday 6:00 a.m. to 5:00 p.m. Pacific Time
Web site: www.dacor.com
When you call, have the complete model and serial number for your appliance available.
The numbers are found on the product data label located on back of the drawer front. See
page 3 for label location. Write these numbers below for future reference.
Model number
Serial number
Date of purchase
Since Dacor continuously improves the quality and performance of our products, we may
need to make changes to the appliance without updating this manual. Visit www. dacor.
com to download the latest version of this manual.
Energy-saving
• For most efficient function, keep the filter system and hood surfaces free of grease and
debris.
• Select cookware (size, material, construction) appropriate to the task.
English 5
Safety information
Safety information
The Important Safety Instructions and warnings in this manual do not all possible
problems/situations. Use common sense and cautiocovern when installing, maintaining,
and operating this or any other appliance. Always contact the Dacor Customer Service
Team about problems or situations that you do not understand.
What you need to know about safety instructions
Warnings and important safety instructions in this manual do not cover all possible
conditions and situations that may occur. It is your responsibility to use common sense,
caution, and care when installing, maintaining, and operating your oven.
Important safety symbols and precautions
What the icons and signs in this user manual mean:
WARNING
Hazards or unsafe practices that may result in severe personal injury or death.
CAUTION
Hazards or unsafe practices that may result in minor personal injury or property damage.
CAUTION
To reduce the risk of fire, explosion, electric shock, or personal injury when using your
drawer, follow these basic safety precautions.
Do NOT attempt.
Do NOT disassemble.
Do NOT touch.
Follow directions explicitly.
Unplug the power plug from the wall socket.
Make sure the machine is grounded to prevent electric shock.
Call a Dacor Customer Service for help.
Note
These warning signs are here to prevent injury to you and others. Please follow them
explicitly.
After reading this section, keep it in a safe place for future reference.
English6
Safety information
Safety information
State of California Proposition 65 warning (US only)
WARNING: This product contains one or more chemicals known to the State of California
to cause cancer.
WARNING: This product contains one or more chemicals known to the State of California
to cause birth defects or other reproductive harm.
For your safety
When using electrical appliances, you should follow basic safety precautions, including the
following:
CAUTION
• Use this appliance only for its intended purpose as described in this Owner’s Manual.
• Potentially hot surfaces include the oven vent opening, surfaces near the opening, and
crevices around the oven door.
Proper Installation - Be sure your appliance is properly installed and grounded by a
qualified technician.
User servicing - Do not repair or replace any part of the appliance unless specifically
recommended in this manual. All other servicing should be referred to a qualified
technician.
Always disconnect the power to the appliance before servicing by removing the
fuse or switching off the circuit breaker.
WARNING
• To avoid a possible explosion or fire, do not store/use combustible, flammable,
or explosive vapors and liquids (e.g., gasoline) inside or around this or any other
appliance. Also, keep items that could explode (e.g., aerosol cans) away from cooktop
burners, ovens, and range hoods. Do not store flammable/explosive materials in
adjacent cabinets/areas.
English 7
Safety information
WARNING
• TO REDUCE THE RISK OF FIRE, ELECTRIC SHOCK, OR PERSONAL INJURY
a. Use this unit only as intended by the manufacturer. If you have questions, contact
the manufacturer.
b. Before servicing/cleaning the unit, turn power off at the service panel, and lock the
service disconnecting means so power cannot be switched on accidentally. If you
cannot lock the service disconnecting means, securely fasten a prominent warning
device (e.g., tag) to the service panel.
General safety
WARNING
• To reduce the risk of fire, electric shock, serious injury, or death when using your range
hood, follow basic safety precautions, including these
• If you receive a damaged product, immediately contact your dealer/builder. Do not
install/use a damaged hood.
• Verify that the hood was properly installed and grounded by a qualified installer
according to procedures in this guide.
Have the installer show you the fuse or junction box so you can turn the power ON/
OFF as needed.
• Do not install/repair/replace any part of the range hood unless specifically
recommended by the procedures in this guide. A qualified service technician should
perform all other service.
• To avoid risk of electric shock:
- Before service is performed, switch power off at the fuse/junction box, and lock the
electrical-panel door so power cannot be switched on accidentally. If the electrical
panel cannot be locked, securely fasten a prominent warning device (e.g., tag) to the
panel.
- Before cleaning the hood, turn off the main power switch (Pg. 3).
• Use the hood only as outlined in this manual. Do NOT use the hood to vent hazardous/
explosive materials or vapors.
If you have questions, contact Dacor (contact info on Pg. 1).
• Do not tamper with the controls.
• Never let the filters become blocked/clogged, or foreign objects (e.g., cigarettes,
napkins) be sucked into the hood.
• To avoid a fire hazard: If the range/cooktop is near a window, do not use window
coverings that could blow over the cooking surface and hood.
• Always run the hood fans when using your range/cooktop.

English8
Safety information
Safety information
WARNING
• Concerning children:
- Never leave children in the vicinity of an operating range/cooktop.
- Never let children sit/stand on/play with your range/cooktop and hood; or store
items of interest to children above/around these appliances.
• The minimum vertical distance between the cooking surface and the bottom-most part
of the hood must be at least 30” (76.2 cm). Consult the hood Installation Instructions for
the minimum vertical distance in your specific case.
• To reduce risk of a grease fire:
- never leave the range/cooktop unattended at high settings; boil-overs cause
smoking and greasy spill-overs that may ignite; heat oils slowly on low/medium
settings
- always turn the hood ON when cooking at high heat or when flambéing food (e.g.,
Crepes Suzette, Cherries Jubilee, Peppercorn Beef Flambé)
- clean ventilating fans frequently; do not let grease accumulate on the filter or other
hood components
- always use cookware appropriate to the size of the surface element or grate.
• TO REDUCE RISK OF PERSONAL INJURY FROM A COOKTOP GREASE FIRE:
- CAREFULLY SMOTHER FLAMES with a close-fitting lid, cookie sheet, or metal tray,
then turn off the burner. If the flames do not die immediately, EVACUATE, THEN
CALL THE FIRE DEPARTMENT.
- NEVER PICK UP A FLAMING PAN.
- DO NOT try to extinguish flames with water or wet dish cloths/towels; a violent
steam explosion may result.
• (FOR GREASE FIRES) USE A FIRE EXTINGUISHER ONLY IF:
- you have a Class ABC extinguisher and know how to operate it
- the fire is small and contained in its area of origin
- the fire department is being called
- you can fight the fire with your back to an exit.
English 9
Introducing your new hood
Introducing your new hood
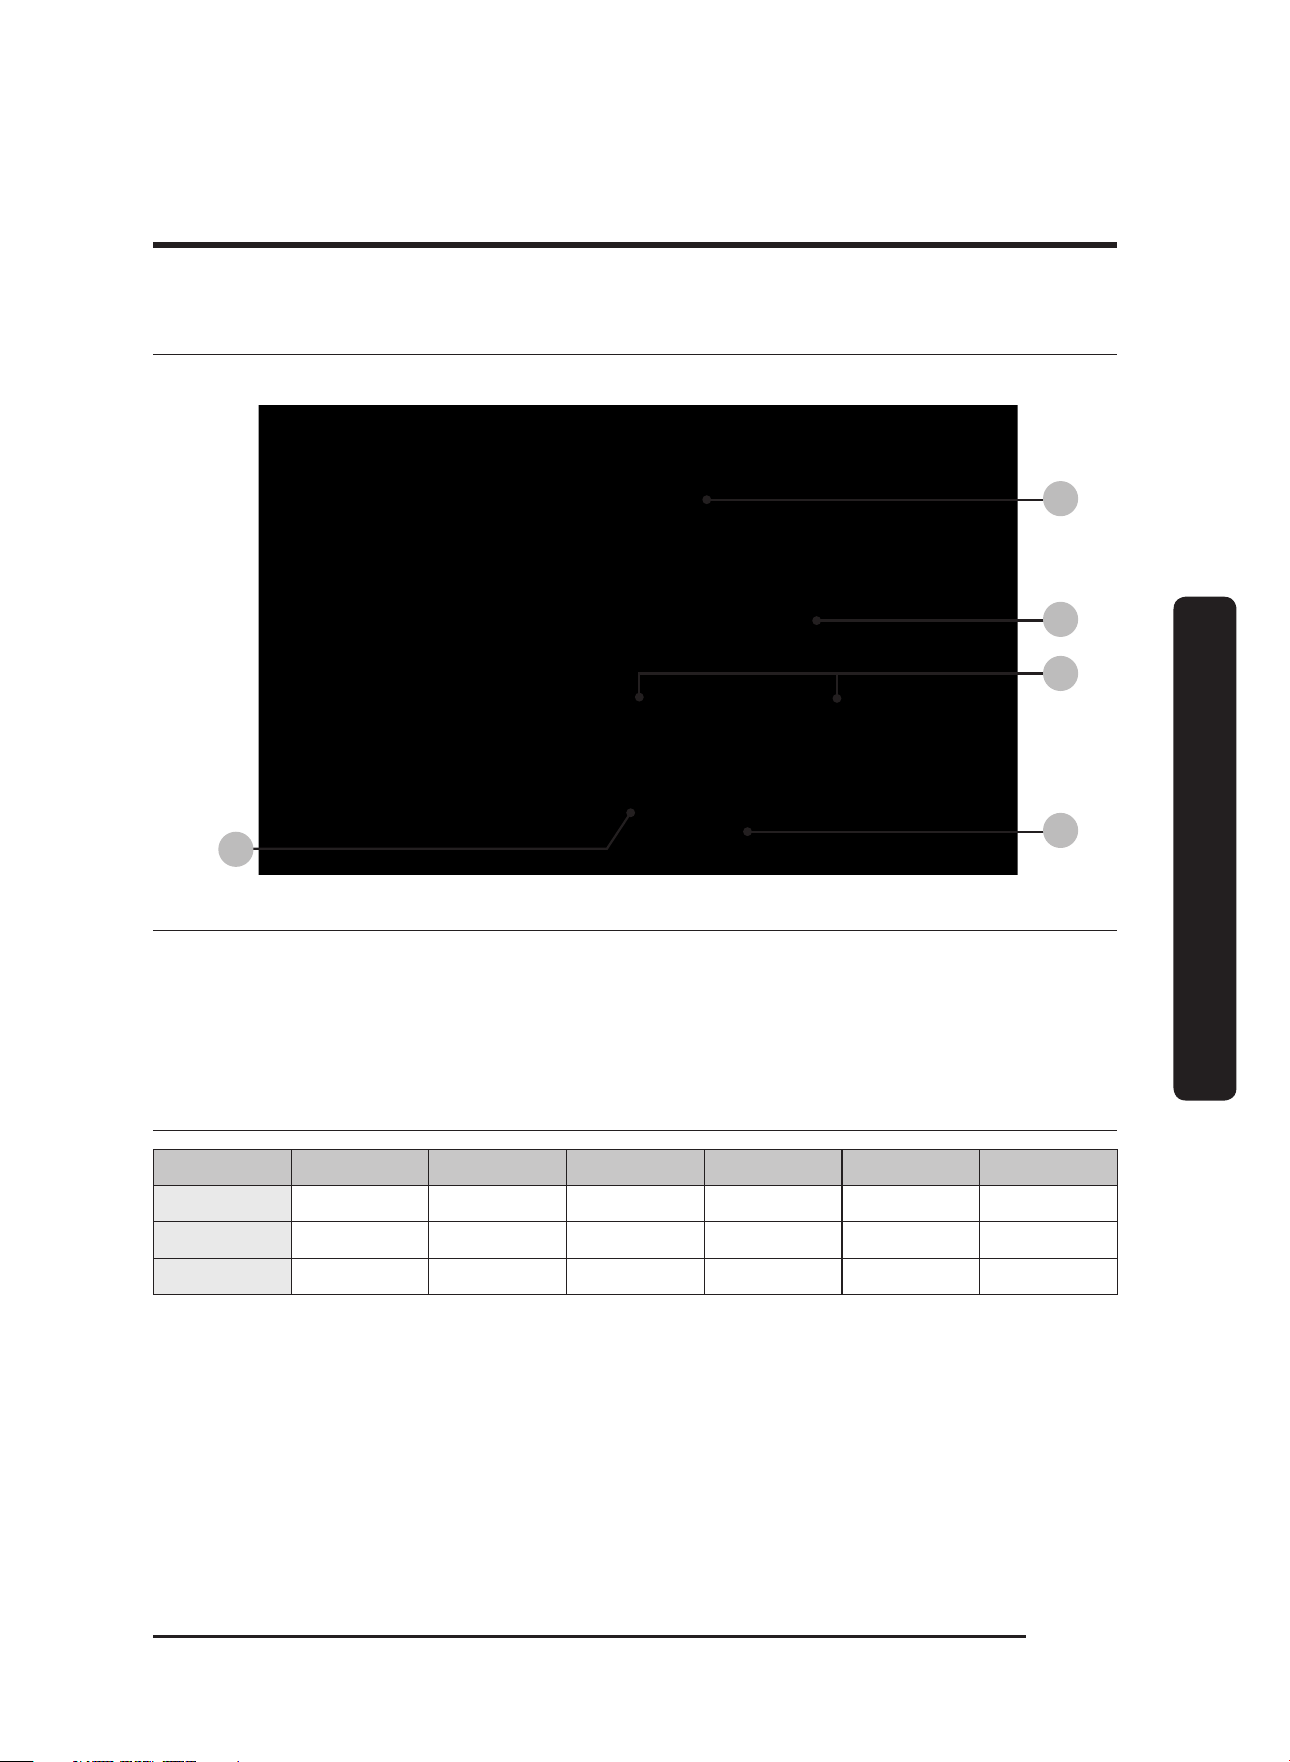
Overview
04
06
01
02
03
01 Hood Canopy 02 Lights 03 Grease Channel
04 Control Panel 05 Filters
Dimensions
Model Width Height Depth B Depth T Filters Lights
DHD30 30” 18” 24” 11 7/8” 2 2
DHD36 36” 18” 24” 11 7/8” 3 3
DHD48 48” 18” 24” 11 7/8” 4 4
Introducing your new hood
English10
Introducing your new hood
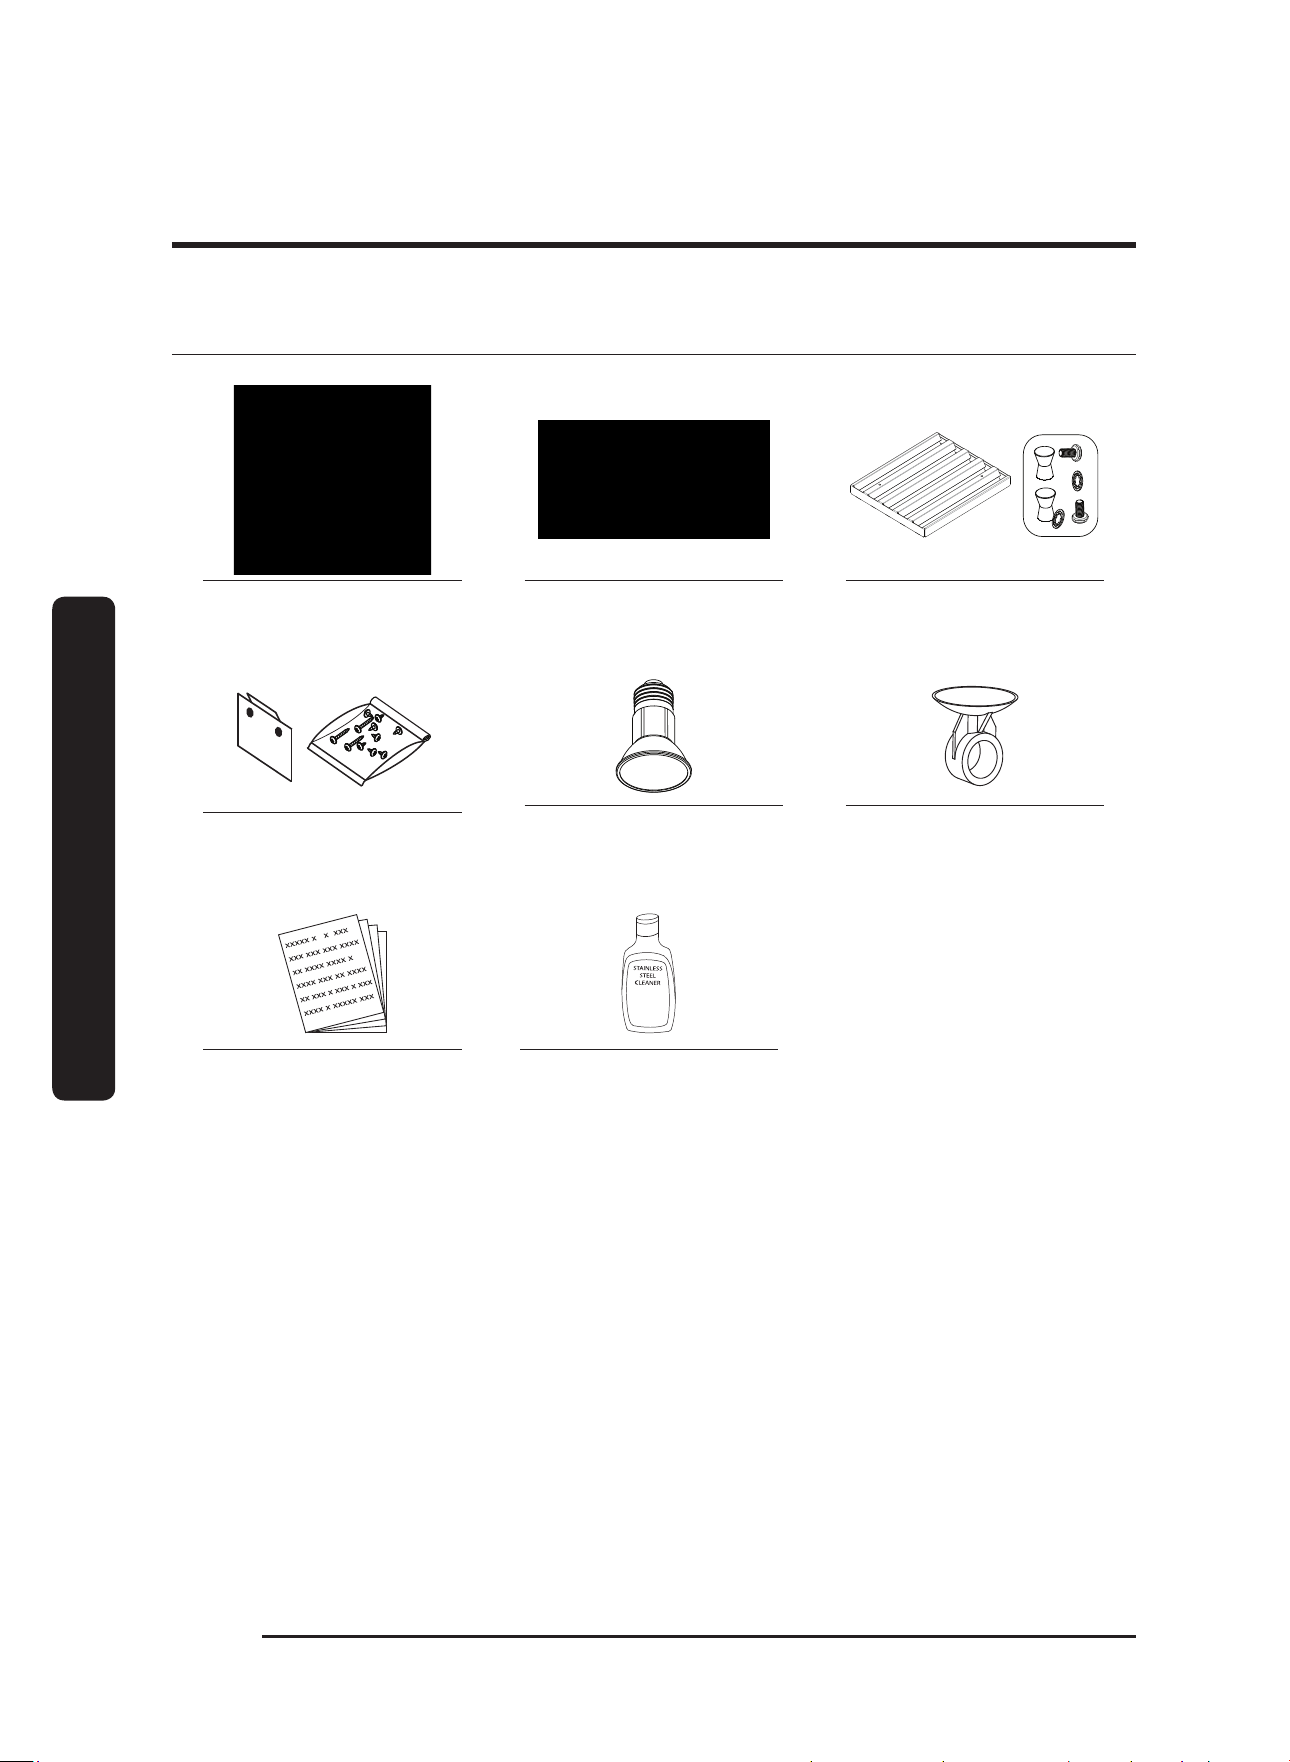
What is included
Hood (1)
(models vary in size)
Grease channel (1) Baffle-style filter*
48” (4), 36” (3), 30” (2)
Holding brackets, Hardware
(2)
Dimmable LED light bulbs
48” (4), 36” (3), 30” (2)
Light-replacement tool (1)
Product literature** (2)
* Ready-to-assemble kit (see pg. 21)
** Installation instructions, User manual.
Dacor cleaning cream (1)
stainless steel
units only
English 11
Operations
Operations
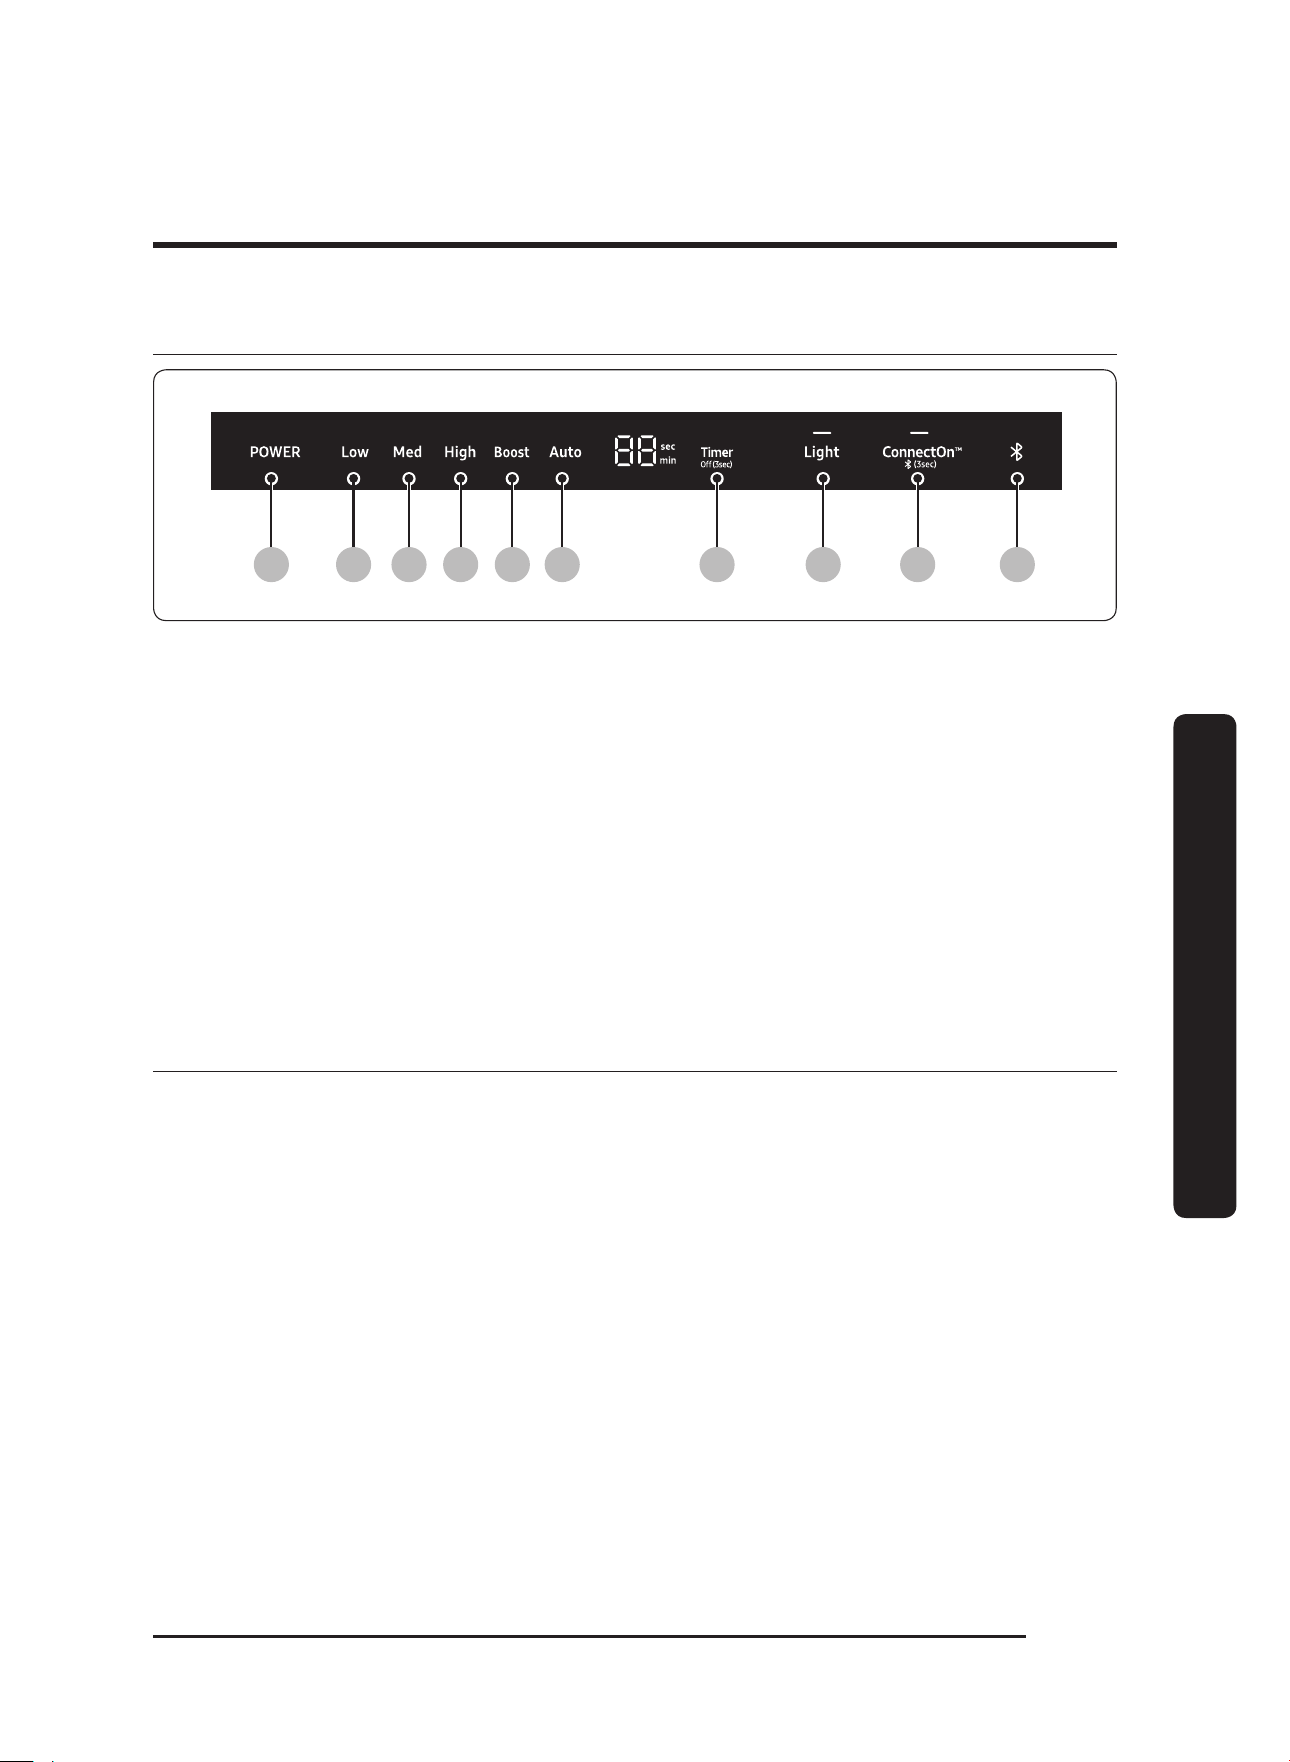
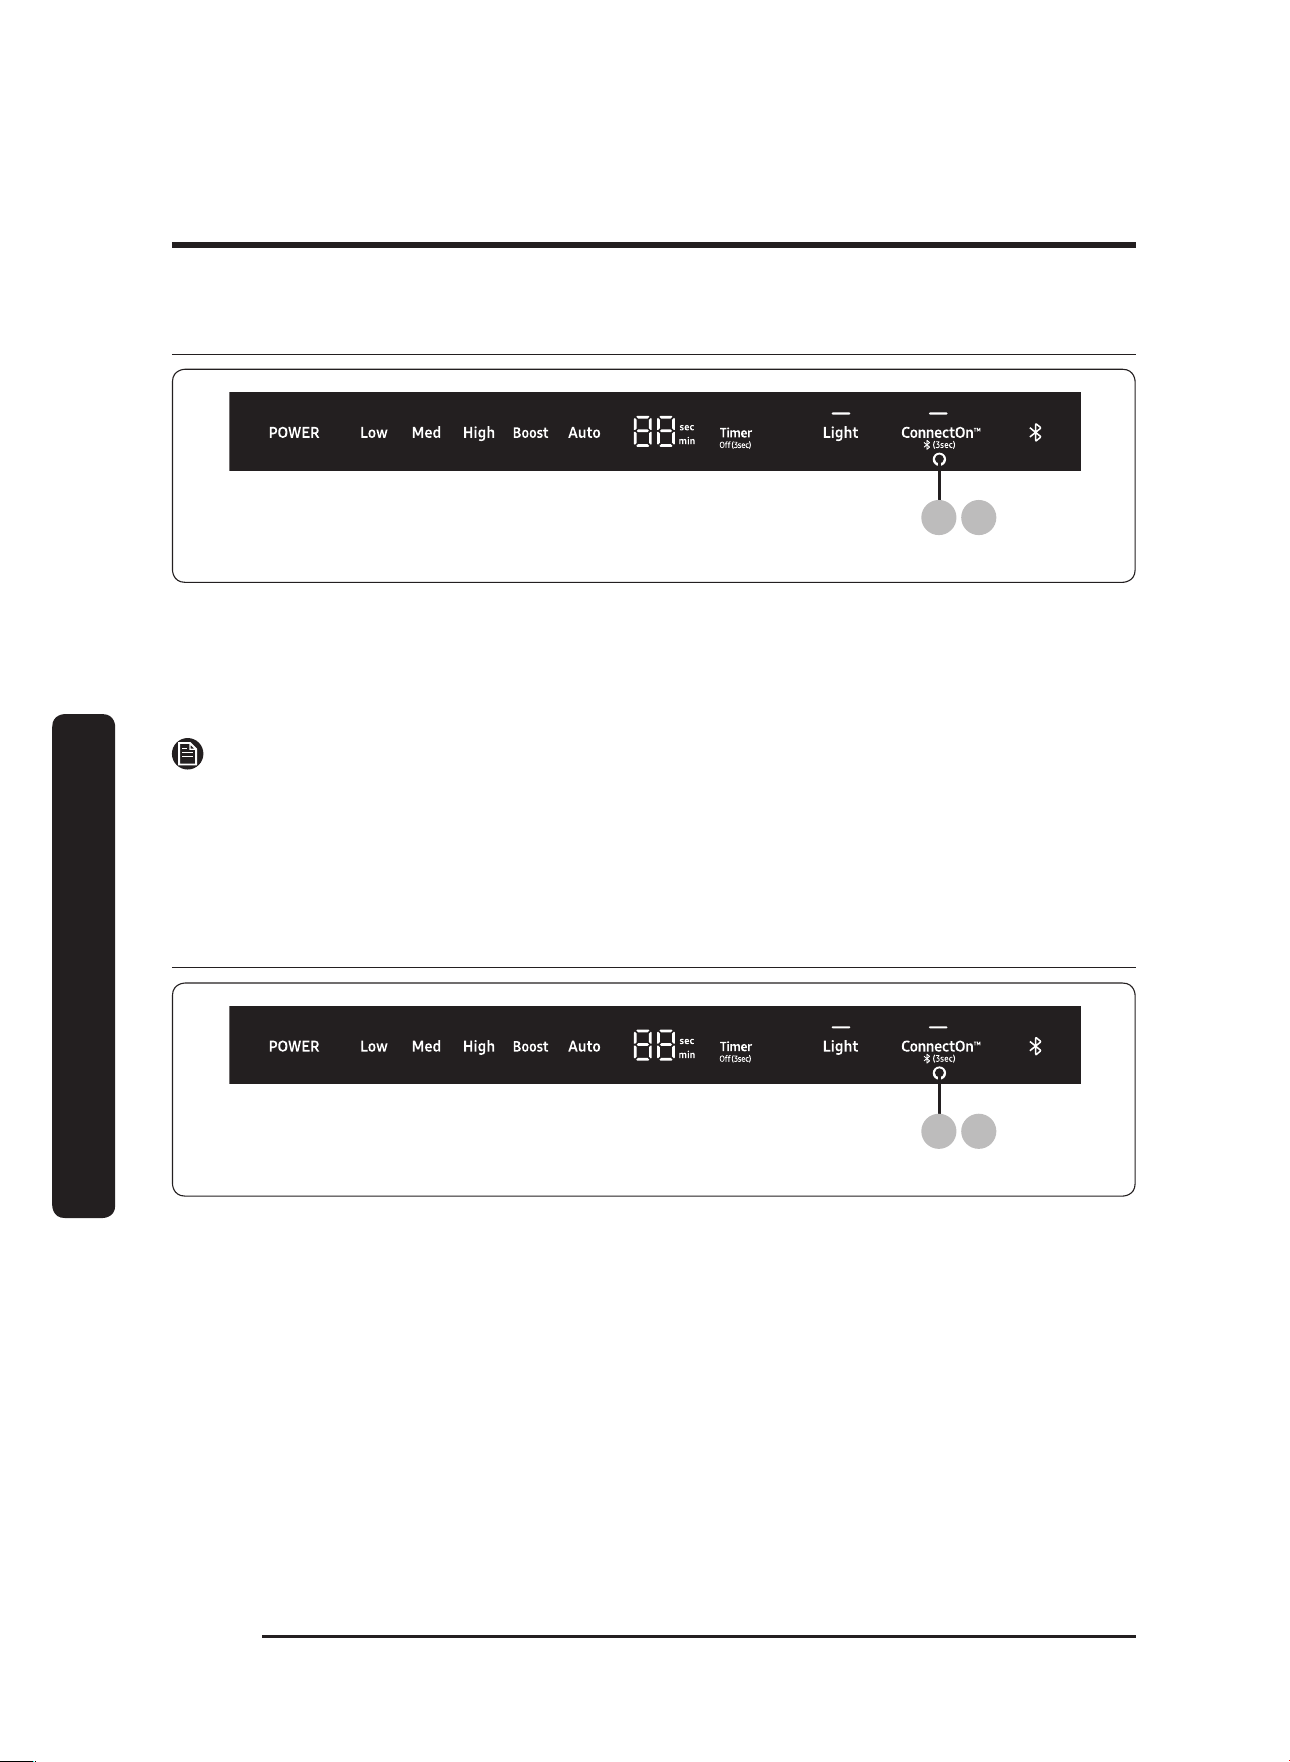
Control panel
01 02 03 04 05 06 07 08 09 10
01 POWER : Turn on/off the Hood
02 Low : Activate the hood at Low speed
03 Med : Activate the Hood at Medium speed
04 High : Activate the Hood at High speed
05 Boost : Activate the Hood at maximum speed
06 Auto : Decrease the temperature.
07 Timer : Set the Timer
08 Light : Turn on/off the lights
09 ConnectOn™ : Activate the ConnectOn™ function.
10 Bluetooth indicator
Before you start
1. Install LED Lamps provided in the installation kit.
2. Grasp the tab in the upper-
right corner of the control panel, and peel away the
protective film.
3. Install filters.
English12
Operations
Operations
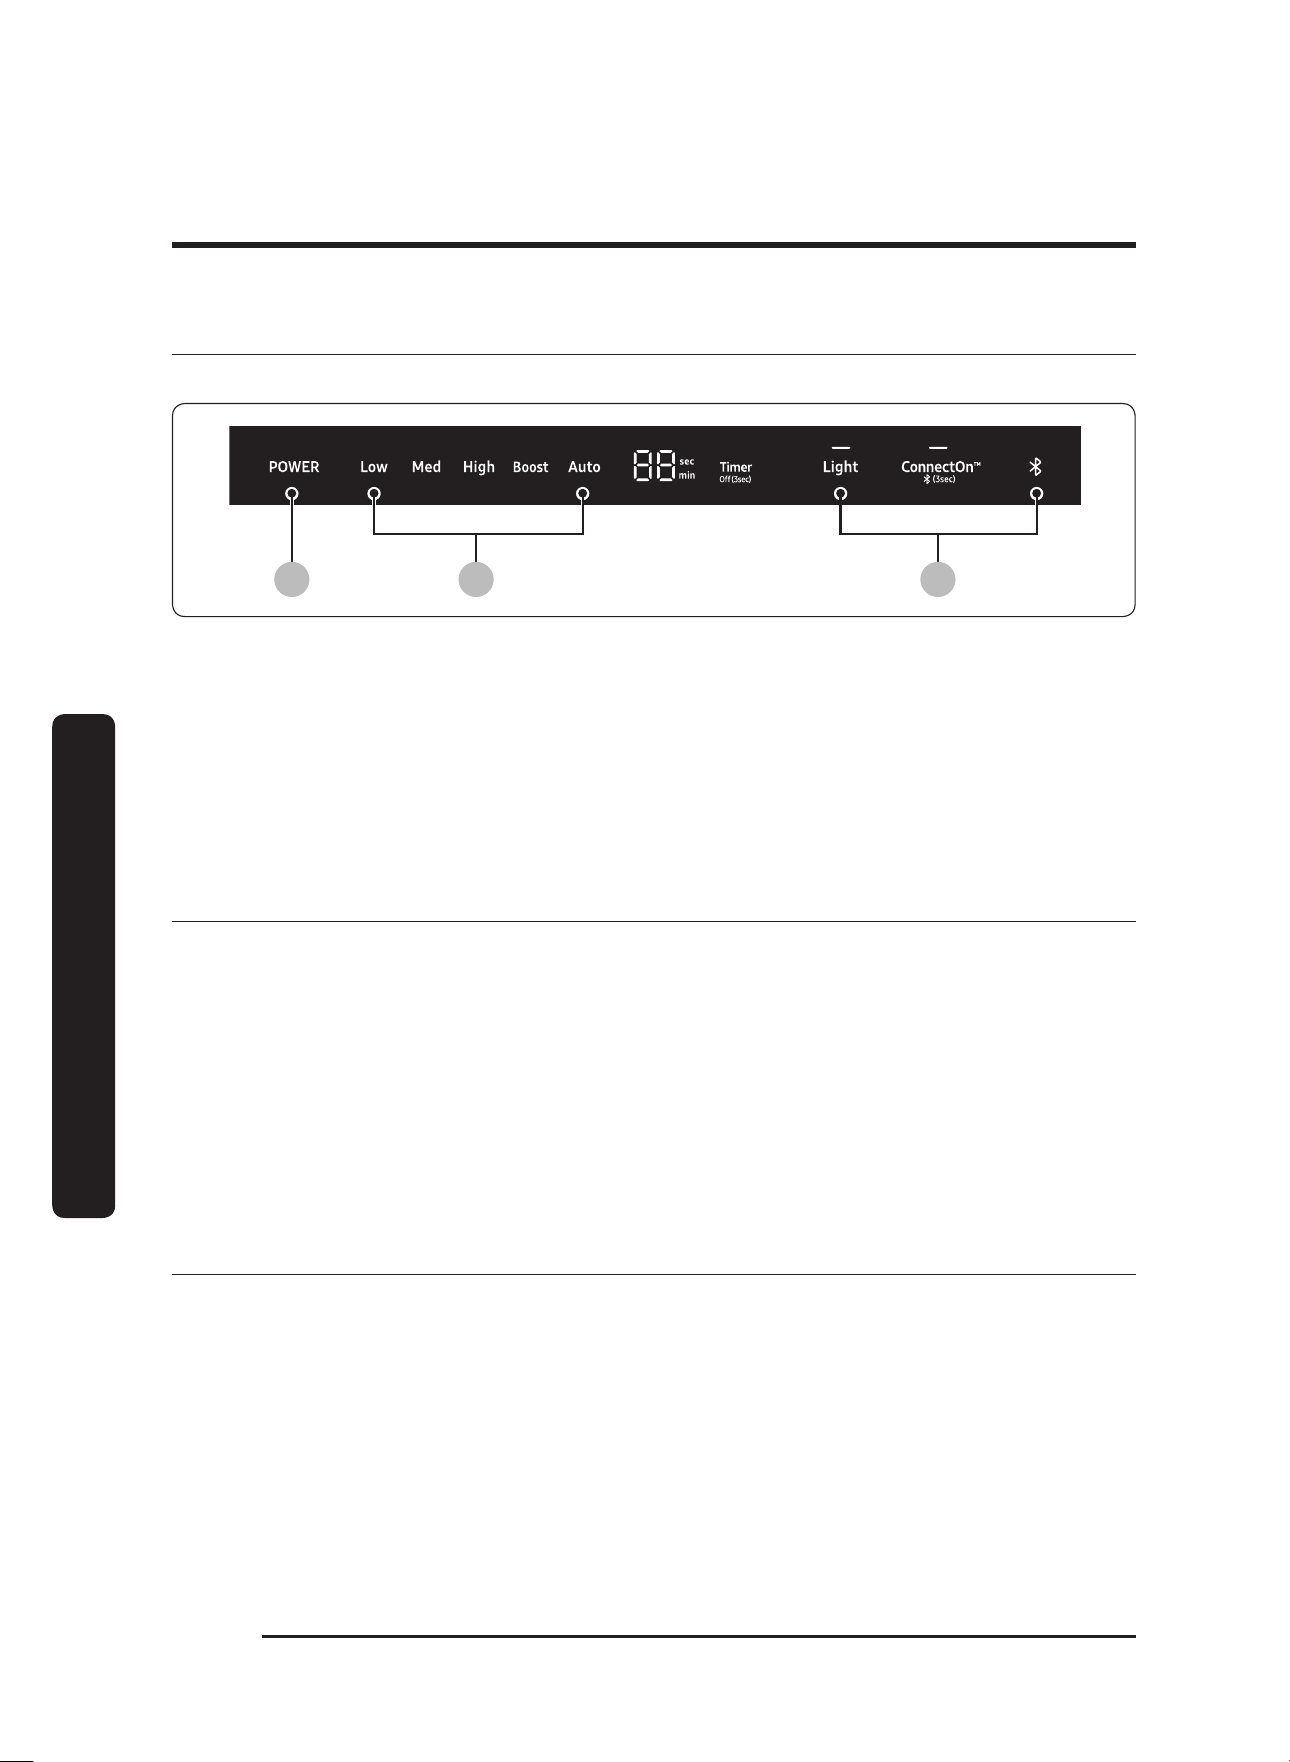
Using the fan
Fan speed is indicated by the word that appears on the fan-speed portion of the display bar.
1 2 3
1. Press the POWER button.
The fan comes on at the lowest speed.
2. Press the
Med, High, Boost button to increase the speed.
The fan changes speed.
3. Press the POWER button.
The fan turns off.
Important operating tips
• Always use the fan when cooking.
• Turn the fan on a few minutes before cooking to establish an airflow current in the
room.
• Adjust the fan speed to the volume and weight of the food being cooked.
• Shut nearby windows and doors, turn off ceiling fans, and close nearby heating and AC
vents to reduce drafts around the hood.
• Place your largest pots and pans on the back burners when possible.
• For safety’s sake, heat oils and fats slowly
Energy saving tips
• For most efficient function, keep the filter system and hood surfaces free of grease and
debris.
• Select cookware (size, material, construction) appropriate to the task.
English 13
Operations
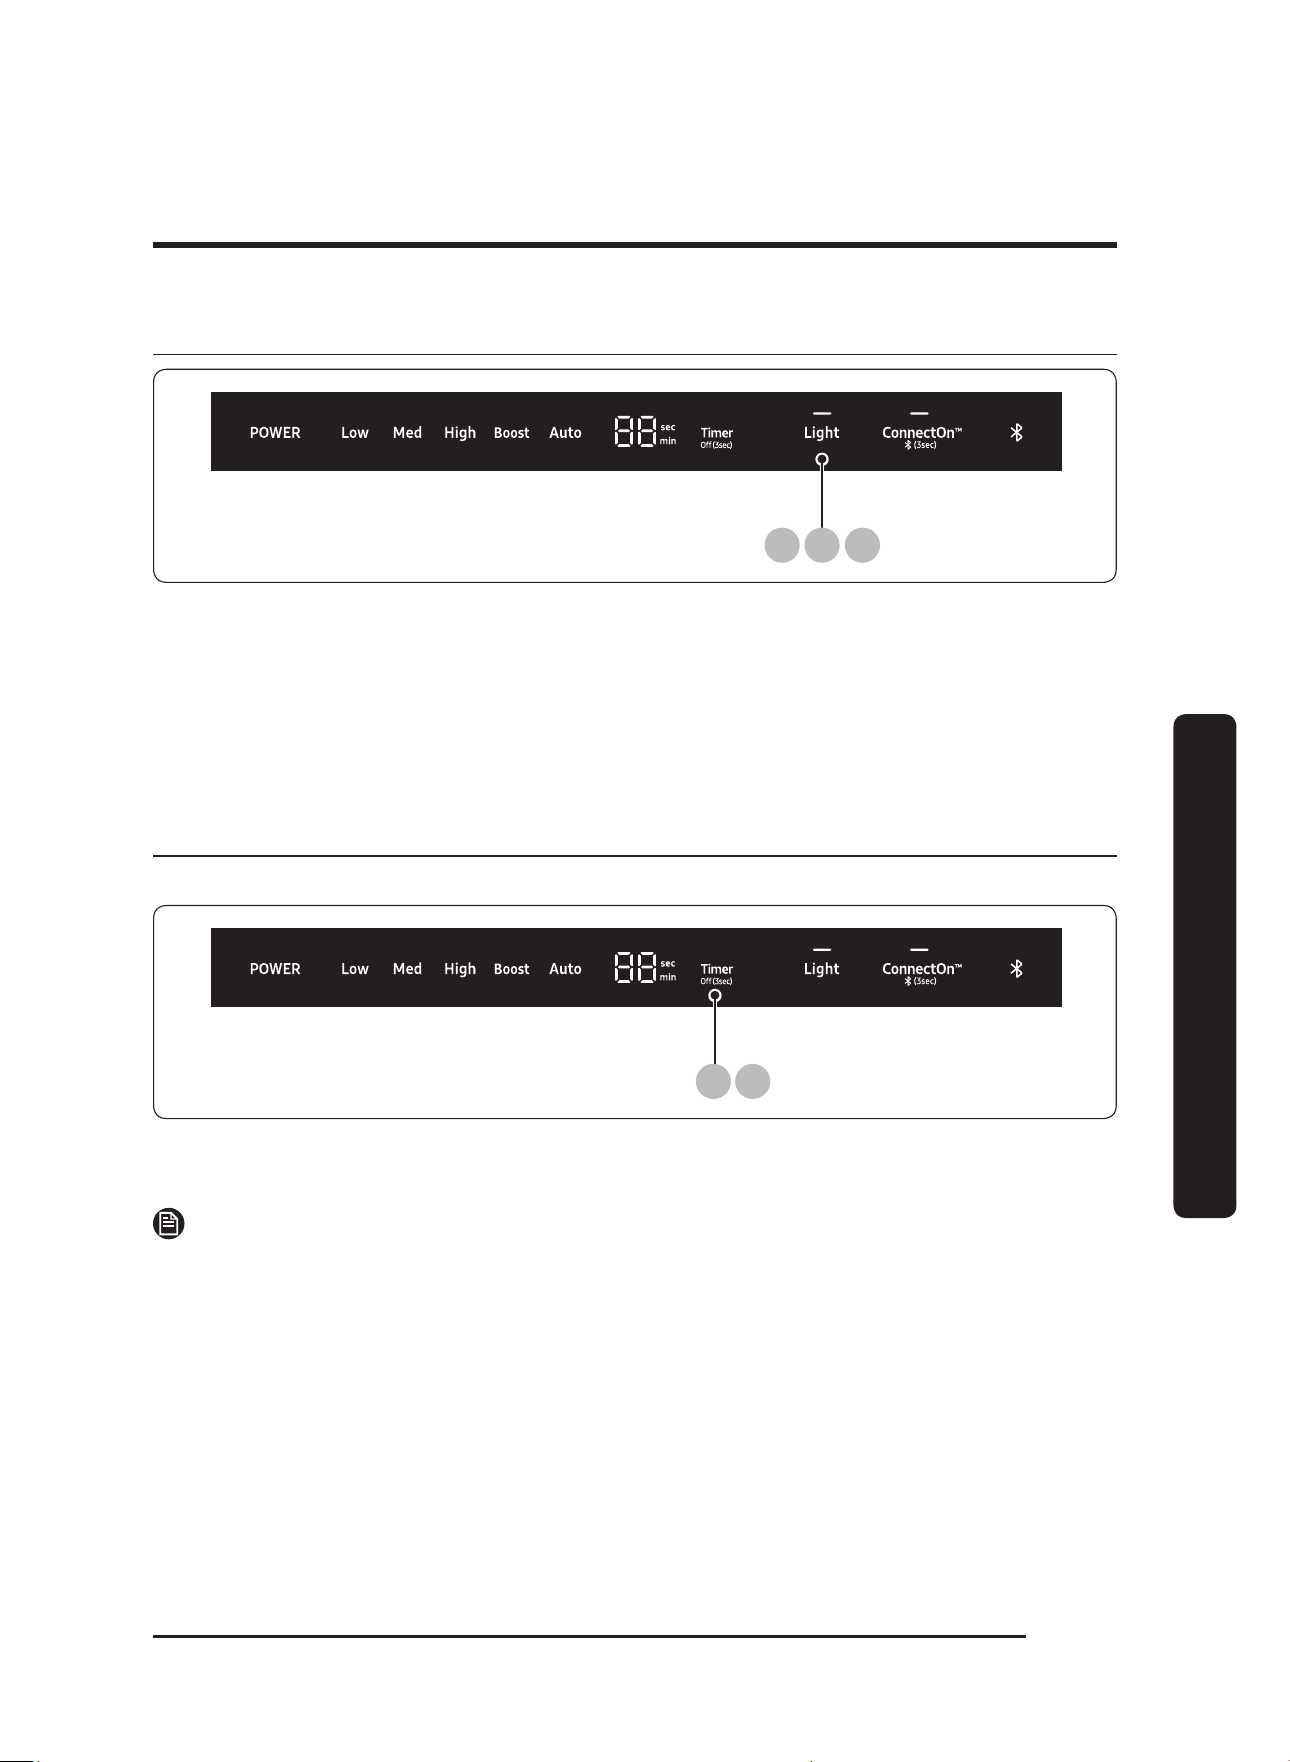
Using the lights
21 3
1. Press the Light button.
The lights come on at the high setting.
2. Press the Light
button a second time.
The lights turn dimmer.
3. Press the Light button a third time. The lights turn off.
Setting/Turning off the timer
Your hood has a timer that automatically turns the fan off.
1 2
1. Press the Timer button to set the desired time setting.
The hood will stay on for the amount of time you have set.
NOTE
Each time you press the Timer button, you add 10 min to the display time, up to a
maximum
of 99 min.
2. Press the Timer button for 3 sec.
The Timer function will turn off.
English14
Operations
Operations
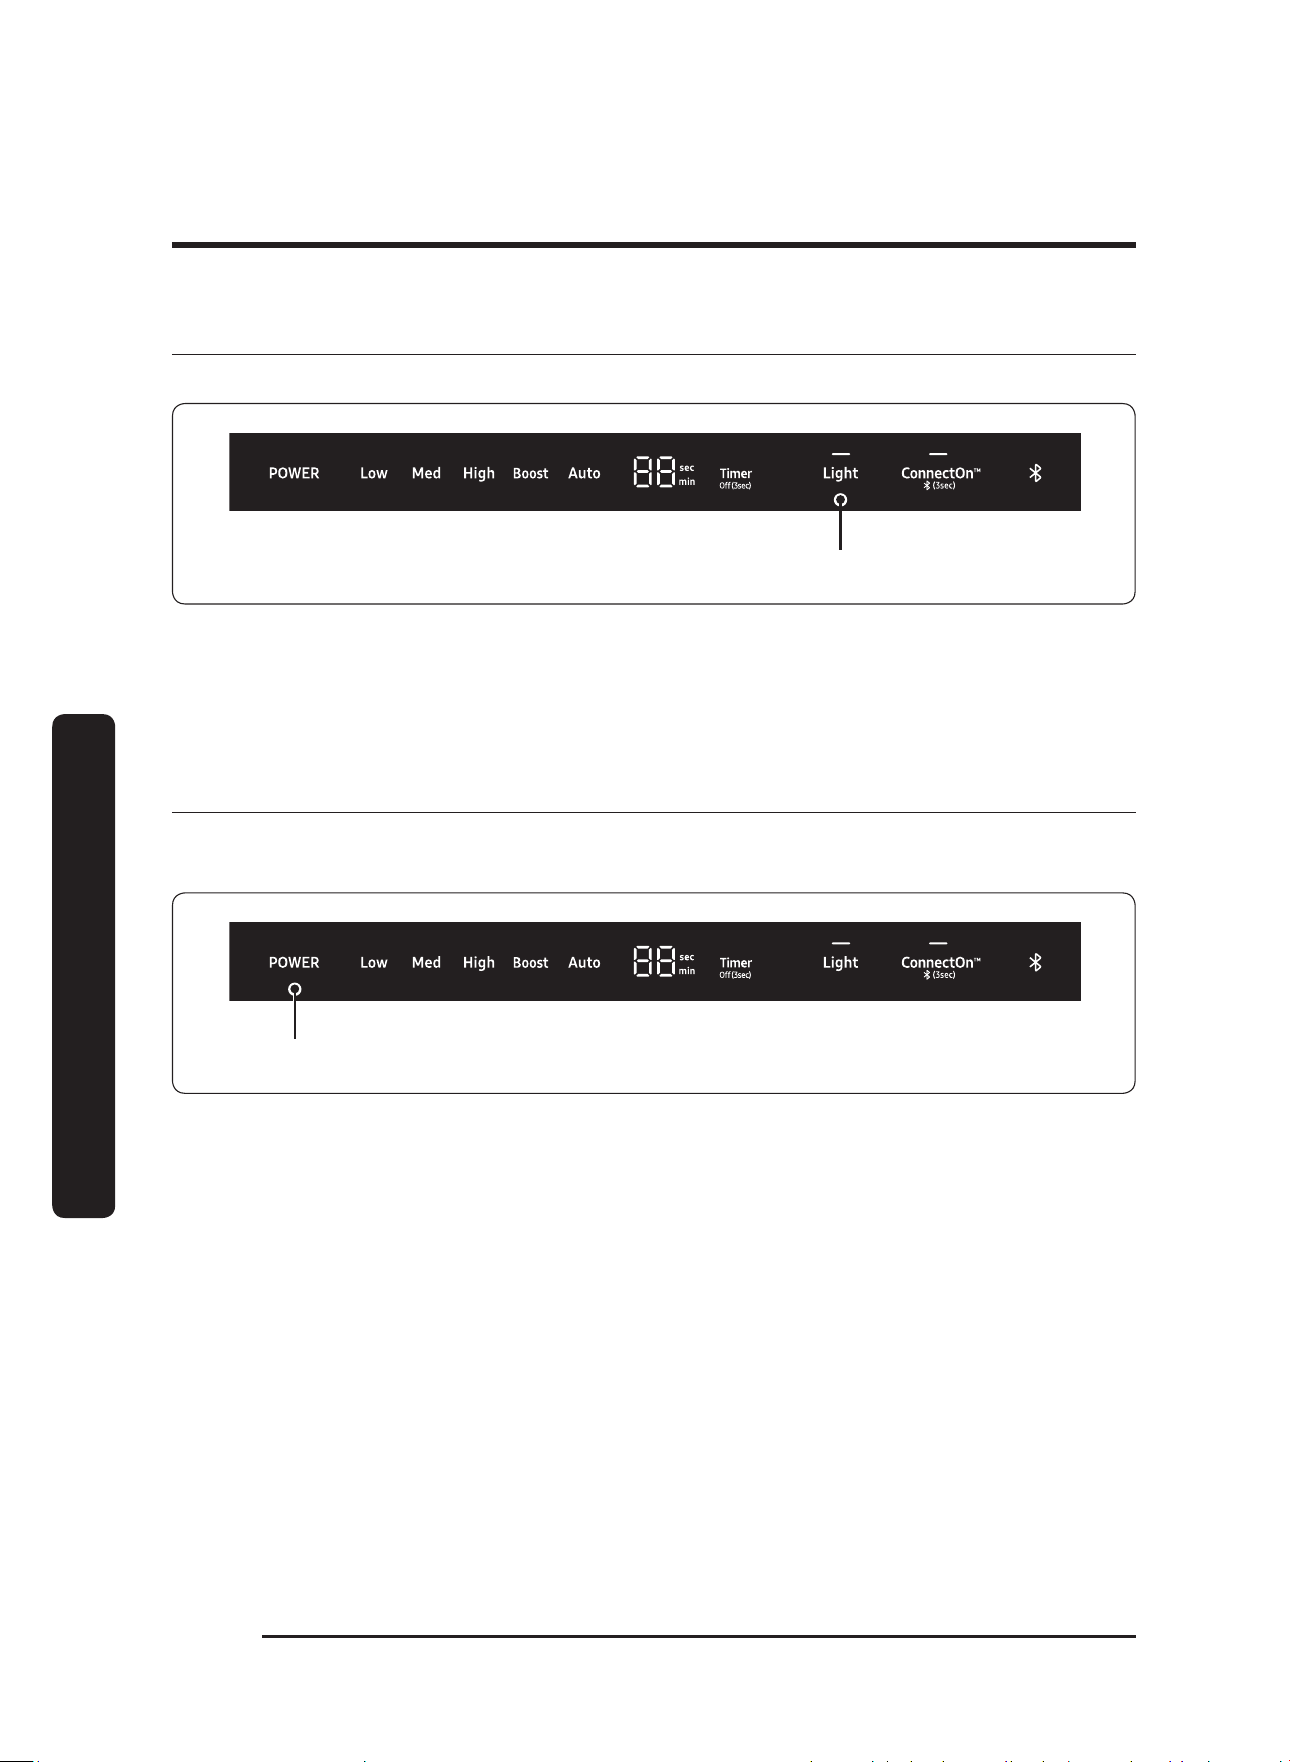
Muting/Unmuting the control sound
You can enable/disable the hood's control panel sounds.
3 seconds
1. Press-hold Light for 3 seconds to mute the control panel sound (beep).
2. Press-hold
Light again for 3 seconds to enable the sound (beep).
Resetting the clean filter light
Every 50 hours of fan use, the Clean Filter light comes on, indicating the filters may need
to be cleaned.
3 seconds
1. To reset the Clean Filter Light, press on POWER button for 3 seconds.
2. Clean the filters if needed. (See Cleaning the filters and grease channel, page 19).
English 15
Operations
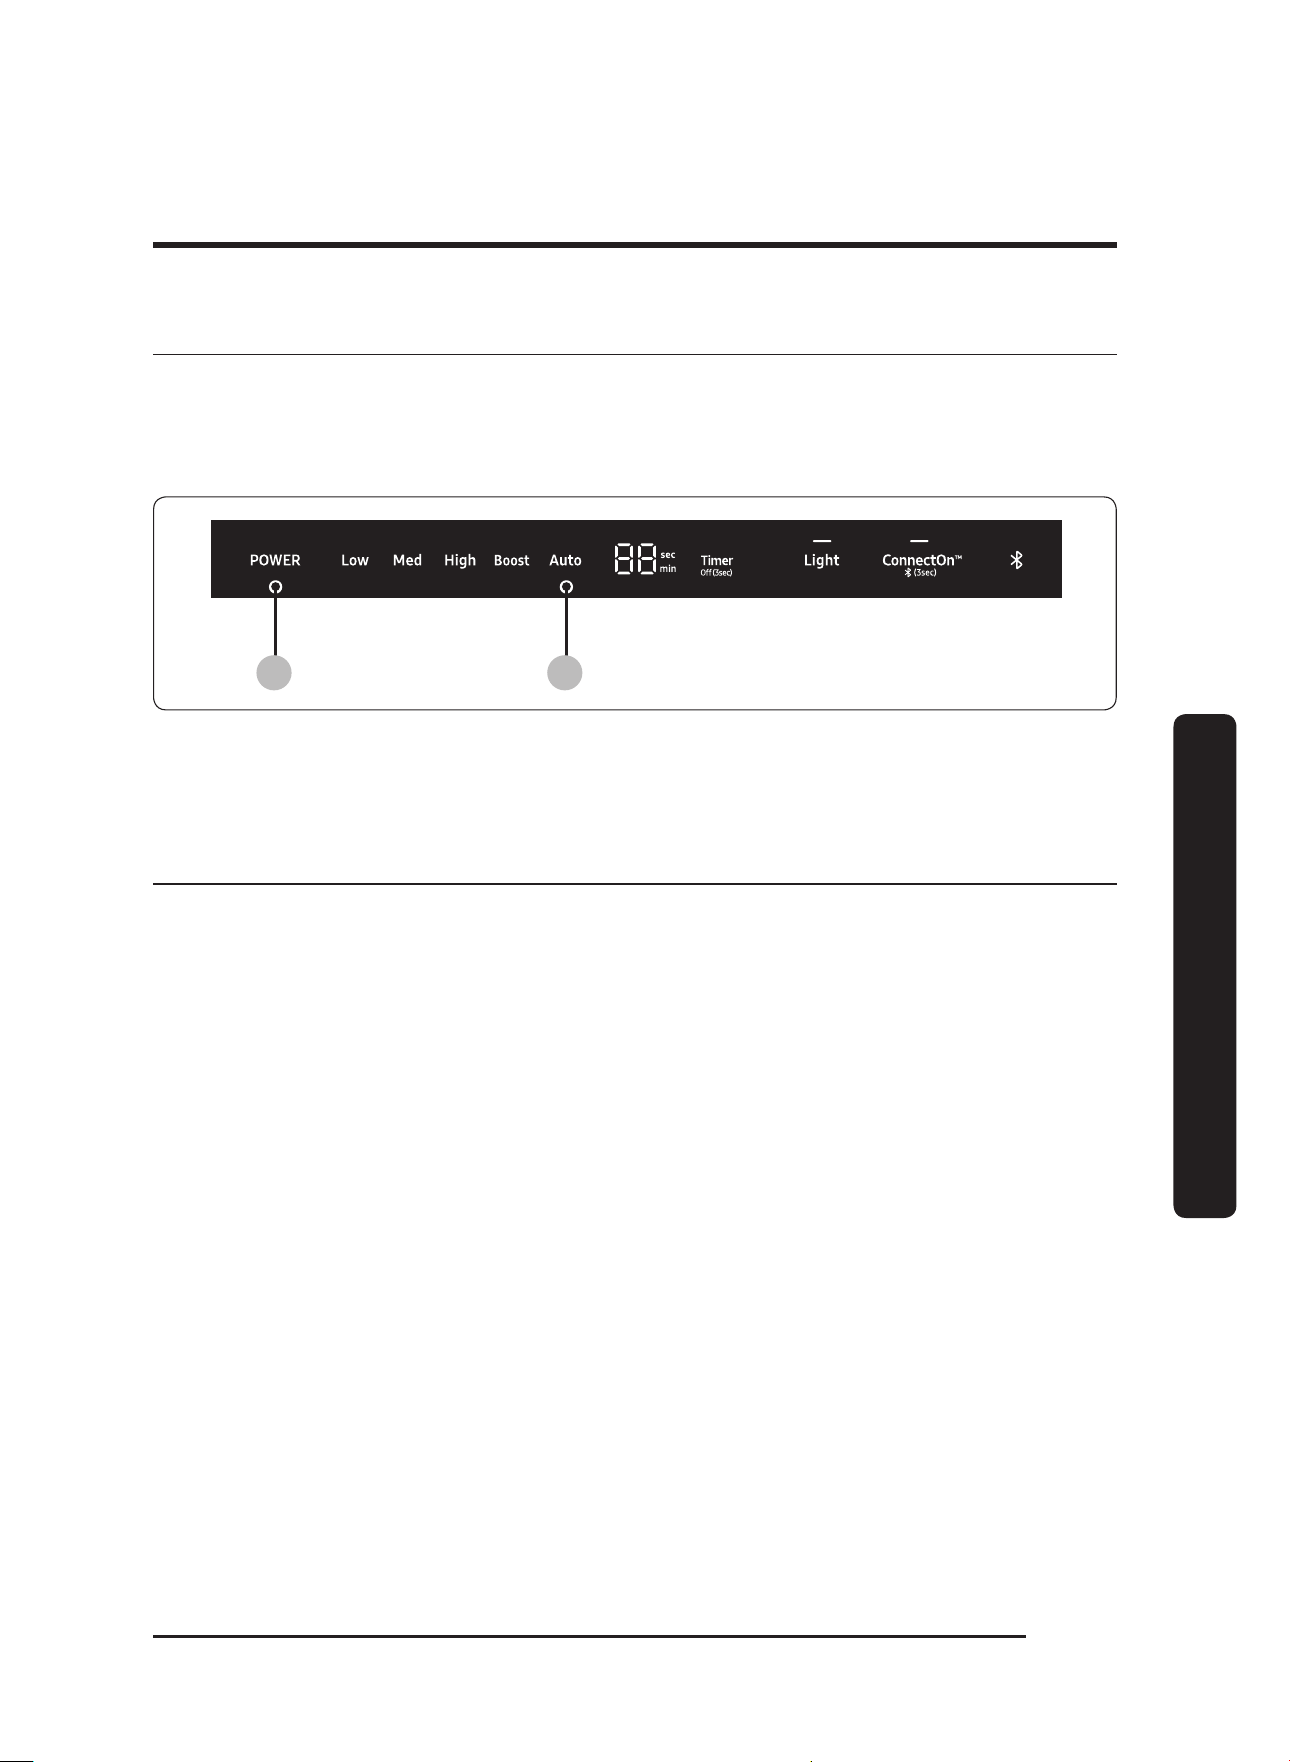
About the Auto-ON safety feature
To protect the electronics from heat damage, the fan automatically turns ON if Auto-ON is
enabled or if the unit is connected via Bluetooth with a Dacor cooktop and the cooktop is
on. Press POWER to manually turn off the fan. Fan speed increases with heat.
1 2
1. Press on the POWER pad or select a different fan speed.
the Auto Light will turn OFF.
About ConnectOn™
• Before using ConnectOn™, set up this feature on your compatible Dacor cooktop.
• This appliance has a feature which allows you to pair compatible Dacor cooktops and
your hood via Bluetooth.
• After hood and compatible cooktop are paired. you can download the Dacor Smart
Home app to a mobile device, and then use it to:
- Monitor and control the On/Off status of hood.
- Monitor and control the fan speed.
- Monitor ad control the lights.
- Set the hood shut-off timer with the time-up alarm.
• For more information about the downloading the Dacor Smart app to your mobile
device and using it to control your hood, visit: www.dacor.com
English16
Operations
Operations
Before using ConnectOn™
(3 sec)
1 3
1. Press ConnectOn™ for 3 seconds.
The pairing mode will be activated and the indicator of Bluetooth symbol will flash.
2. Press the Bluetooth button on
your compatible Dacor cooktop.
The hood and the cooktop will be paired.
NOTE
For a detailed description of the pairing method, see the user manual of a compatible
Dacor cooktop.
3. Press-hold the Bluetooth button for 3 second again.
Using ConnectOn™
(3 sec)
1 3
1. Press ConnectOn™.
This function will be activated.
2. Turn on the cooktop.
The hood will activate automatically. (default : Auto)

English 17
Care and maintenance
Care and maintenance
Care and cleaning of the hood.
Cleaning the Stainless Steel and Painted Surfaces
• Regularly use a dry cloth to remove all foreign substances such as dust or water from
the power plug terminals and contact points.
• Clean stainless steel surfaces and Painted Surfaces with a mild solution of dishwashing
liquid and warm water, always wiping with the grain.
(For best results, Dacor recommends you use Dacor Stainless-Steel Cleaner, according to
package directions).
•
Do not clean with abrasive cleaners or abrasive cloths.
• Rinse and dry with a micro-fiber or other soft, lint-free cloth.
• Do not use benzene, thinner, or home/car detergent to clean the hood.
• Do not spray water onto the hood. This may cause electric shock.
• Do not put fingers or any objects into the hood.
Control Panel
• Clean the control panel with a soft cloth dampened with a mild detergent-hot water
solution.
• Rinse and dry with a soft cloth.
• Exercise caution to avoid introduction of liquids into the area behind the control panel.
• Do not use abrasive cleaners or scrubbers. They may permanently damage the finish or
scrape off the letters and graphics.
WARNING
To avoid the risk of fire/electric shock/personal injury:
• Turn off power to the hood at the circuit-breaker panel or fuse box before cleaning.
• Clean the hood only as directed with the cleaning solutions specified in this manual.
• Thoroughly dry the filter(s) immediately after cleaning.
• Turn off the cooktop/range, and ensure the appliance has cooled sufficiently before
cleaning it and the hood.
• To avoid damaging the fan, do not reinstall damaged filters.
English18
Care and maintenance
Care and maintenance
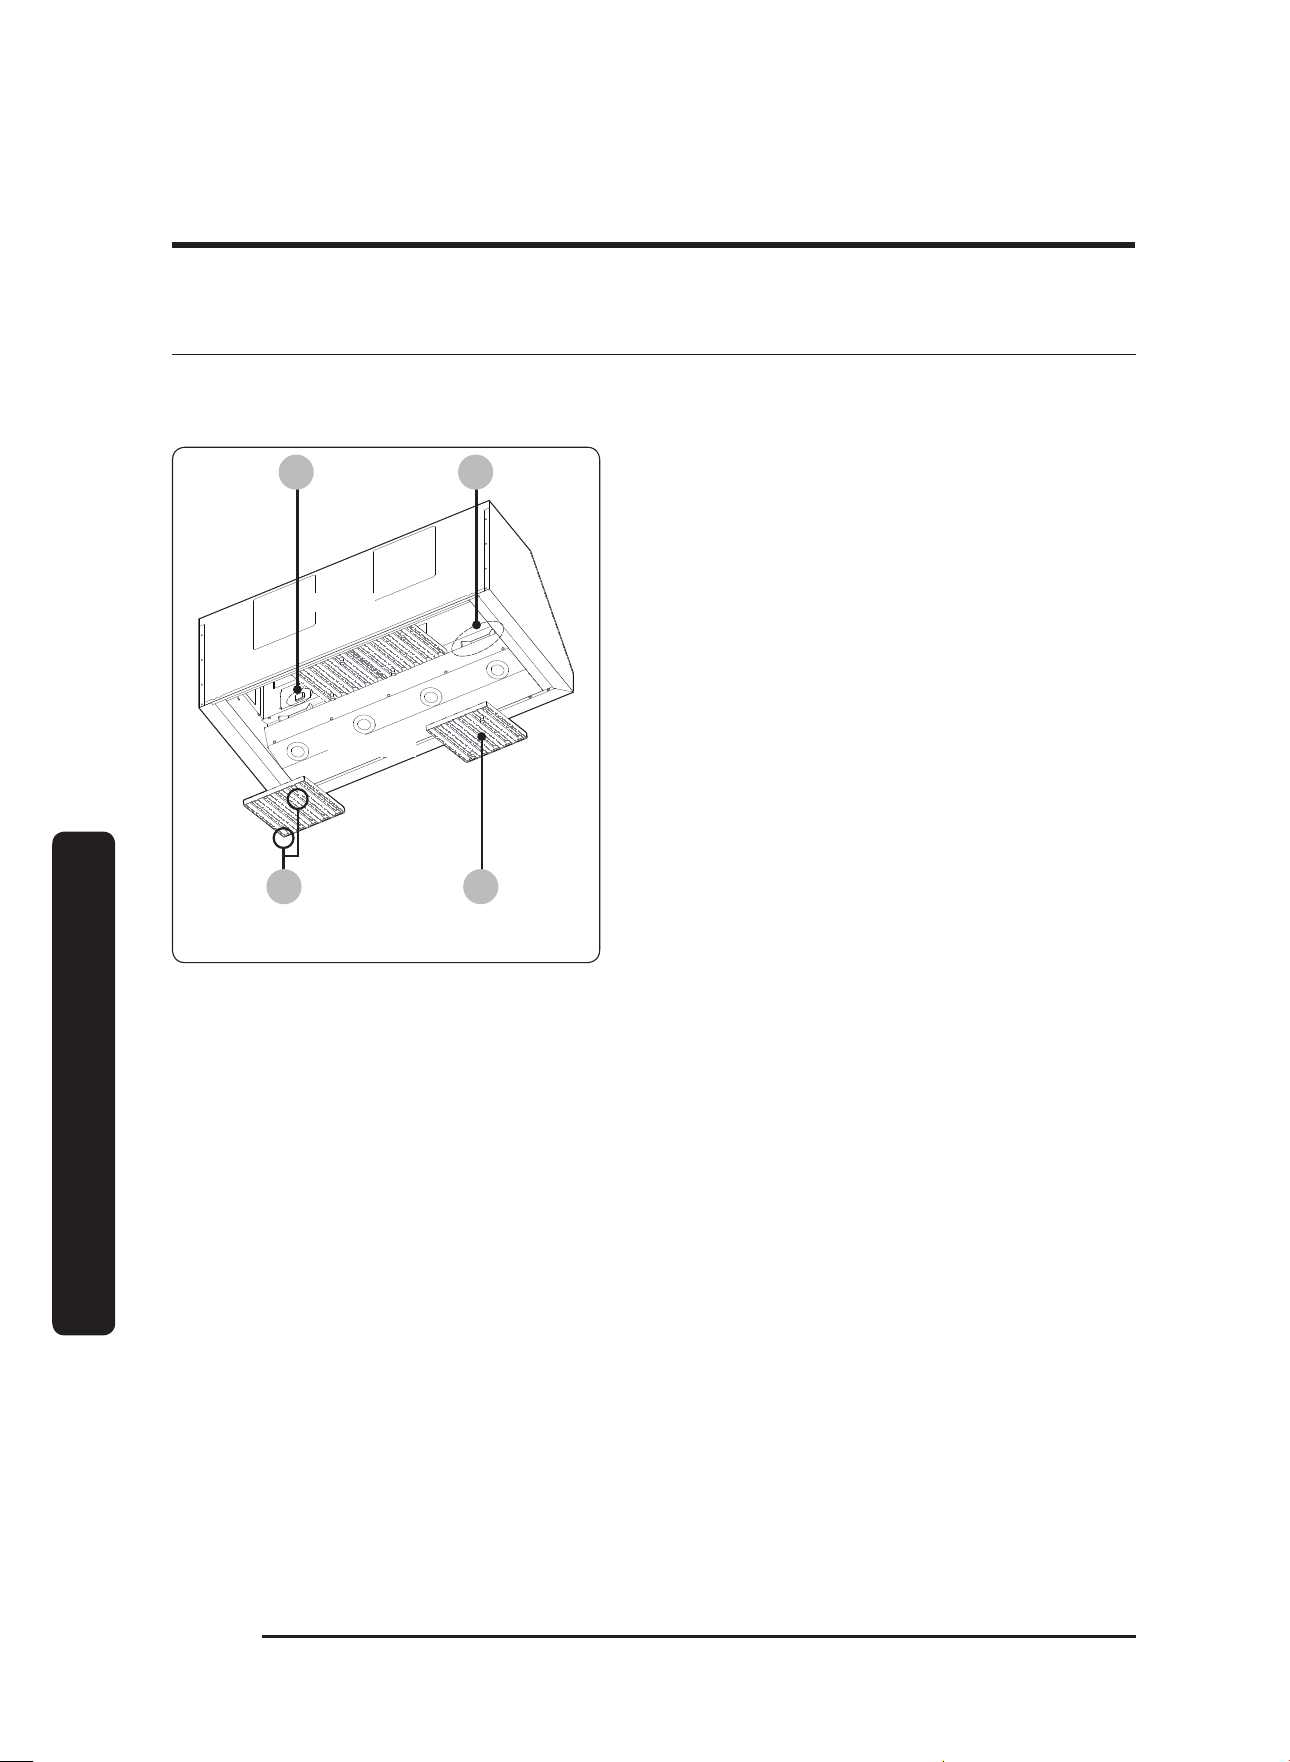
Removing the filters
The filters are under the hood toward the rear. These external components lie directly
above all heat, steam, and particulates that are drawn upward into the blower(s).
A B
C D
Model Shown: DHD48
REAR
BOTTOM
A. Main power switch
B. Tension clip
C. Filter knob
D. Filter
1. Tension clips at the front of the hood
hold the filters in place.
2. You can easily access the main power
switch when the filter beneath it is
removed.
3. In performing this procedure, take
care not to bump the switch or scratch
the grease channel along the hood’s
bottom-rear edge.
4. If you cannot reach the filters from
the floor, Dacor recommends you use
a stepstool or similar sturdy device to
help you reach up into the hood.
English 19
Care and maintenance
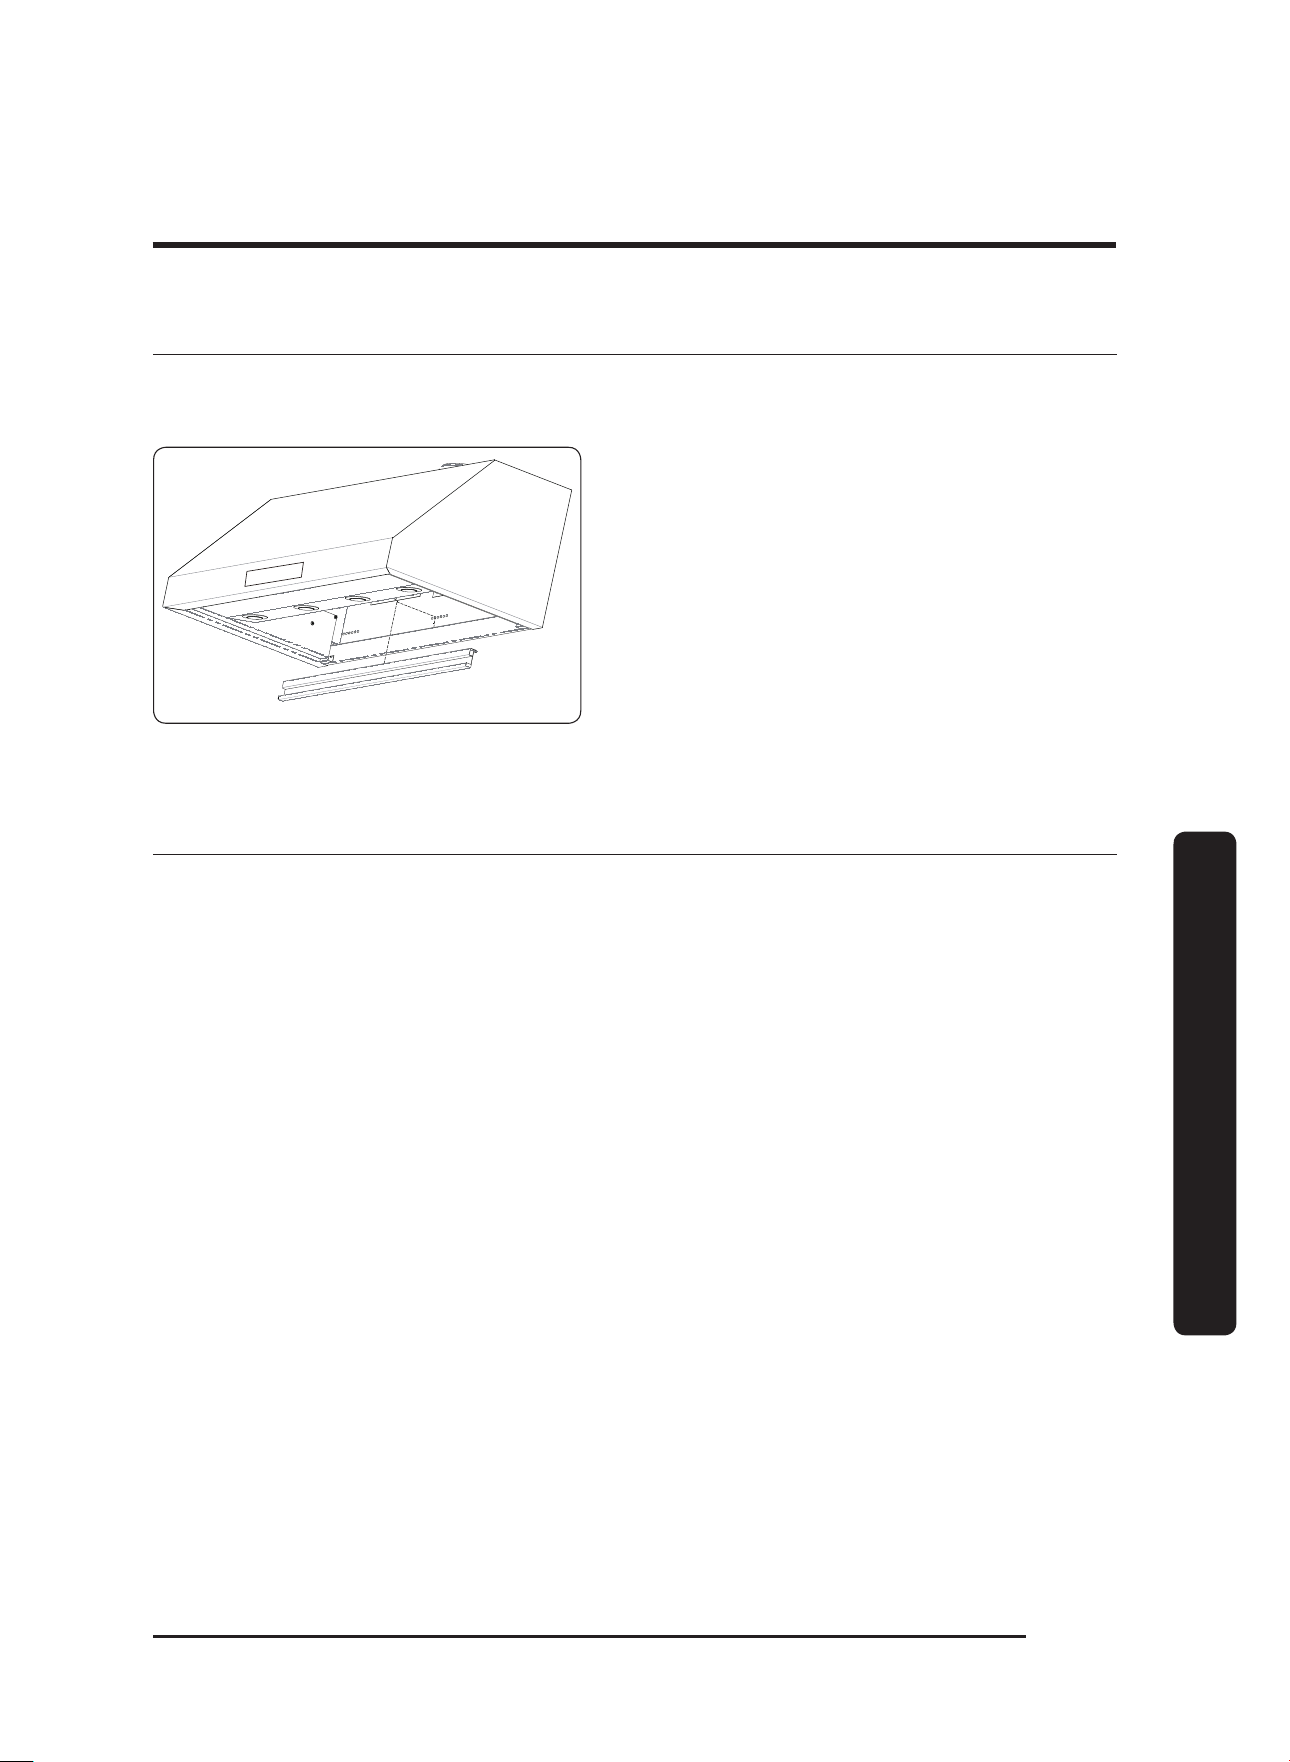
Cleaning the filters and grease channel
If you cannot reach the grease channel from the floor, Dacor recommends you use a
stepstool or similar sturdy device to help you reach up into the hood.
Grease Channel
1. Unhinge (lift with boths hands and
detach), and clean the grease channel
with a hot, soapy sponge.
2. Wash the filters in hot, soapy water, or
in a dishwasher.
3. Thoroughly dry the grease channel and
filters.
Reinstalling the filters and grease channel
1. Reattach the grease channel.
2. Grasping the knobs, press the filter’s front edge firmly against the tension clip until the
filter’s rear edge clears the grease channel.
3. Carefully raise the filter’s rear edge up into the hood.
4. Gently release tension on the clip, and rest the filter’s rear edge on the grease channel.
5. Wipe away fingerprints, and adjust the components as needed.
English20
Care and maintenance
Care and maintenance
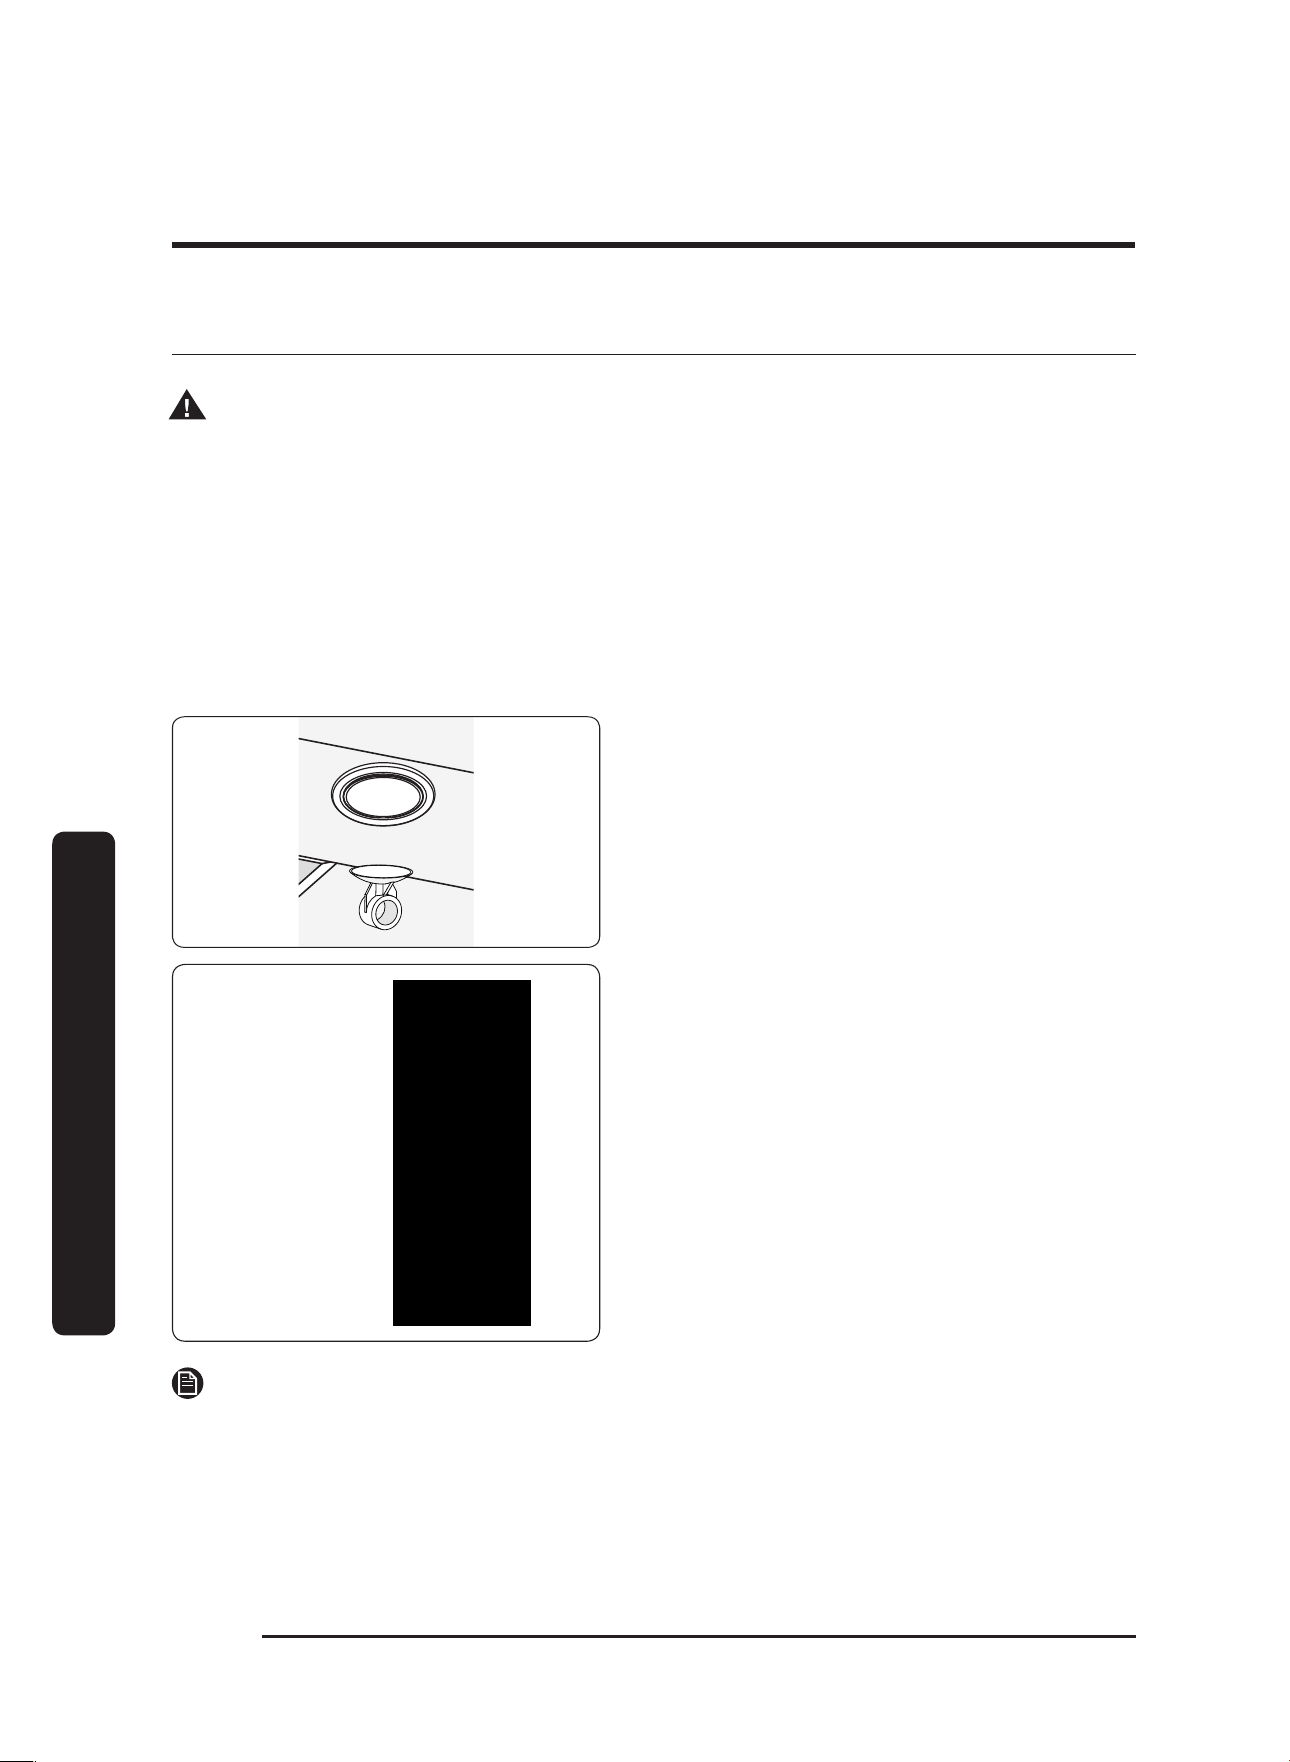
Replacing the light bulbs
Fixture
Dimmable
Bulb
Suction
Cup
1. (To avoid harming the appliance electrical
system should a short occur) Turn power
OFF at the circuit breaker or fuse box.
2. Wipe the bulb lens clean, then gently
press the suction-cup tool onto the lens.
3. Turn the tool left to loosen the bulb, then
remove the bulb from the
housing.
4. Attach the suction-cup tool to the lens of
the replacement bulb.
5. Insert the bulb into the housing, and turn
the tool handle right to tighten the bulb.
6. Remove the suction cup, and turn the
power ON at the fuse box or circuit panel.
NOTE
• If buying your own bulb, take the old bulb to the store as reference, or use these
specifications: Dimmable LED 7.5W (max) or Halogen 75W (max), 120V; PAR16,
E26/27, 500 lumens.
• If the bulb does not engage, ensure the new bulb’s lens is clean, then repeat Steps 4
and 5, b
eing sure to insert the bulb fully into the housing.
• If buying your own bulb, take the old bulb to the store as reference, or use these
specifications: Dimmable LED 7.5W (max) or Halogen 75W (max), 120V; PAR16,
E26/27, 500 lumens.
• If the bulb does
not engage, ensure the new bulb’s lens is clean, then repeat Steps 4
and 5,
b
eing sure to insert the bulb fully into the housing.
•
The owner changes the bulb. Before replacing a bulb (or if a light does not work), verify
that power is ON at the circuit breaker, fuse box, light swich, or main power switch.
• To prevent elec
tric shock, turn power OFF at the fuse box or circuit breaker panel, then
replace the light bulb.
•
To avoid risk of fire, use bulbs
no
stronger than 7.5W LED or 75W, 120V Halogen.
• To avoid a burn injury, ensure the hood and the bulb lens are cool before changing the
bulb.
• To avoid system damage and faulty performance, use only dimmable bulbs.
WARNING
English 21
Care and maintenance
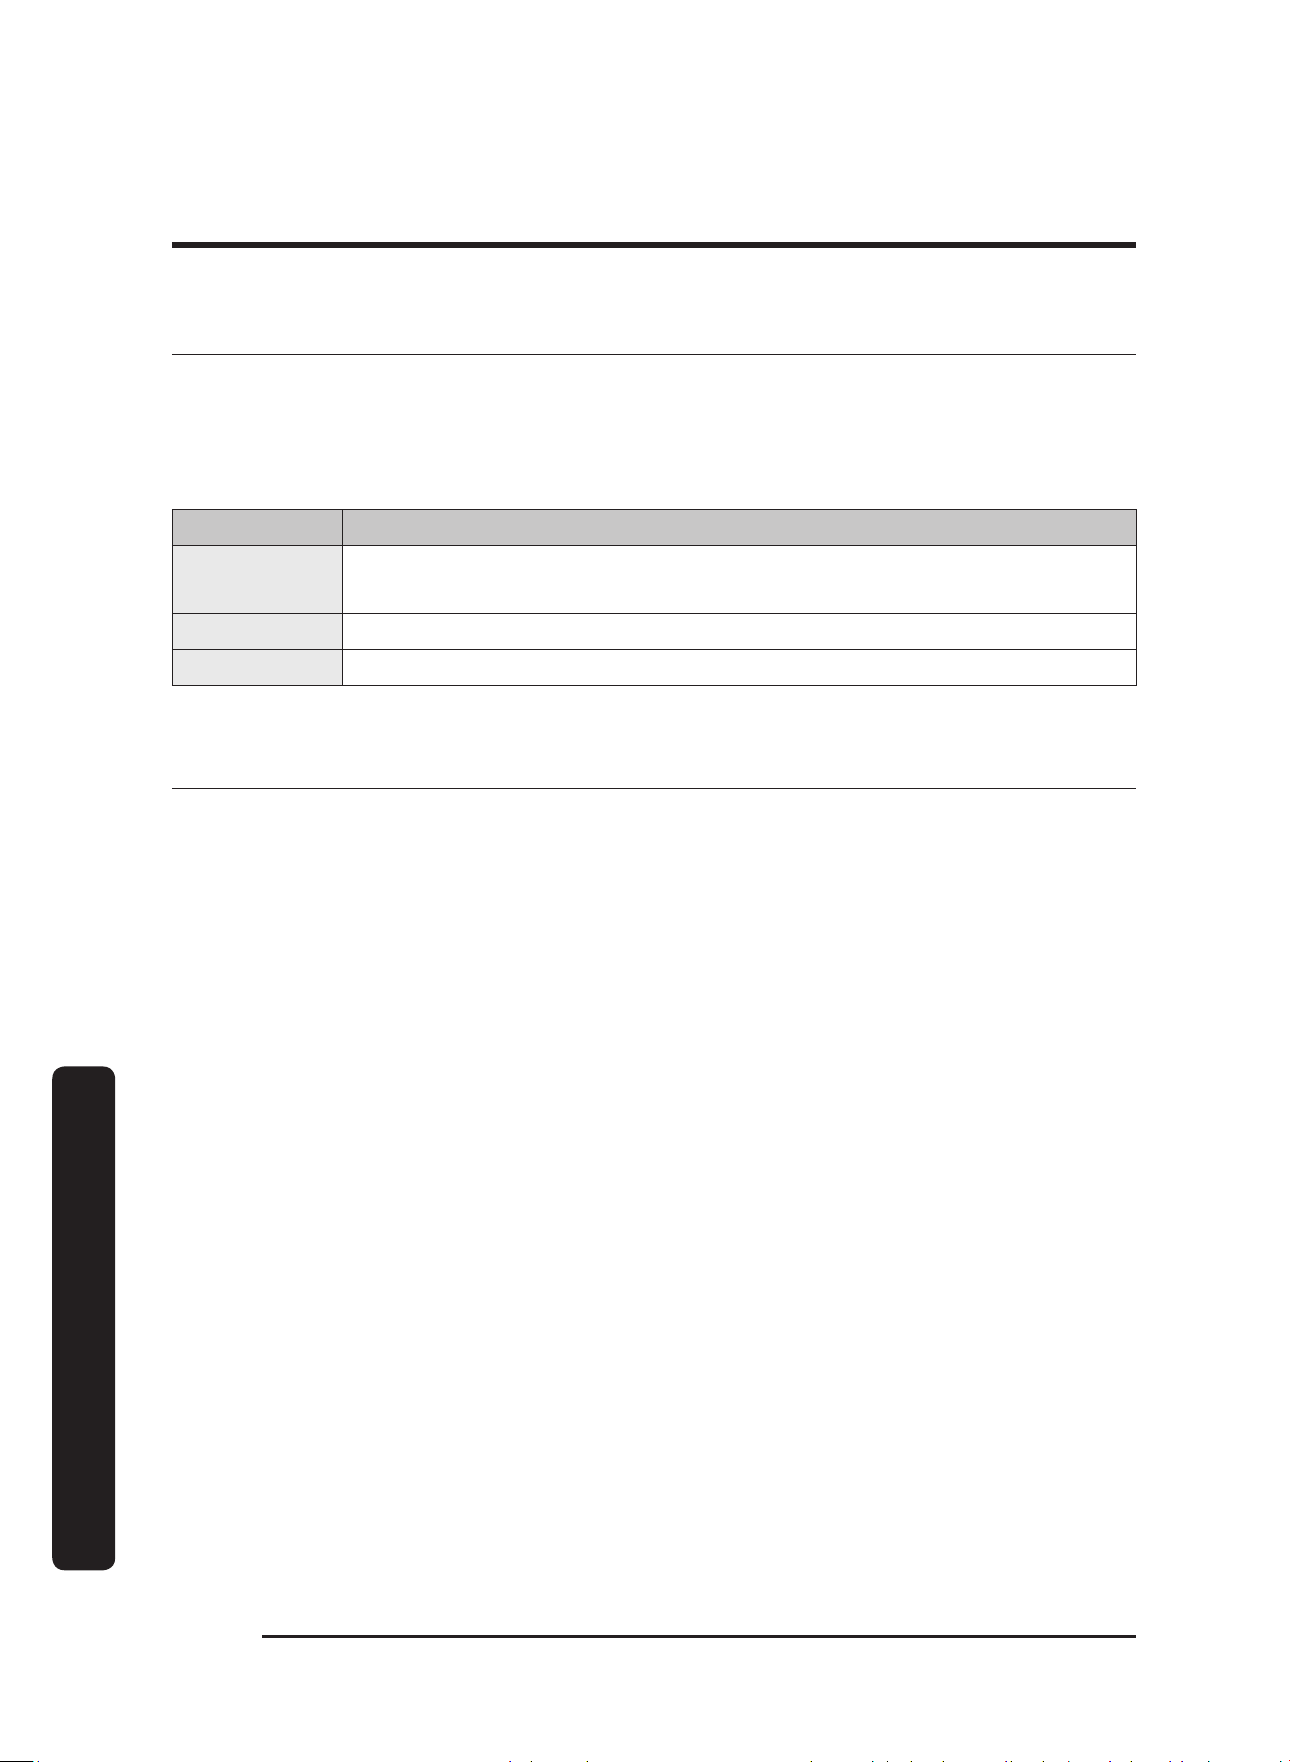
Replacement parts
Order at www.everything.dacor.com
Dacor Part # Description
702666 Dimmable LED Bulb Replacement Kit (1 bulb + 1 suction cup tool)
702579 Baffle Filter Kit (1 pc + hardware)
702580 Baffle Filter Kit (2 pc + hardware)
Dacor hoods use either baffle or mesh filter types. Contact Dacor customer service for
assistance/information concerning the filter types.
This table shows the model numbers and descriptions of the available filter types:
Model # Description
AWHBF2/3/4
Baffle filter: 30” (2 filters); 36” (3 filters); 48” (4 filters)
English22
Troubleshooting
Troubleshooting
This table lists various minor problems concerning the function of the hood, possible
causes, and their solutions. If you experience an issue listed in this table, try resolving the
problem yourself by applying the corresponding solution. If you are unable to resolve the
problem, contact Dacor. (See Warranty and Service for business hours and phone number.)
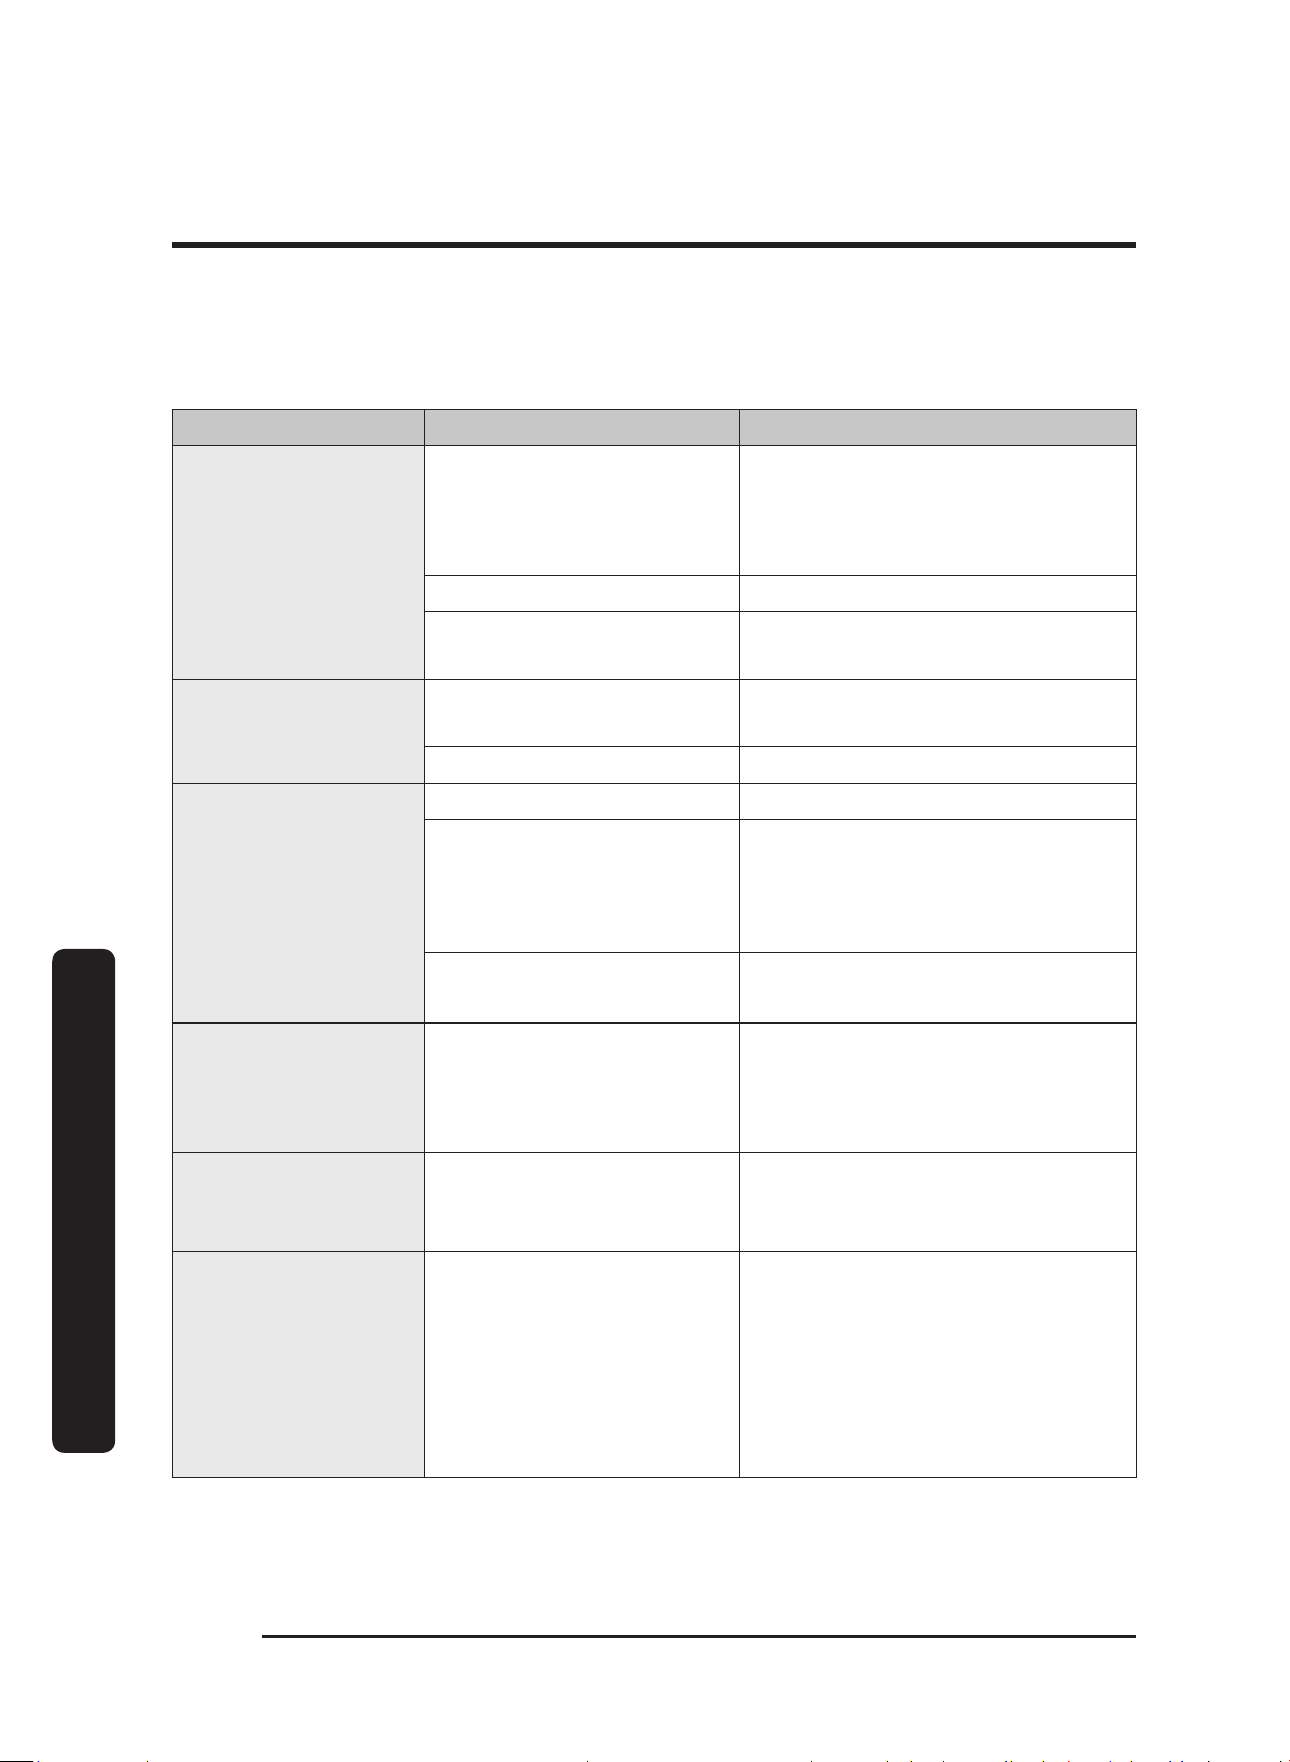
Problem Cause(s) Solution
Nothing Works
(control panel not
lit; fan/lights not
working)
Main power switch is OFF
Power to hood OFF
Check the main power switch
inside the hood; turn on power
at junction/fuse box; check for
tripped breaker or blown fuse.
Power outage Call your electric company
Hood not connected to
power source
Have qualified electrician connect
hood to power source.
Light(s) not working
(control panel lit; fan
working)
Light bulb loose Screw in bulb completely (Page
20).
Light bulb burned out Replace bulb (Page 20).
Fan not drawing heat
and smoke properly
Fan speed too low See Operating Instructions section.
Filters clogged/dirty
Open window, draft, HVAC
interference
Make sure filters are clean and free
of grease/debris.
Check for drafts and airflow
interference.
Damper jammed shut
Ducting clogged
Consult qualified installation
professional*.
Fan shuts off by itself Hood’s “Timed” feature was
set
If timer is set, fan turns off after
set time. The max time is 99 min.
(Setting/Turning off the timer,
page 13).
Fan not working
(control panel lit;
lights working)
Fan electrical malfunction Call for service.
Fan comes on by
itself
Hood’s AUTO-ON feature
was started
The exhaust fan comes on
automatically if the Auto-ON is
enabled or if the unit is connected
via Bluetooth with a Dacor cooktop
and the cooktop is on.
Press POWER to manually turn off
the fan.
* Dacor does not manufacture/warrant/service the ducting that vents heat/smoke from the hood's
chimney
to the outside. The owner shall have a qualified person install/maintain the ducting.
English 23
Troubleshooting
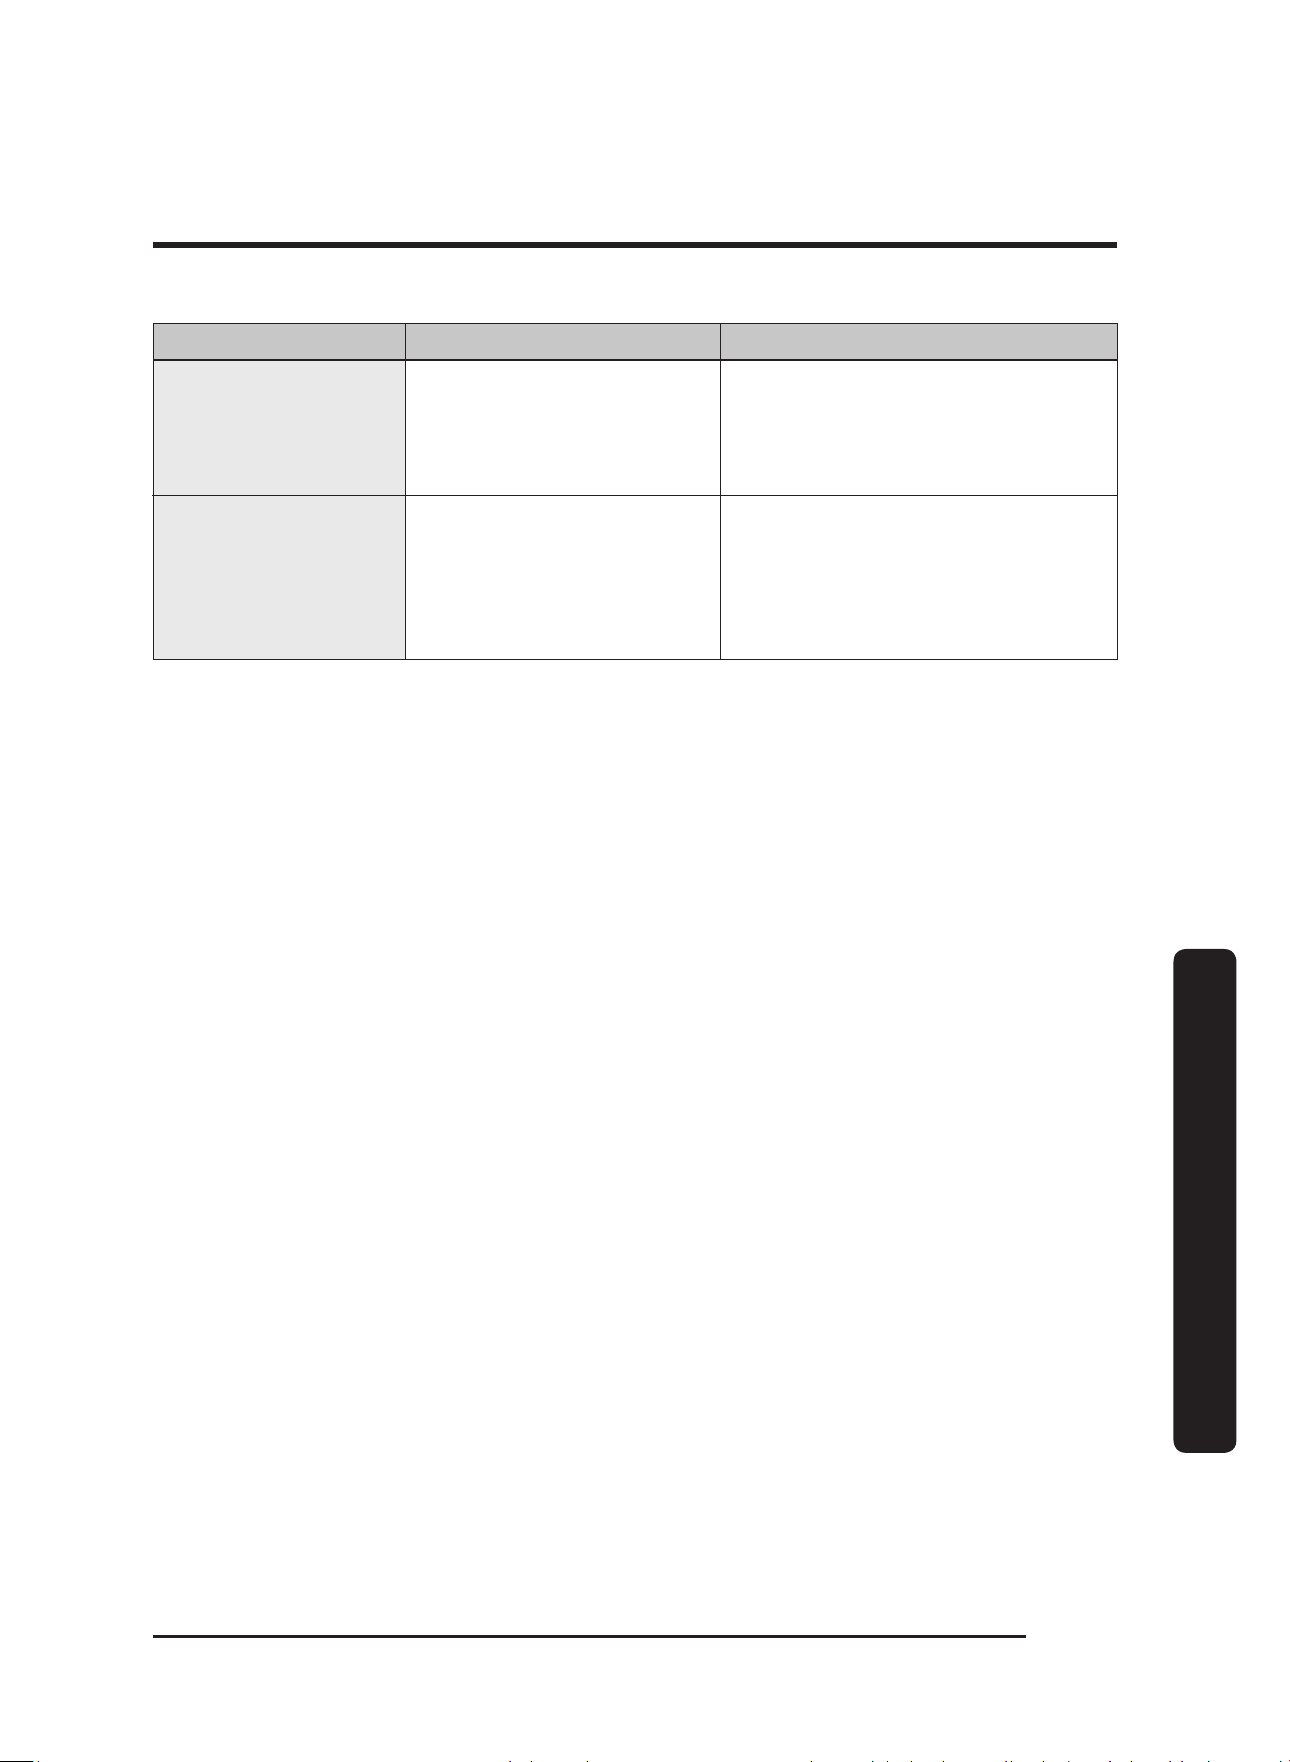
Problem Cause(s) Solution
ConnectOn™ function
not working
The hood is not co
nnected
to the cooktop.
Only a Dacor-compatible cooktop
can be paired with the hood. (For
details, see
Before using
ConnectOn™, pg. 16.)
Bluetooth light
blinks or shuts off
automatically
The hood has trouble
connecting to a
compatible range or
cooktop
Reset bluetooth on the hood:
Press-hold Light and ConnectOn
simultaneously for 5 seconds;
the display shows bT and
changes to rT
English24
Warranty and Service
Warranty and Service
Getting Help
Before seeking assistance:
1. Review Dacor’s Problem-Solution Guide in the Before You Call For Service section
above.
2. Learn the hood’s warranty terms/conditions (next page).
Contact Type Contact Info
Warranty Dacor Distinctive Service;
US/Canada: (800) 793-0093 x2822; 6:00 a.m. to 5:00 p.m. Pacific Time
Non-warranty US/Canada: (800) 793-0093 x2813; 6:00 a.m. to 5:00 p.m. Pacific Time
Website www.dacor.com/contact-us
Warranty
Review this section to learn the warranty and non-warranty terms and conditions
concerning this product. For details/clarifications, contact Dacor.
What Is Covered
CERTIFICATE OF WARRANTIES: DACOR OVENS
WITHIN THE FIFTY STATES OF THE U.S.A., THE DISTRICT OF COLUMBIA, AND CANADA:
FULL ONE-YEAR WARRANTY
The warranty applies only to the Dacor appliance sold to the first use purchaser, starting
from the date of original retail purchase or closing date for new construction, whichever
period is longer. Warranty is valid on products purchased brand new from a Dacor
Authorized Dealer, or other seller authorized by Dacor.
If your Dacor product fails to function within one year of the original date of purchase,
due to a defect in material or workmanship, Dacor will remedy it without charge to you.
All cosmetic damage (such as scratches on stainless steel, paint/porcelain blemishes, etc.)
to the product or included accessories must be reported to Dacor within 60 days of the
original purchase date to qualify for warranty coverage. Consumable parts such as filters
and light bulbs are not covered and are the responsibility of the purchaser.

English 25
Warranty and Service
LIMITATIONS OF COVERAGE
Service will be provided by a Dacor designated service company during regular business
hours. Please note service providers are independent entities and are not agents of Dacor.
Dealer display and model home display products with a production date greater than 5
years, products sold “As Is,” and products installed for non-residential use, which include
but are not limited to religious organizations, fire stations, bed and breakfast, and spas
carry a one year parts warranty only. All delivery, installation, labor costs, and other
service fees are the responsibility of the purchaser.
Warranty will be null and void on product that has altered, defaced, or missing serial
numbers and tags.
The owner must provide proof of purchase or closing statement for new construction
upon request. All Dacor products must be accessible for service.
Warranty is null and void if non-ETL or non-CUL approved product is transported from the
U.S.A.
OUTSIDE THE FIFTY STATES OF THE U.S.A, THE DISTRICT OF COLUMBIA, AND CANADA:
LIMITED FIRST YEAR WARRANTY
If your Dacor product fails to function within one year of the original date of purchase
due to a defect in material or workmanship, Dacor will furnish a new part, F.O.B. factory to
replace the defective part.
All delivery, installation, labor costs and other service fees are the responsibility of the
purchaser.
What Is Not Covered
• Slight color variations may be noticed because of differences in painted parts, kitchen
lighting, product placement, and other factors; this warranty does not apply to color
variation.
• Service calls to educate the customer on proper use and care of the product.
• Service fees for travel to islands and remote areas, which include but are not limited to,
ferries, toll roads or other travel expenses.
• Consequential or incidental damage, including but not limited to food or medicine loss,
time away from work or restaurant meals.
• Failure of the product when used for commercial, business, rental or any application
other than for residential consumer use.
• Failure of the product caused by improper product installation.
• Replacement of house fuses, fuse boxes or resetting of circuit breakers.
• Damage to the product caused by accident, fire, flood, power interruption, power
surges or other acts of God.

English26
Warranty and Service
Warranty and Service
• Liability or responsibility for damage to surrounding property including cabinetry,
floors, ceilings and other structures or objects around the product.
• Breakage, discoloration, or damage to glass, metal surfaces, plastic components, trim,
paint or other cosmetic finish caused by improper usage, care, abuse or neglect.
Out of Warranty
Should you experience a service issue beyond the standard warranty period, please
contact us. Dacor reviews each issue and customer concern to provide the best possible
solution based on the circumstances.
THE REMEDIES PROVIDED IN THE ABOVE EXPRESS WARRANTIES ARE THE SOLE AND
EXCLUSIVE REMEDIES. THEREFORE, NO OTHER EXPRESS WARRANTIES ARE MADE, AND
OUTSIDE THE FIFTY STATES OF THE UNITED STATES, THE DISTRICT OF COLUMBIA AND
CANADA, ALL IMPLIED WARRANTIES, INCLUDING BUT NOT LIMITED TO, ANY IMPLIED
WARRANTY OF MERCHANTABILITY OR FITNESS FOR A PARTICULAR USE OR PURPOSE,
ARE LIMITED IN DURATION TO ONE YEAR FROM THE DATE OF ORIGINAL PURCHASE. IN
NO EVENT SHALL DACOR BE LIABLE FOR INCIDENTAL EXPENSE OR CONSEQUENTIAL
DAMAGES. IN THE EVENT DACOR PREVAILS IN ANY LAWSUIT, DACOR SHALL BE ENTITLED
TO REIMBURSEMENT OF ALL COSTS AND EXPENSES, INCLUDING ATTORNEY’S FEES, FROM
THE DACOR CUSTOMER. NO WARRANTIES, EXPRESS OR IMPLIED, ARE MADE TO ANY
BUYER FOR RESALE.
Some states do not allow limitations on how long an implied warranty lasts, or do not
allow the exclusion or limitation of inconsequential damages, therefore the above
limitations or exclusions may not apply to you. This warranty gives you specific legal
rights, and you may also have other rights that vary from state to state.

cut herecut here
Please visit www.Dacor.com to activate your warranty online.
WARRANTY INFORMATION
IMPORTANT:
Your warranty will not begin until you activate it online or return this form to Dacor. If you have purchased more
than one Dacor product, please return all forms in one envelope, or activate the warranty for each product online.
Please rest assured that under no conditions will Dacor sell your name or any of the information on this form for
mailing list purposes. We are very grateful that you have chosen Dacor products for your home and we do not
consider the sale of such information to be a proper way of expressing our gratitude!
Owner’s Name:
Street:
Last (Please Print or Type) First Middle
City: State: Zip:
Purchase Date: Email: Telephone:
Dealer:
City: State: Zip:
Your willingness to take a few seconds to fill in the section below will be sincerely appreciated. Thank you.
1. How were you first exposed to Dacor products? (Please check one only.)
A. T.V. Cooking Show F. Builder
B. Magazine G. Architect/Designer
C. Appliance Dealer Showroom H. Another Dacor Owner
D. Kitchen Dealer Showroom I. Model Home
E. Home Show J. Other
2. Where did you buy your Dacor appliances?
A. Appliance Dealer D. Builder
B. Kitchen Dealer E. Other
C. Builder Supplier
3. For what purpose was the product purchased?
A. Replacement
only
C. New Home
B. Part of a Remodel E. Other
4. What is your household income?
A. Under $75,000 D. $150,000 – $200,000
B. $75,000 – $100,000 E. $200,000 – $250,000
C. $100,000 – $150,000 F. Over $250,000
5. What are the brands of appliances that you have in your kitchen?
A. Cooktop C. Dishwasher
B. Oven D. Refrigerator
6. Would you buy or recommend another Dacor product?
Yes No
Comments:
Thank you very much for your assistance. The information you
have provided will be extremely valuable in helping us plan for the
future and giving you the support you deserve.
Place Serial Number Label Here
Website: www.Dacor.com
Phone: 1+800+793-0093
Dacor ∙ 14425 Clark Avenue, City of Industry, CA 91745 ∙ Phone: (800) 793-0093 ∙ Fax: (626) 403-3130 ∙ www.dacor.com
