Loading ...
Loading ...
Loading ...
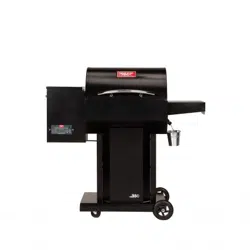
5. Attaching the Main Body
ATTENTION: The assistance of a second person is
strongly recommended for this step.
• Attach the main grill body to the assembled
pedestal with the provided washers and bolts.
Note: The three cushioned pads installed between the
lid and the body of the unit are for shipping purposes
only. Please remove them.
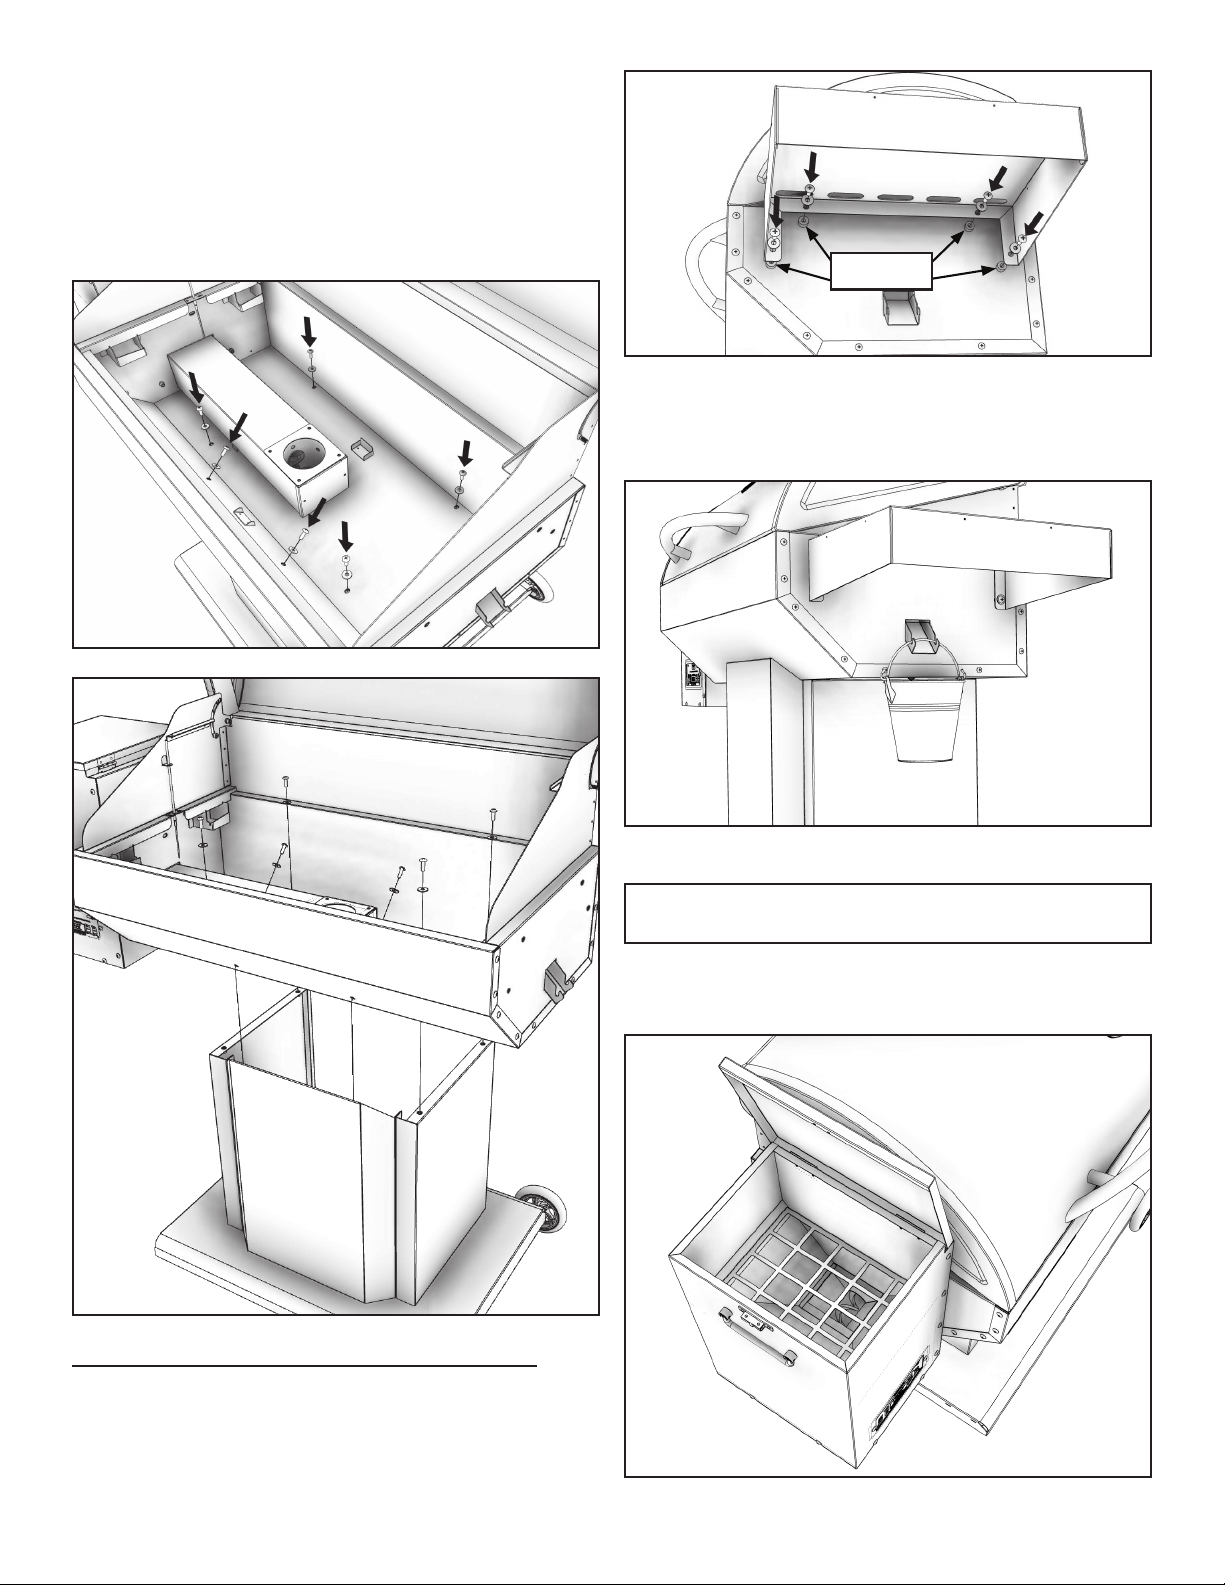
STEP 2 SIDE TABLE ASSEMBLY & INITIAL FIRING
1. Attaching the Side Table
• Attach the side table to the main grill body
using the provided spacers, 1/4 - 20 X 3/4” bolts,
and washers. Note: The spacers are to be place
between the grill body and side table during
installation.
Spacers
2. Bucket Placement
• Hang the grease catching bucket on the
provided hook located under the side table.
3. Initial Firing System Check
IMPORTANT: DO NOT put any pellets into the hopper
or grill during the Initial Firing System Check.
• Open the pellet hopper lid to check for foreign
objects in the hopper.
-6-
Loading ...
Loading ...
Loading ...