Loading ...
Loading ...
Loading ...
Door Removal
,,,,,
4
, ILCAUTION:
To Avoid The Risk Of Personal
Injury Or Property Damage
have two people remove the
door, One to hold the door and
one to remove the safety tape,
and help with the tools,
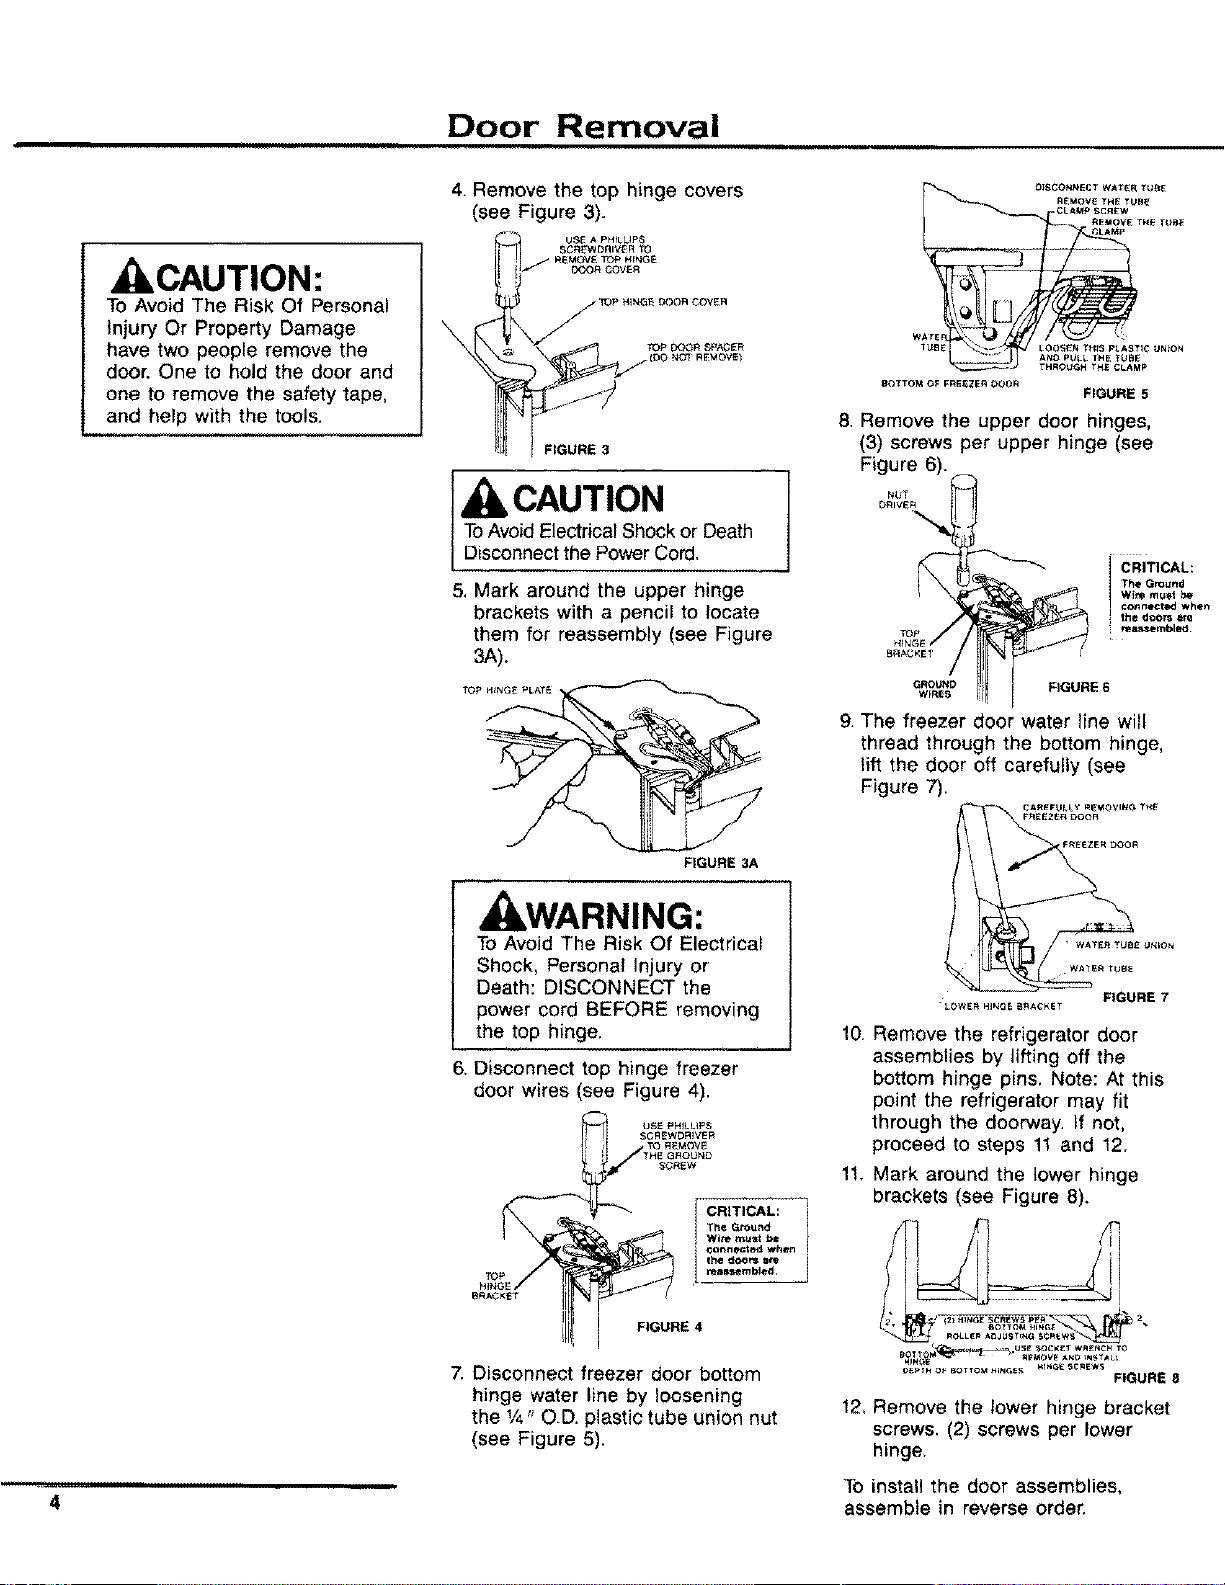
4, Remove the top hinge covers
(see Figure 3).
FIGURE 3
[ CAUTION
ToAvoid Electrical Shock or Death
Disconnect the Power Cord,
5. Mark around the upper hinge
brackets with a pencil to locate
them for reassembly (see Figure
3A).
TOP HINGE PLATE
FIGURE 3A
J WARNING:
To Avoid The Risk Of Electrical
Shock, Personal Injury or
Death: DISCONNECT the
power cord BEFORE removing
the top hinge,
6, Disconnect top hinge freezer
door wires (see Figure 4),
7. Disconnect freezer door bottom
hinge water line by loosening
the 1/4"O.D. plastic tube union nut
(see Figure 5).
O}SCONNECT WATER TU_
R_:MOV_ THE TUB_
CLAMp SCR_'W
REMOVE TH_ TUB_
__LAMP
WArE !
1UBE LOOSEN THIS p_.AgTIC UNION
A_IO pt_LL THE TUBE
P
_TTO_I OF FR_EZE_I OOOR
FIGURE 5
8. Remove the upper door hinges,
(3) screws per upper hinge (see
Figure 6).
r_UT
DRIVER
H_NG_
B_GKE _
GROUND
WIRES
k
CRITICAL:
I FIGURE 6
g. The freezer door water line will
thread through the bottom hinge,
lift the door off carefully (see
Figure 7).
• WATE_ I YklllE U_4;ON
2/:2
LOWE_H_E S_C_ET FIGURE 7
10.
Remove the refrigerator door
assemblies by lifting off the
bottom hinge pins. Note: At this
point the refrigerator may fit
through the doorway. If not,
proceed to steps 11 and 12.
11. Mark around the lower hinge
brackets (see Figure 8),
FIGURE 8
12_Remove the lower hinge bracket
screws. (2) screws per lower
hinge,
To install the door assemblies,
assemble in reverse order.
Loading ...
Loading ...
Loading ...