Loading ...
Loading ...
Unpacking, Door Handle and Door Removal
CAUTION:
To Avoid The Risk Of Personal
Injury use caution in
unpacking, handling, removing,
instalFing and cleaning atl parts
of product which may have
sharp edges.
,CAUTiON:
To Avoid The Risk Of Personal
Injury wear protective hand
covering.
Remove a}l tape and packing mate-
rial. To remove tape residue, touch
a portion of the tape to the residue
and lift it off, If adhesive residue still
remains, try cleaning the sticky area
with a clean cloth soaked in mild
dish washing soap, Wipe area
clean, tf the wood base is still
attached, have someone help you
tilt the unit onto its back, placing a
sturdy support underneath. Remove
the mounting bolts from the base
and discard bolts and wood base.
IMPORTANT! DOnot leave the cabi-
net on it's back longer than it takes
to remove the wooden base and do
not connect the power cord until
after al! the inside packing has
been removed and the cabinet has
been leveled for proper operation.
With the unit upright, pull the toe
grille from the bottom front (see
Figure 1) and make sure the defrost
drain pan is located underneath the
defrost water drain tube. Two drain
pan side supports (attached to the
cabinet bottom) keep the pan in the
proper location, to make the auto-
matic defrost drain water drop on
the sound reducing cone. The drain
pan locating stops prevent the pan
from being installed backwards,
Remove all tape and packing
material from inside the unit.
SPECIAL NOTE: If cabinet is
unable to fit through doorway safely,
you may have to remove the door
handles, or door assemblies. Refer
to the following chart and diagrams.
To Remove Door Handles
1. Remove screws with a phillips
screwdriver from top of handle
(end cap). (See Figure 2.)
2. Remove end cap,
3. Remove screw from bottom end
cap. (Goes into doer.) Note:
Screws are in at an angle -- do
not scratch handle edge.
4. Pull out vinyl decorator strip by
pulling straight up.
5. Remove screws retaining handle.
6. Handles will easily fall away,
To Remove The Door Assemblies
NOTE: If unit is already in-
stalled slide unit out from
cabinetry first.
t, CAUTION
To Avoid The Risk Of Personal
injuryfirst tape the top of doors for
safety after removing top door
trim. (See Figure 2A)
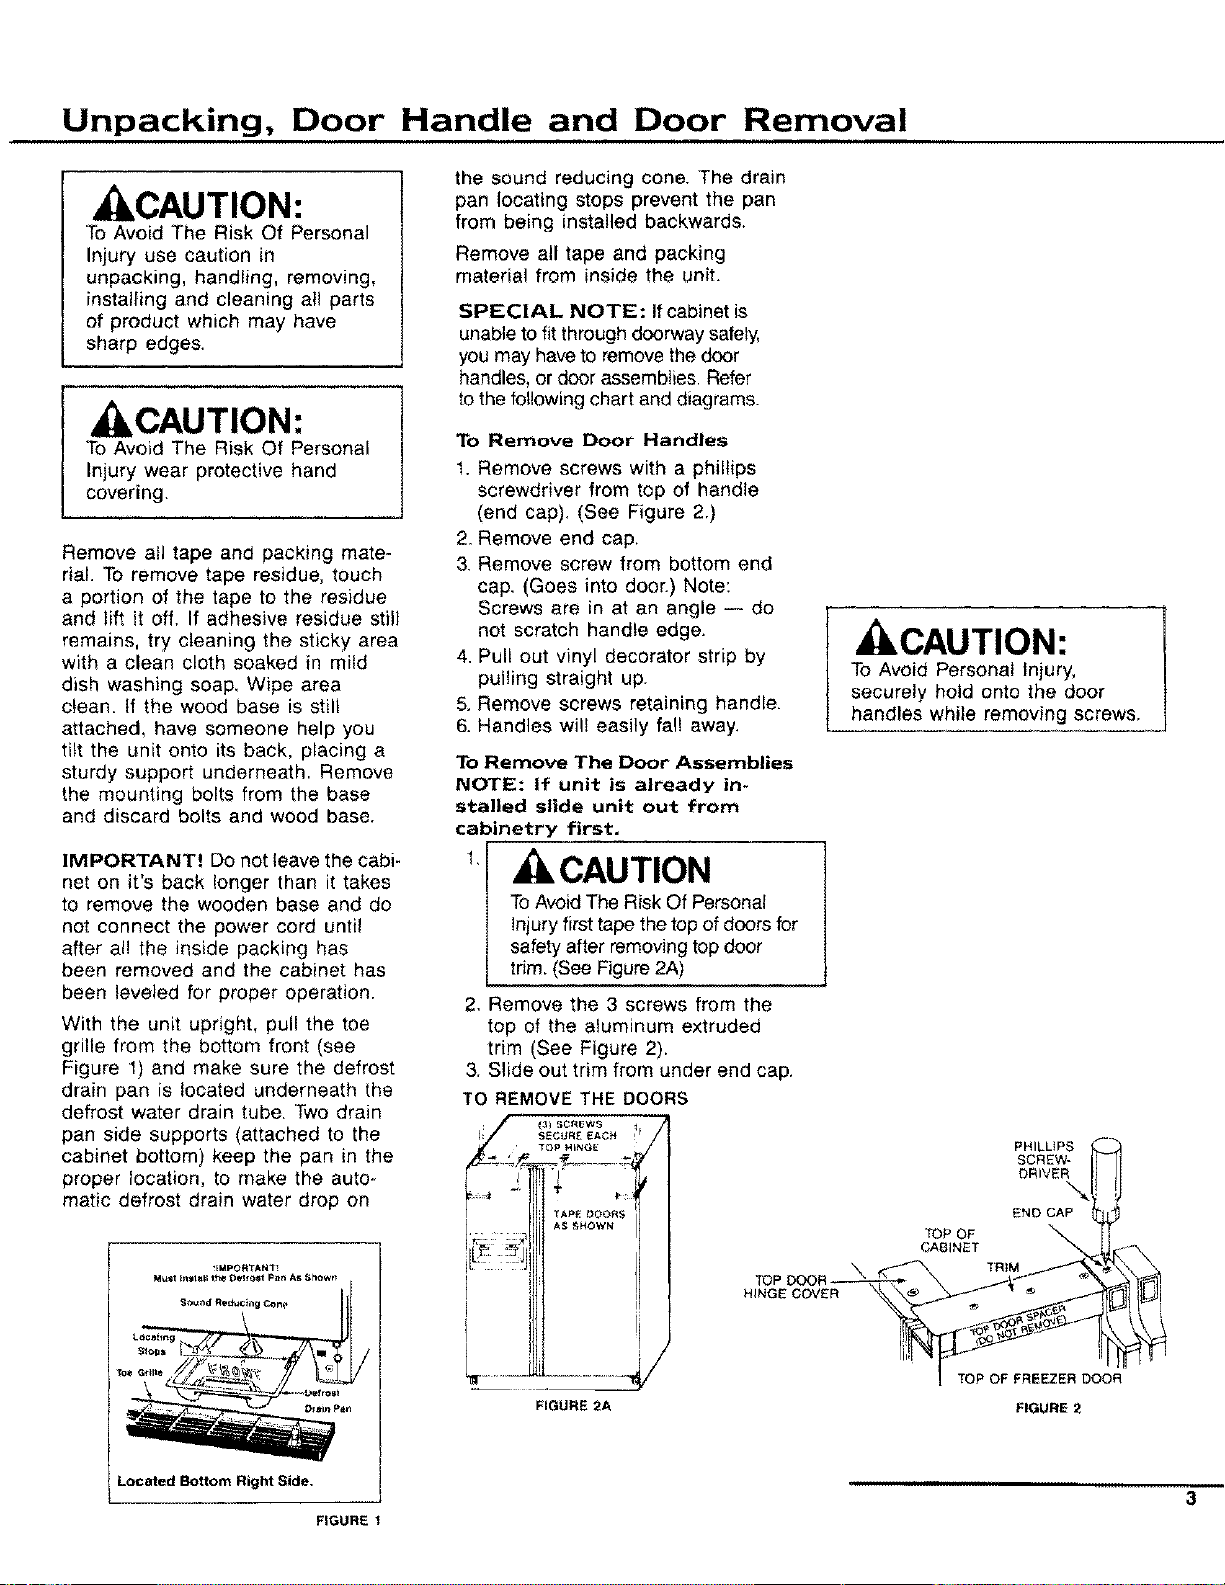
2, Remove the 3 screws from the
top of the aluminum extruded
trim (See Figure 2).
3. Slide out trim from under end cap.
TO REMOVE THE DOORS
.................,y
FIGURE 2A
CAUTION:
To Avoid Personal Injury,
securely hold onto the door
handles while removing screws.
PHILLIPS
SCREW-
DRIVER
END CAP
TOP OF
CABINET
TRiM
TOP OF FREEZER DOOR
FIGURE 2
Located Bottom Right Side, , ,,n_,,,,,,
-- 3
FIGURE 1
Loading ...
Loading ...
Loading ...