Loading ...
Loading ...
Loading ...
2. PREPARETHE INSTALLATION
Make sure that the following items are included:
Hood
Accessories:
• Filters (2 for 30" and 36" width hoods, 3 for 42" width hood)
• Plastic diverter (assembled in hood)
• 3W' x 14" adapter/damper (inside one filler)
• Bag of parts (inside one filler) including:
1 wire clamp, 6 no. 8 x 1/2" screws, 2 wire connectors and 3 no. 6 x 1/2" standard screws
• Shielded halogen lights (MR16, GU10, 120V, 50W)
Parts sold separatel_
Transition 3W' x 14" to 8" round model no. 459 (optional), transition 3W' x 14" to 7" round model no. T460
(optional), adapter/damper 3W' x 14" to 3W' x 10" model no. T461 (optional), ducts, elbows, dampers, wall or roof caps.
NOTES: 1. During installation, protect countertop and/or cooktop.
2. If the bottom of the cabinet is recessed, attach four 1" wide wood strips (not included), as shown below, in
order to properly attach the hood to the cabinet. The wood strips must be as thick as recess.
1'[
CABINET BOTTOM
HO0028A
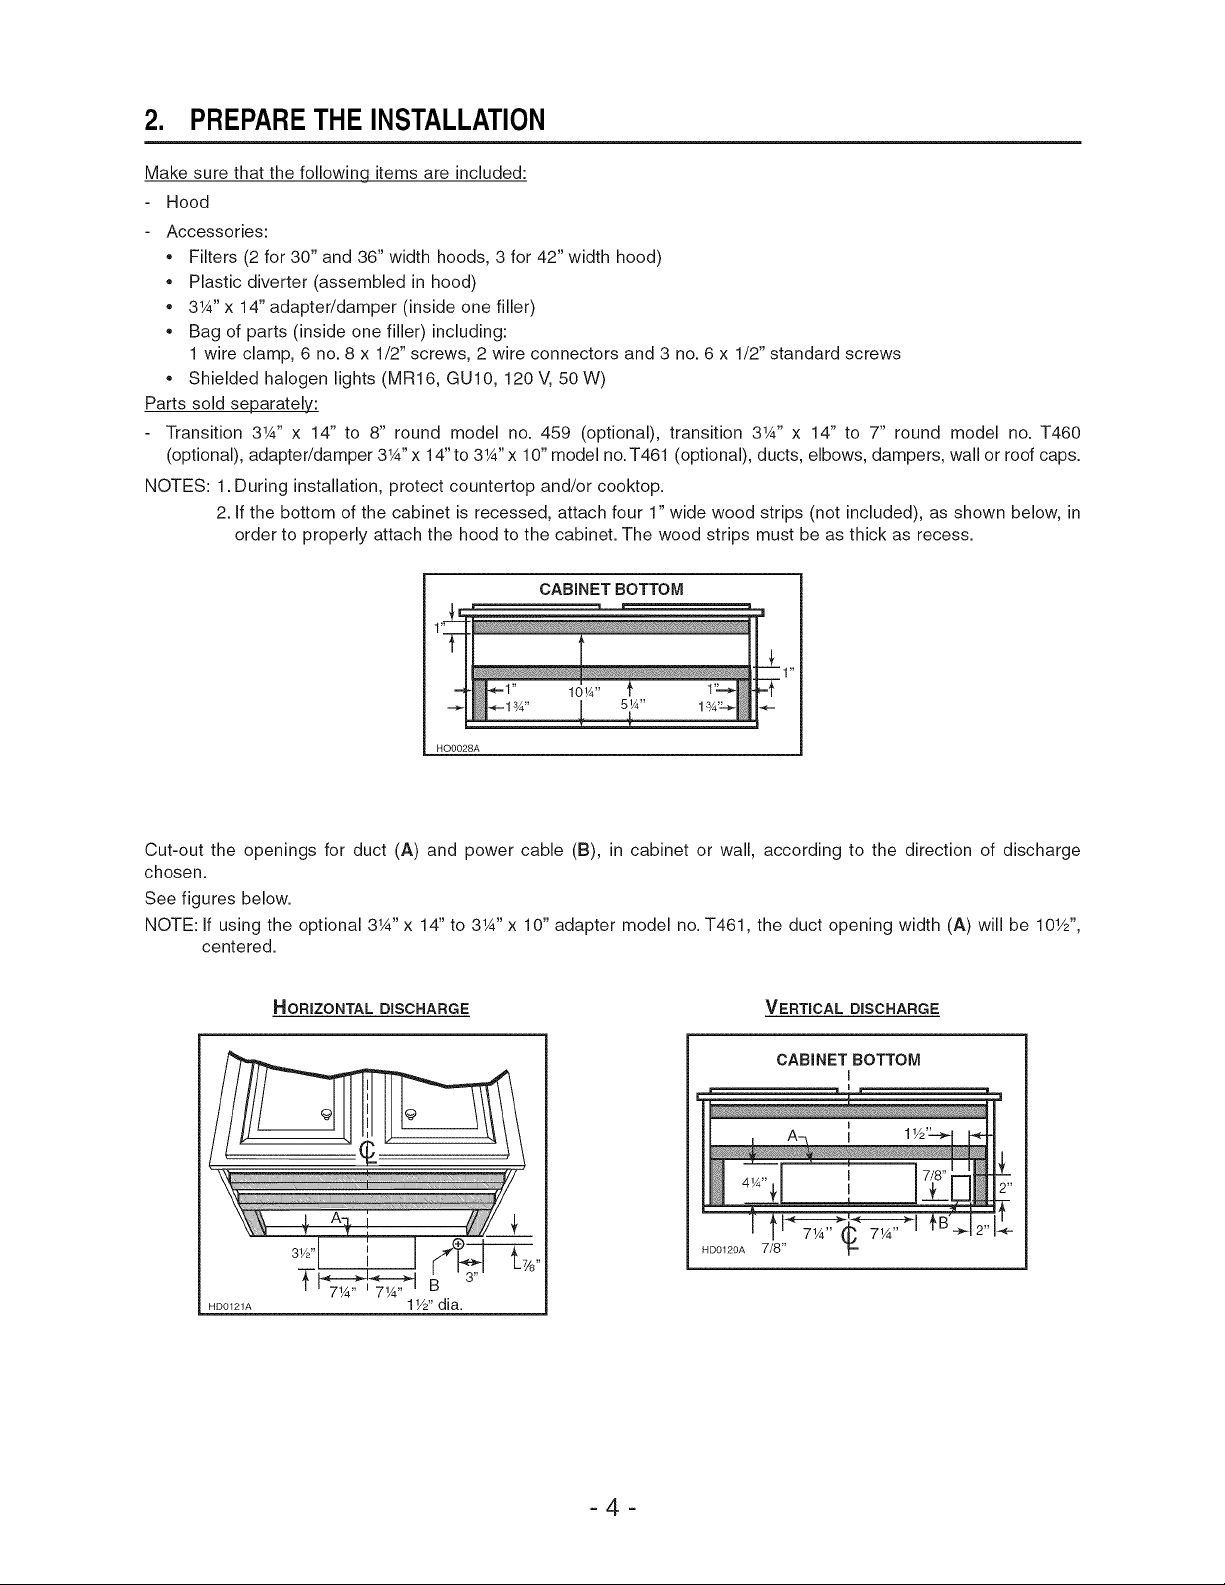
Cut-out the openings for duct (A) and power cable (B), in cabinet or wall, according to the direction of discharge
chosen.
See figures below.
NOTE: If using the optional 3W' x 14" to 3W' x 10" adapter model no. T461, the duct opening width (A) will be 101/2'',
centered.
HORIZONTAL DISCHARGE
HD0121A 1W' dia.
VERTICAL DISCHARGE
CABINET BOTTOM
I
' tt "l
_-....-....-..-_ i_......-....-..-_
I 7W'_ 7W' I't-B'._2
HD0120A 7/8" ['"
),,
-4-
Loading ...
Loading ...
Loading ...