Loading ...
Loading ...
Loading ...
MaJflteflaflce
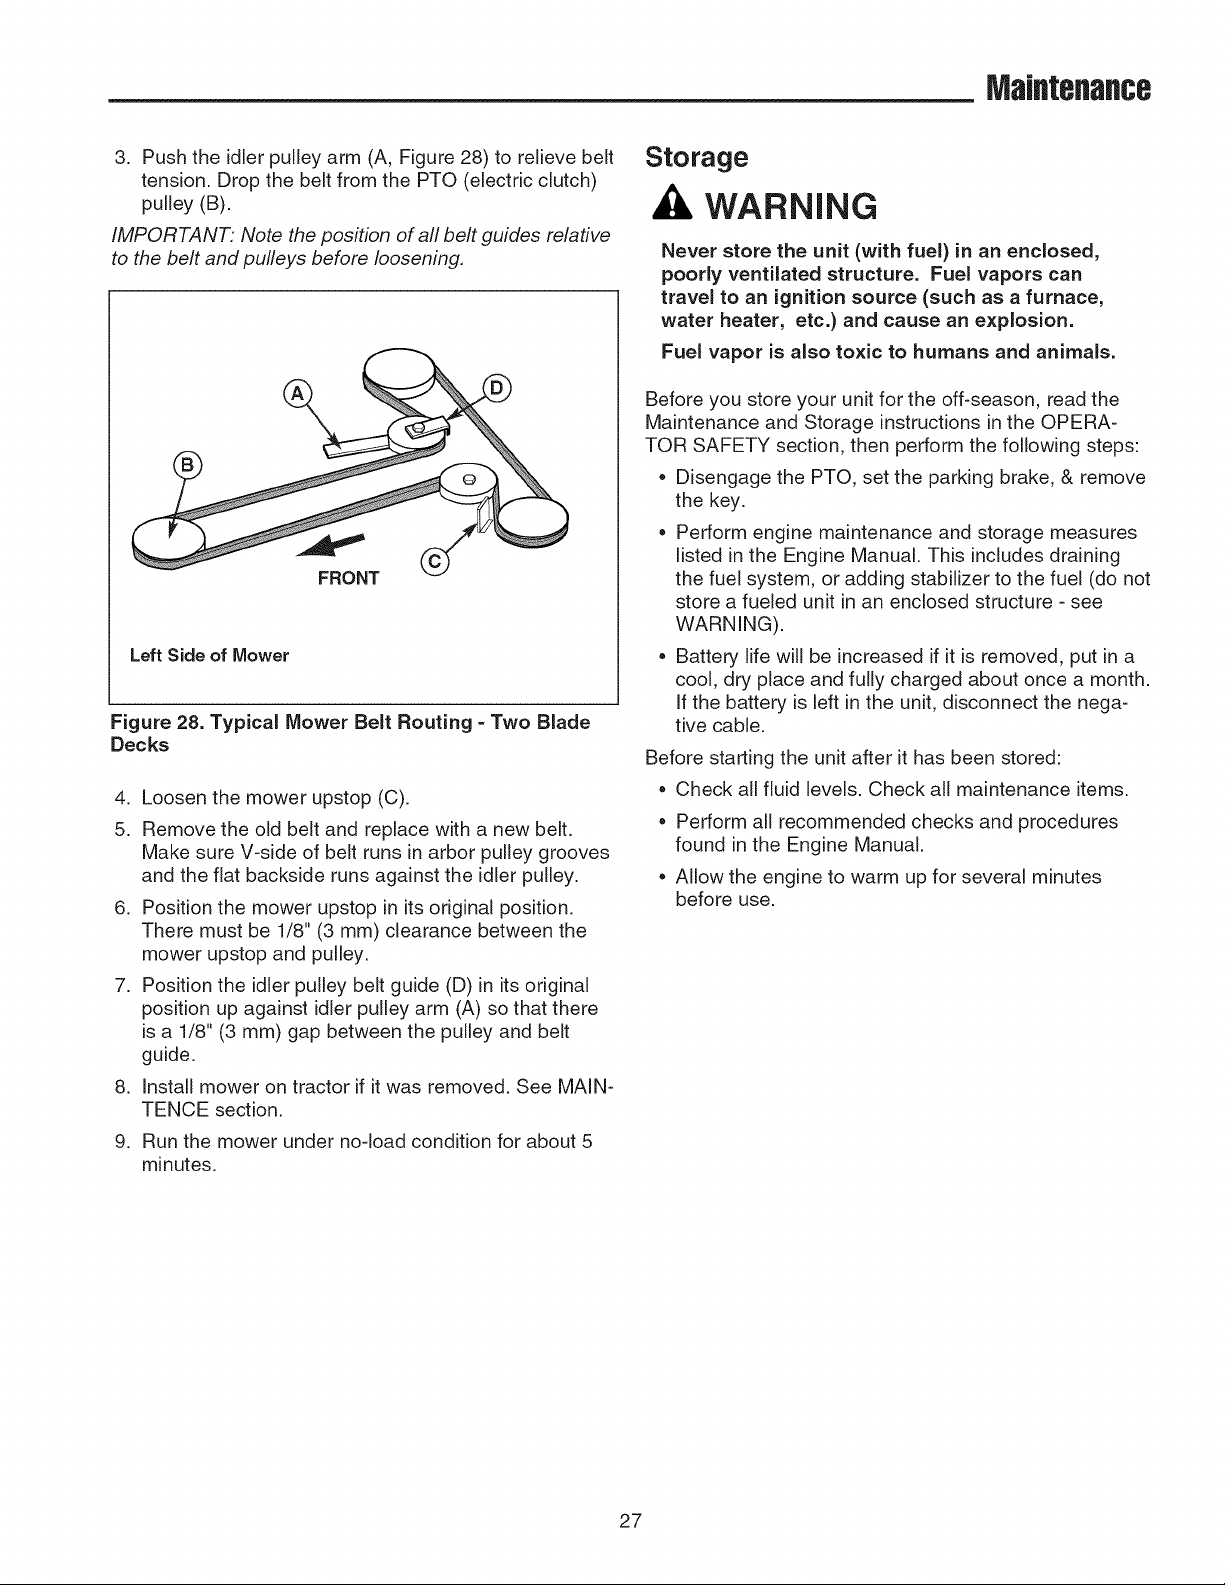
3. Push the idler pulley arm (A, Figure 28) to relieve belt
tension. Drop the belt from the PTO (electric clutch)
pulley (B).
IMPORTANT: Note the position of all belt guides relative
to the belt and pulleys before loosening,
Left Side of Mower
Figure 28. Typical Mower Belt Routing =Two Blade
Decks
,
9.
4. Loosen the mower upstop (C).
5. Remove the old belt and replace with a new belt.
Make sure V-side of belt runs in arbor pulley grooves
and the fiat backside runs against the idler pulley.
6. Position the mower upstop in its original position.
There must be 1/8" (3 mm) clearance between the
mower upstop and pulley.
7. Position the idler pulley belt guide (D) in its original
position up against idler pulley arm (A) so that there
is a 1/8" (3 mm) gap between the pulley and belt
guide.
Install mower on tractor if it was removed. See MAIN-
TENCE section.
Run the mower under no-load condition for about 5
minutes.
Storage
WARNING
Never store the unit (with fuel) in an enclosed,
poorly ventilated structure. Fuel vapors can
travel to an ignition source (such as a furnace,
water heater, etc.) and cause an explosion.
Fuel vapor is also toxic to humans and animals.
Before you store your unit for the off-season, read the
Maintenance and Storage instructions in the OPERA-
TOR SAFETY section, then perform the following steps:
* Disengage the PTO, set the parking brake, & remove
the key.
Perform engine maintenance and storage measures
listed in the Engine Manual. This includes draining
the fuel system, or adding stabilizer to the fuel (do not
store a fueled unit in an enclosed structure - see
WARNING).
* Battery life will be increased if it is removed, put in a
cool, dry place and fully charged about once a month.
If the battery is left in the unit, disconnect the nega-
tive cable.
Before starting the unit after it has been stored:
Check all fluid levels. Check all maintenance items.
Perform all recommended checks and procedures
found in the Engine Manual.
Allow the engine to warm up for several minutes
before use.
27
Loading ...
Loading ...
Loading ...