Loading ...
Loading ...
Loading ...
page 3
ON
OFF
ON
OFF
4. Hanging Bracket Installation.
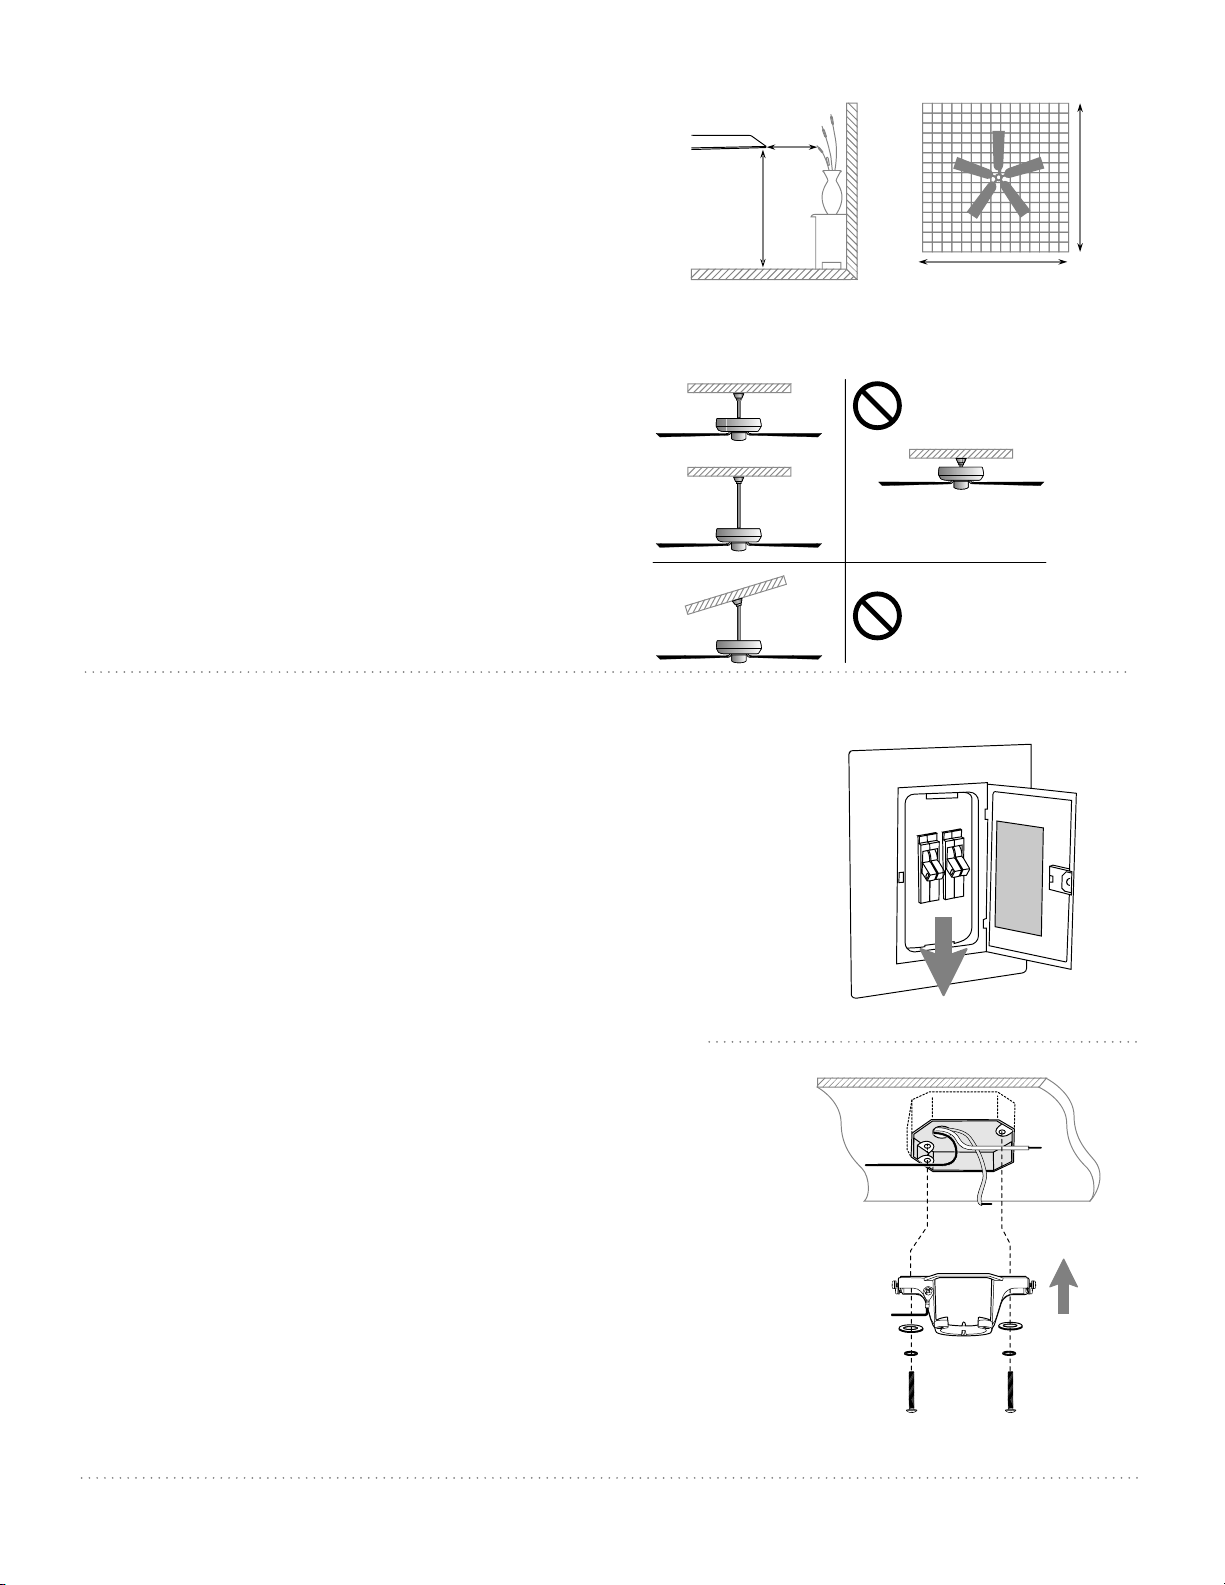
3. Installation Preparation.
blade edge
(76cm)
30
inches
7 feet
(2.13m)
10ft. - 12ft.
10ft. - 12ft.
(3.05m - 3.66m)
(3.05m - 3.66m)
To prevent personal injury and damage, ensure
that the hanging location allows the blades a
clearance of 7ft. (2.13m) from the floor and 30in.
(76cm) from any wall or obstruction.
This fan is suitable for room sizes up to 144 square
feet (13.4 square meters).
This fan can be mounted with a downrod
on a regular (no-slope) or vaulted ceiling. The
hanging length can be extended by purchasing a
longer downrod (0.5in./1.27cm diameter). Other
installation, such as flushmount, is not available
for this fan.
Installation requires these tools:
Phillips screwdriver, flathead screwdriver,
adjustable pliers or wrench, stepladder, wire
cutters, and rated electrical tape.
Vaulted ceiling
angle is not to
exceed 20 degrees.
downrod
installation
flushmount
installation
Turn off circuit breakers to current fixture from breaker
panel and be sure operating light switch is turned to the
OFF position.
WARNING: Failure to disconnect power supply prior to
installation may result in serious injury.
Remove existing fixture.
WARNING: When using an existing outlet box, be sure the
outlet box is securely attached to the building structure and
can support the full weight of the fan. Ensure the outlet box is
clearly marked "Suitable for Fan Support." If not, it must be
replaced with an approved outlet box. Failure to do so can
result in serious injury.
CAUTION: Be sure outlet box is grounded properly and that a
ground wire (GREEN or bare) is present.
Install hanging bracket to outlet box using original screws,
spring washers and flat washers provided with new or
original outlet box.* If installing on a vaulted ceiling, face
opening of hanging bracket towards high point of ceiling.
Arrange electrical wiring around the back of the hanging
bracket and away from the hanging bracket opening.
*Note: It is very important that you use the proper hardware
when installing the hanging bracket as this will support the
fan.
hanging bracket
spring washers
outlet box screws
flat washers
Loading ...
Loading ...
Loading ...