Loading ...
Loading ...
Loading ...
2=
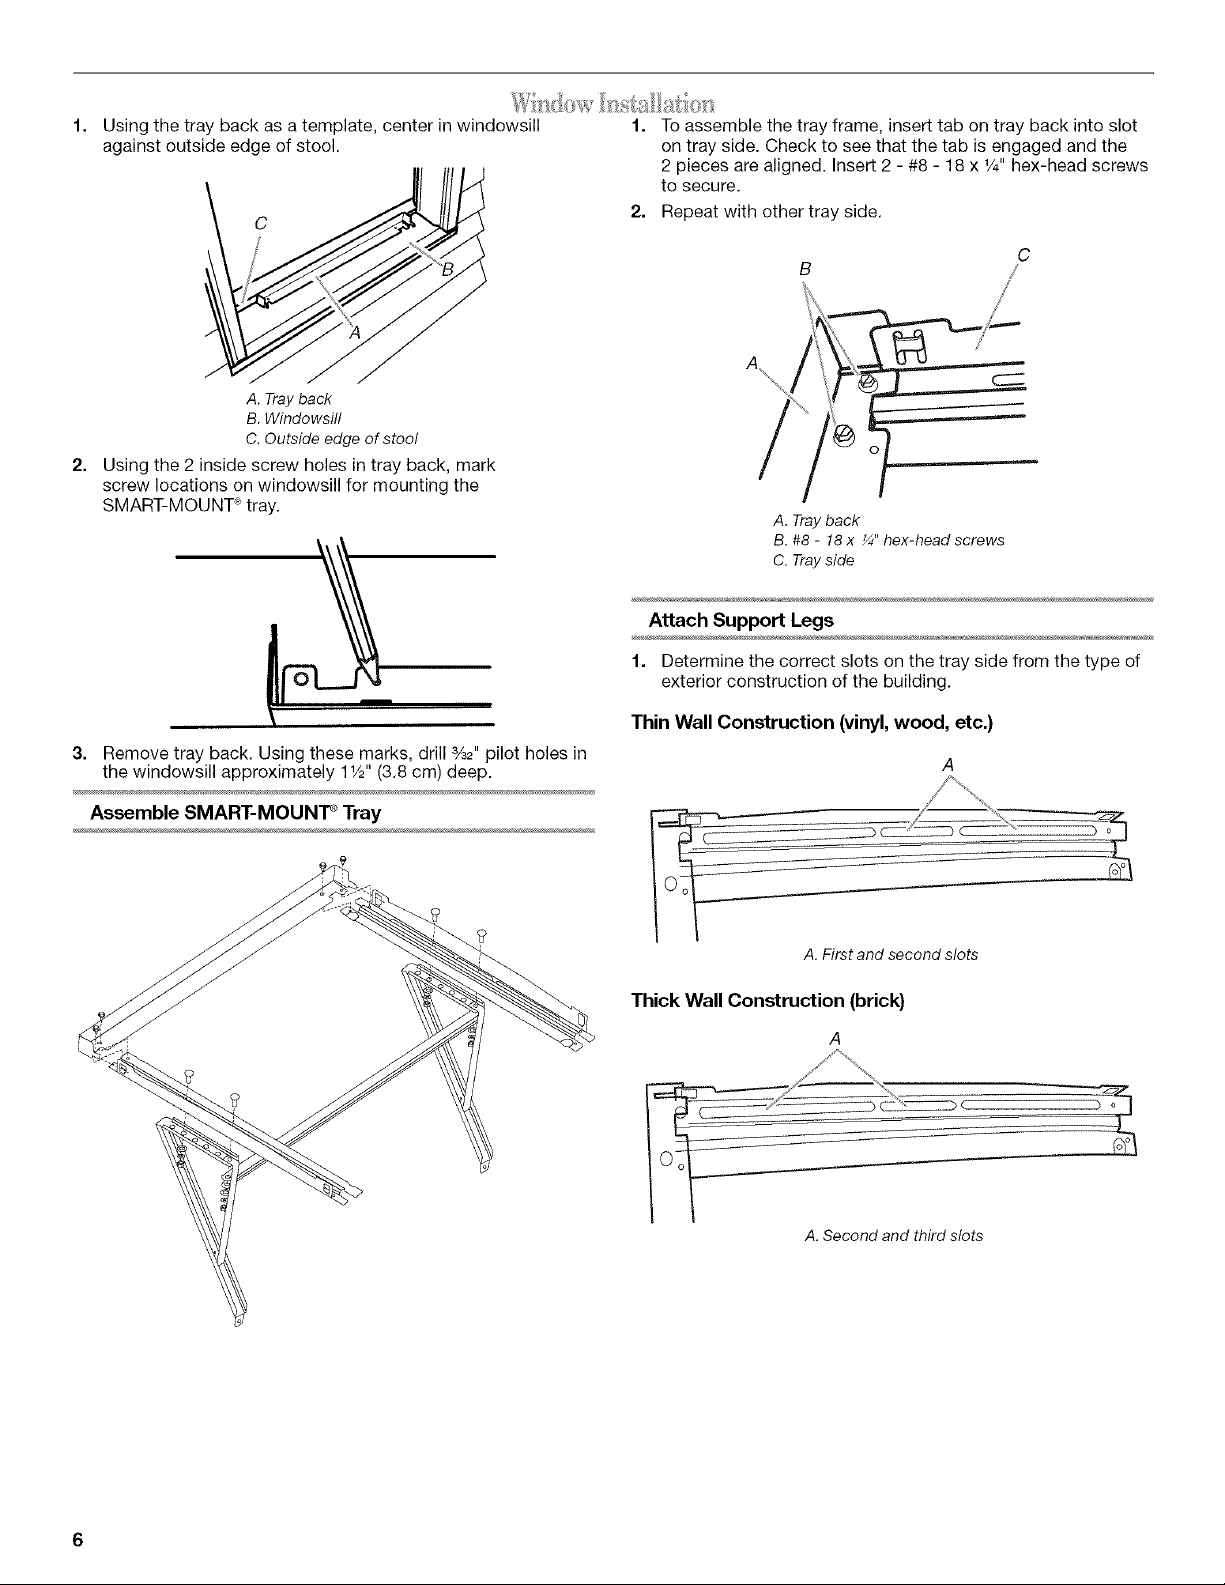
Using the tray back as a template, center in windowsill
against outside edge of stool.
/
A. Trayback
B.Windowsill
C. Outside edge of stool
Using the 2 inside screw holes in tray back, mark
screw locations on windowsill for mounting the
SMART-MOUNT _tray.
3. Remove tray back. Using these marks, drill %2" pilot holes in
the windowsill approximately 11/2"(3.8 cm) deep.
Assemble SMART-MOUNT _ Tray
1. To assemble the tray frame, insert tab on tray back into slot
on tray side. Check to see that the tab is engaged and the
2 pieces are aligned. Insert 2 - #8 - 18 x 1/4"hex-head screws
to secure.
2. Repeat with other tray side.
C
A. Tray back
B. #8 - 18x _" hex-head screws
C. Tray side
Attach Support Legs
1. Determine the correct slots on the tray side from the type of
exterior construction of the building.
Thin Wall Construction (vinyl,wood, etc.)
A.Firstand second slots
Thick Wall Construction (brick}
A
A. Second and third slots
Loading ...
Loading ...
Loading ...