Loading ...
Loading ...
Loading ...
en-us Cooktop operation
30
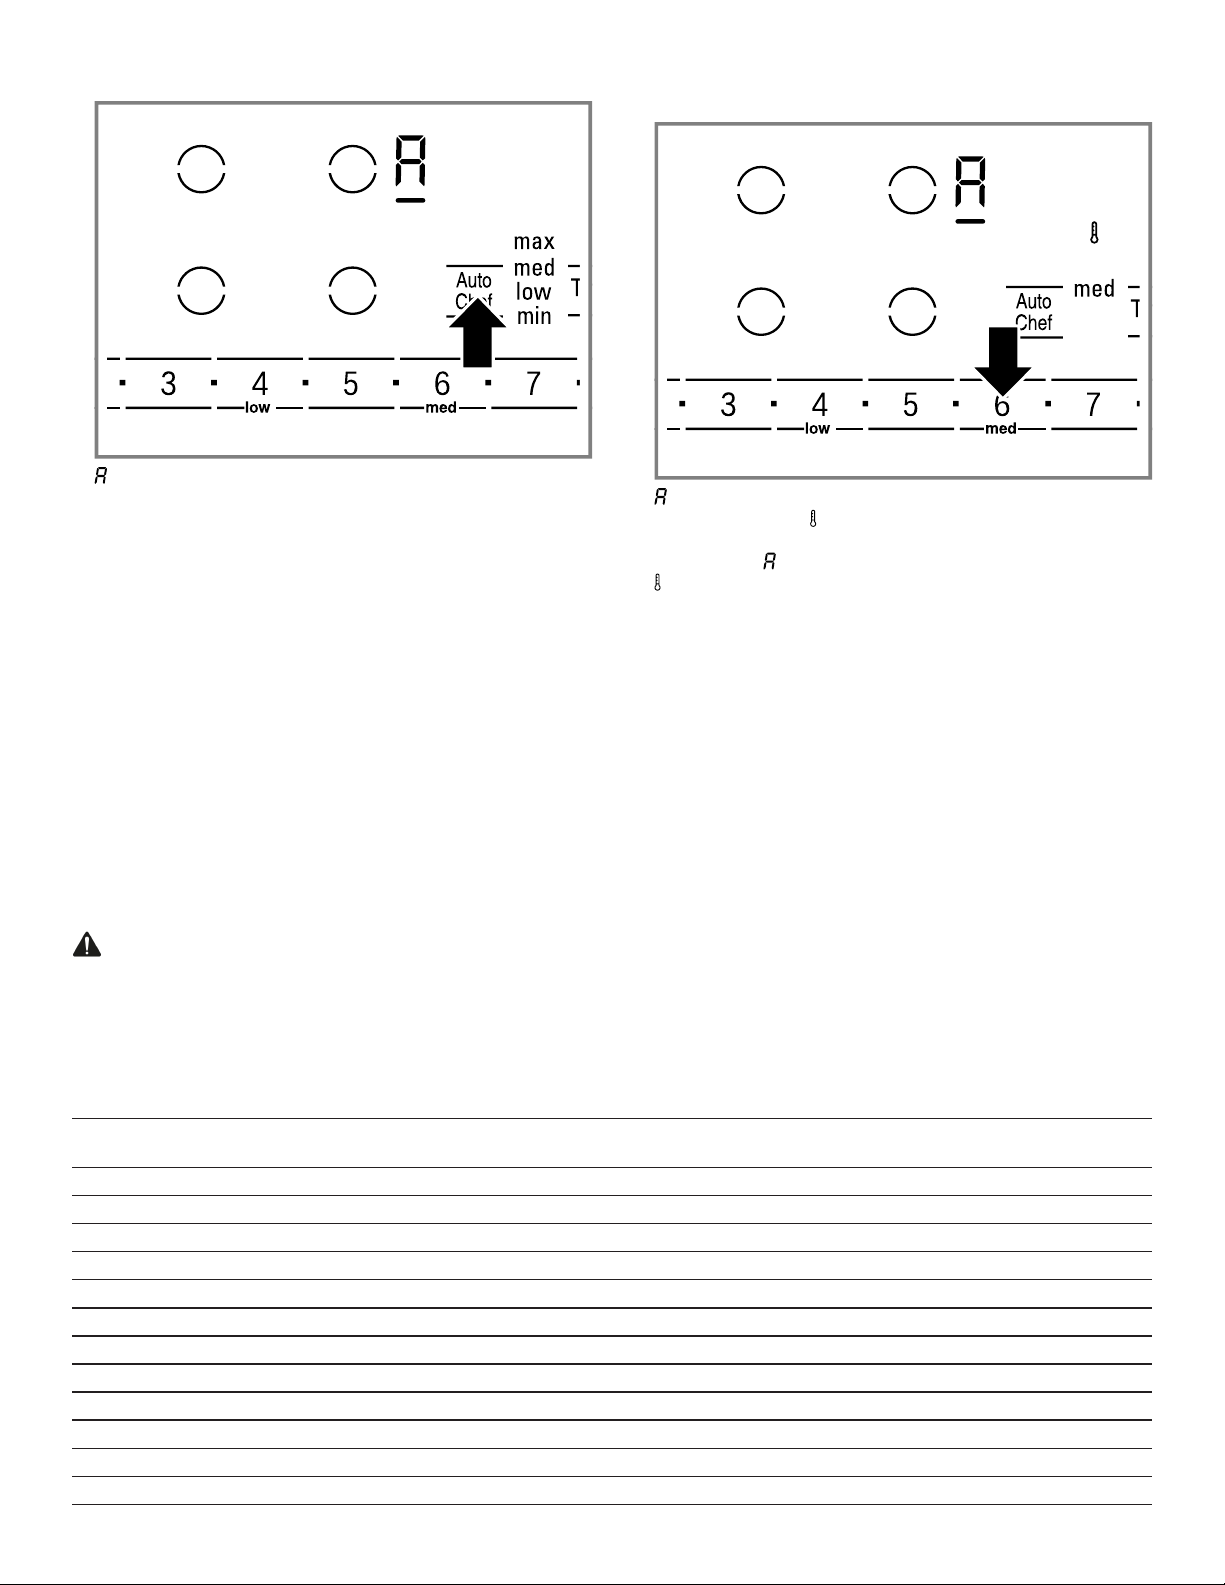
3. Press Auto Chef.
a lights up on the cooking zone display.
a The frying levels light up.
4. Select the desired frying level with the number keys in
the settings area.
a blinks.
a The preheat icon
lights up.
a When the set frying temperature is reached a beep
sounds and
stops blinking.
a goes out.
5. Add the frying oil to the pan.
6. Add the ingredients.
Turn the food over as usual to avoid burning.
Turning AutoChef® off
1. Select the cooking zone.
2. Press Auto Chef.
Frying recommendations
Here you can find recommendations which frying level is
best used for particular foods. The frying time depends on
the type, weight, thickness and quality of the food.
WARNING
If the frying sensor is not working properly, overheating
may result causing smoke and damage to the pan or fire.
WHEN COOKING WITH THE FRYING SENSOR FUNC-
TION OBSERVE THE FOLLOWING.
▶
Always use a sensor frying.
▶
Always put the pan in the center of the cooking zone.
▶
Do not place a lid on the pan.
▶
Never leave hot fat or oil unattended.
Cooking tips
¡ The frying levels stated here are for cooking with the
system pan. The frying levels may vary when you use
other frying pans.
¡ First heat the empty pan. Add the fat and the food to the
pan when the signal sounds.
Meat
Food Frying sensor level Total cooking time from
sound signal
Escalope, plain or breaded med 6 - 10
Fillet med 6 - 10
Chops low 10 - 15
Cordon bleu med 10 - 15
Steak, rare, 1¼" (3cm) thick max 6 - 8
Steak, medium, 1¼" (3cm) thick med 8 - 12
Poultry breast, ¾" (2cm) thick low 10 - 20
Raw or boiled sausages low 8 - 20
Hamburgers, rissoles low 6 - 30
Gyros, meat cut into strips med 7 - 12
Ground meat med 6 - 10
Bacon min 5 - 8
Loading ...
Loading ...
Loading ...