Loading ...
Loading ...
Loading ...
OPERATING YOUR ICE MAKER
IMPORTANT: Although the unit has been tested and cleaned at the factory, due to long-term
transit and storage, the first batch of cubes must be discarded.
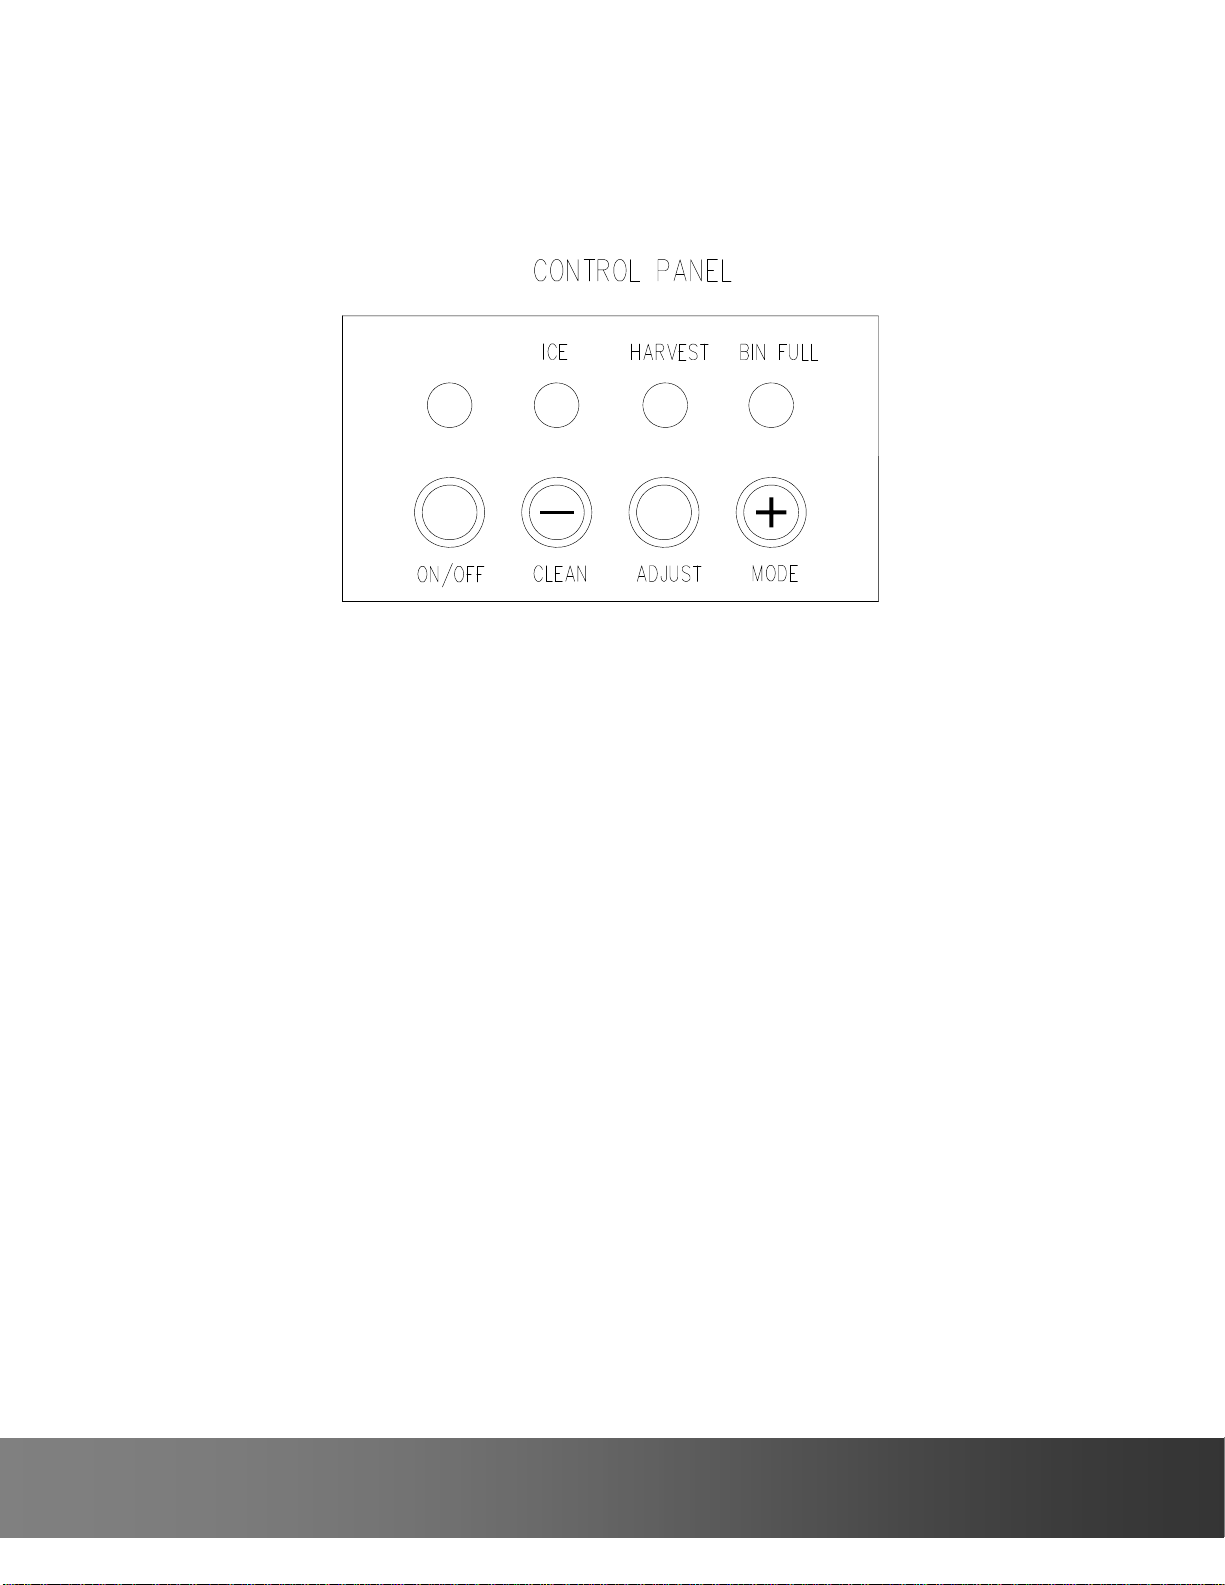
Control Panel Buttons and LEDS
Ice Size Adjustment
1.Press and hold the “Adjust” button for at least 3 seconds. The unit will enter the Ice Size
Adjustment mode. The “HARVEST” LED (yellow) will be blinking continuously during the ice
size adjustment. Release the button when the LED blinks continuously to adjust the ice size.
2.While in the Ice Size Adjustment mode, press the “Clean” (-) button or the “Mode” (+) button
for the desired ice size.
1. Bin Full (Red) LED: Bin full indicator light
When this is lit, the ice storage bin is full of ice or there is something blocking the bin-full
probe. The unit will stop working. When ice cubes are removed from the ice storage bin,
freeing the bin-full probe, the red LED will remain flashing for 3 minutes, then the unit will restart
and return to the ice making mode.
2. Ice Making(Green) LED: Ice making indicator light
When this is lit, the unit is working in the ice making mode controlled by a
temperature probe on the evaporator. When the green LED flashes, the unit is working in the
ice making mode controlled by a fixed timer.
3. Ice Harvest (Yellow) LED: Ice harvest indicator light
When this is lit, the unit is working in the ice harvest mode controlled by the ice-full probe.
4. Mode button: Mainly for service. When this is pressed, the ice making mode changes to the
ice harvest mode or vice versa. The mode can be judged from the status of the green and
yellow LEDs.
5. Adjust button: Mainly for service. When it is pressed over 3 seconds, the unit will enter
the Ice Size Adjustment mode. The mode can be judged from the status of the yellow LED.
11
732 S o u t h Racetrack R o a d , Henderson, Nevada 89015
i n f o @ v i n o t e m p . c o m
Loading ...
Loading ...
Loading ...