Loading ...
Loading ...
Loading ...
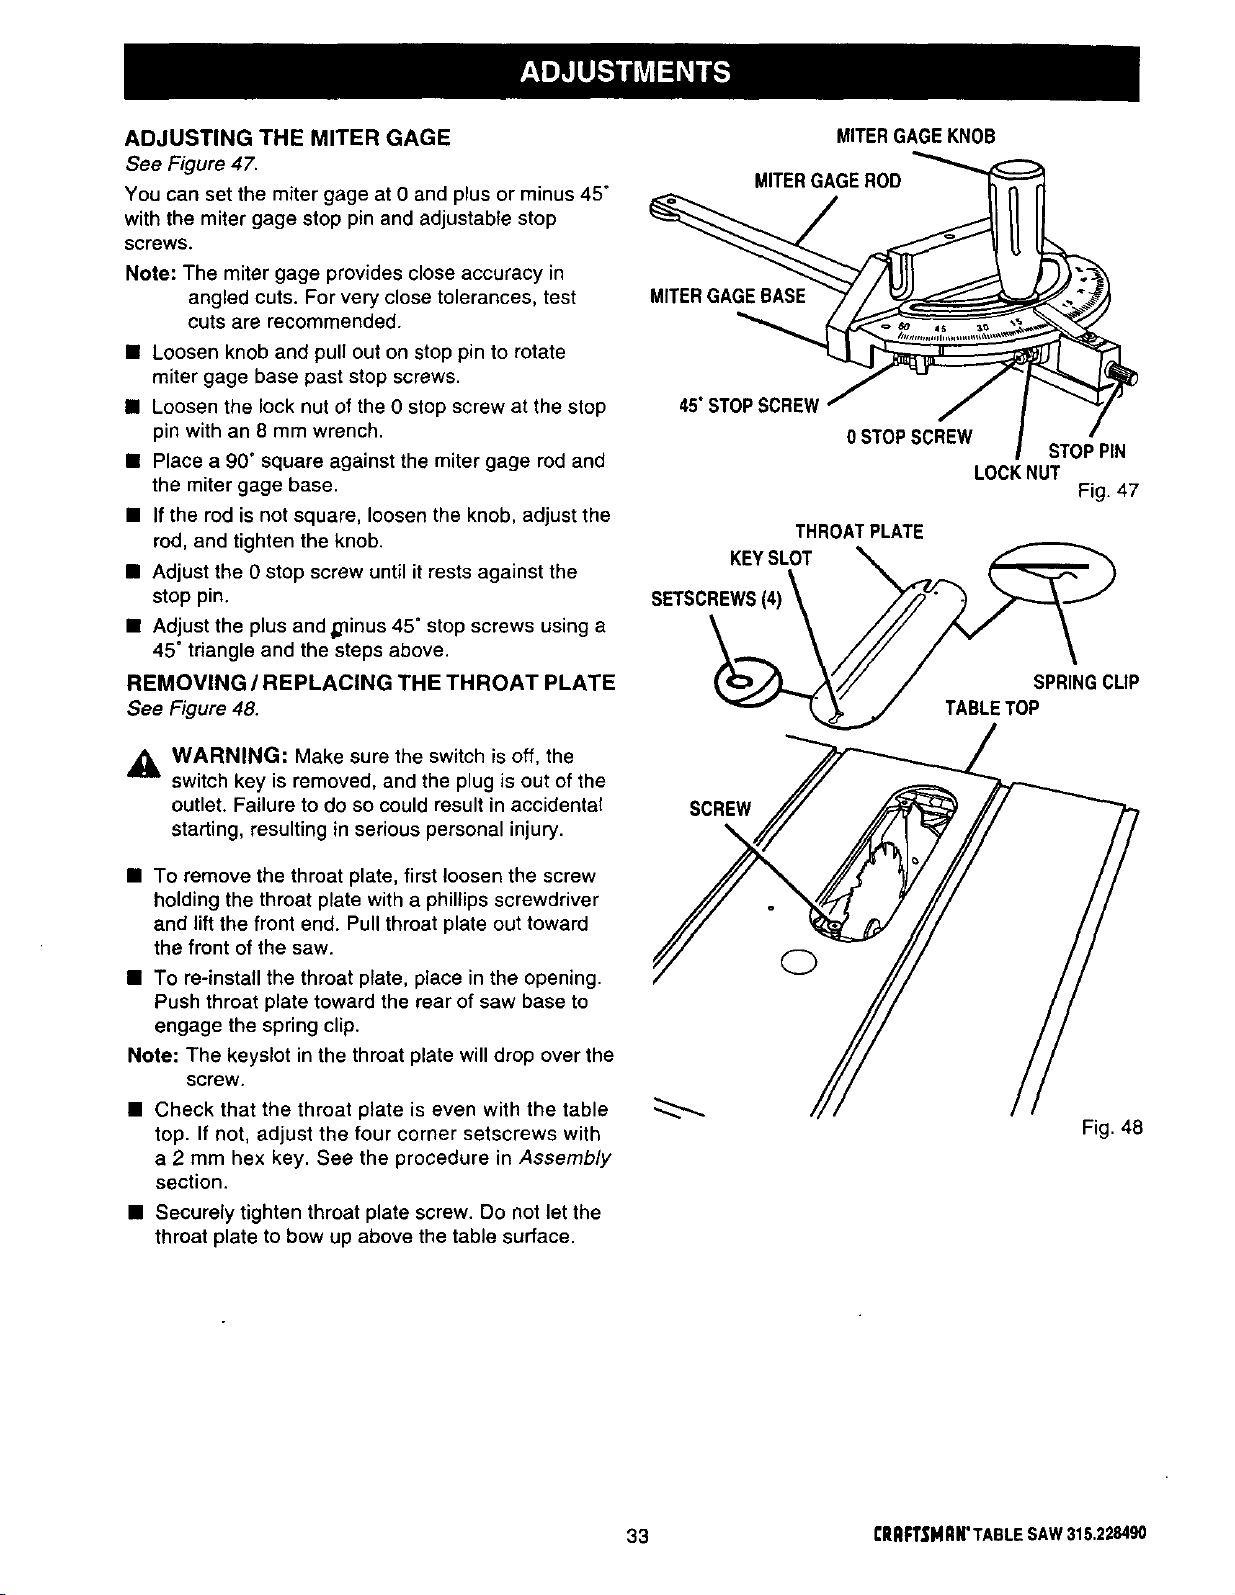
ADJUSTINGTHEMITERGAGE
See Figure 47.
You can set the miter gage at 0 and plus or minus 45"
with the miter gage stop pin and adjustable stop
screws.
Note: The miter gage provides close accuracy in
angled cuts. For very close tolerances, test
cuts are recommended.
• Loosen knob and pull out on stop pin to rotate
miter gage base past stop screws.
• Loosen the lock nut of the 0 stop screw at the stop
pin with an 8 mm wrench.
• Place a 90" square against the miter gage rod and
the miter gage base.
• If the rod is not square, loosen the knob, adjust the
rod, and tighten the knob.
• Adjust the 0 stop screw until it rests against the
stop pin.
• Adjust the plus and _ninus 45 ° stop screws using a
45 °triangle and the steps above.
REMOVING / REPLACING THE THROAT PLATE
See Figure 48.
WARNING: Make sure the switch is off, the
switch key is removed, and the plug is out of the
outlet. Failure to do so could result in accidental
starting, resulting in serious personal injury.
• To remove the throat plate, first loosen the screw
holding the throat plate with a phillipsscrewdriver
and lift the front end. Pull throat plate out toward
the front of the saw.
• To re-install the throat plate, place in the opening.
Push throat plate toward the rear of saw base to
engage the spring clip.
Note: The keyslot in the throat plate will drop over the
screw.
• Check that the throat plate is even with the table
top. If not, adjust the four corner setscrews with
a 2 mm hex key. See the procedure in Assembly
section.
• Securely tighten throat plate screw. Do not let the
throat plate to bow up above the table surface.
MITERGAGEKNOB
MITERGAGEROD
MITERGAGEBASE
45"STOPSCREW
0 STOPSCREW
STOPPIN
LOCKNUT
Fig. 47
THROATPLATE
KEYSLOT
SPRINGCLIP
TABLETOP
SCREW
\
Fig. 48
33 CRRFTSMRN'TABLESAW315.228490
Loading ...
Loading ...
Loading ...