Loading ...
Loading ...
Loading ...
GENERAL
This welder has been engineered to give
many years of trouble-free service
providing that a few very simple steps
are taken to properly maintain it.
1_ Keep the wire drive compartment lid
closed at all times unless the wire
needs to be changed or the drive
tension needs adiusting
2o Keep all consumables (contact tips,
nozzles, and gun liner) clean and
replace when necessary. See
CONSUMABLE MAINTENANCE
AND TROUBLESHOOTING later in
this section for detailed information_
3, Replace power cord, ground cable,
ground clamp, or gun assembly
when damaged or worn
4. Periodically clean dust, dirt, grease,
etco from your welder Every six
months or as necessary, remove
the side panels from time welder and
air-blow any dust and dirt that may
have accumulated inside the
welder.
Ddve Drive Gun
"{besion Tension Liner
Adiustmenl Arm
WARNING
ELECTRIC SHOCK CAN KILL! To
reduce the risk of electric shock, always
unplug the welder from its ac power
source before removing side panels.
IT IS VERY IMPORTANT TO MAINTAIN
THE CONSUMABLES TO AVOID THE
NEED FOR PREMATURE
REPLACEMENT OF THE GUN
ASSEMBLY
The GUN LINER is intended to provide
an unrestricted path for the welding wire
to flow through the gun assembly. Over
time it will accumulate dust, dirt, and
otller debris. RepIacement is necessary
when these accumulations begin to
restrict the free flow of wire through the
gun assembly
REPLACE A GUN LINER
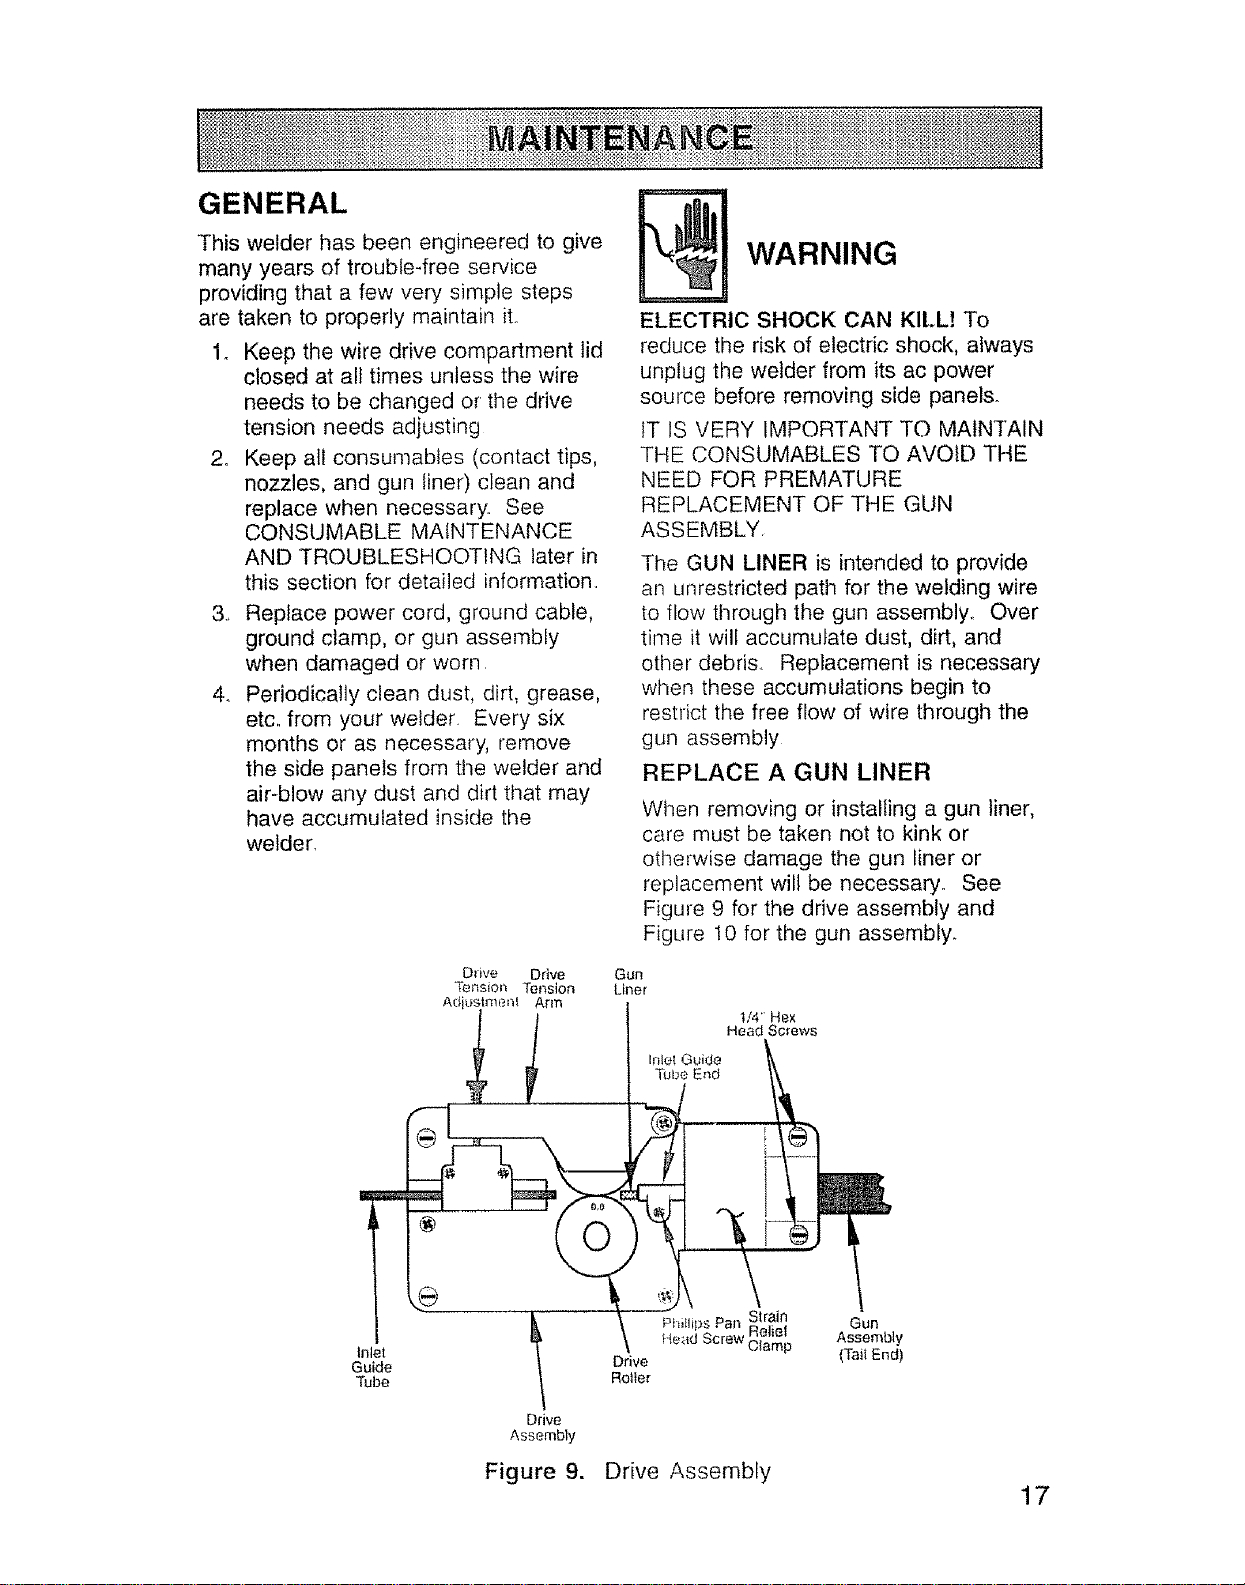
When removing or installing a gun liner,
care must be taken not to kink or
otherwise damage the gun liner or
replacernent wilt be necessary. See
Figure 9 for the drive assembly and
Figure 10 for the gun assembly.
t/4" Hex
Head Screws
Irfle! Guide
Tube End
Inlet
Guide
Tube
Drive
Assembly
PMllips Pan Strain, Gun
llet_e!
\ Head Screw Clamp Assembly
Drive (Taii End)
Rotter
Figure 9. Drive Assembly
17
Loading ...
Loading ...
Loading ...