Loading ...
Loading ...
Loading ...
20_ Installthe nozzleon thegun
assembly.Forbestresults,coatthe
insideof the nozzlewithantFstick
sprayorgel (part#4312,not
supplied).
21_ Cutoff theexcesswirethatextends
pasttheendofthe nozzle
SET THE WIRE DRIVE
TENSION
stainless steel, flux cored hardfacing of
steel, and silicon bronze wetding of
steel, select dc Reverse Polarity (dc +
MIG). When using self-shielding, flux-
core steel wire, use dc Straight Polarity
(dc - FkJx Cored).L
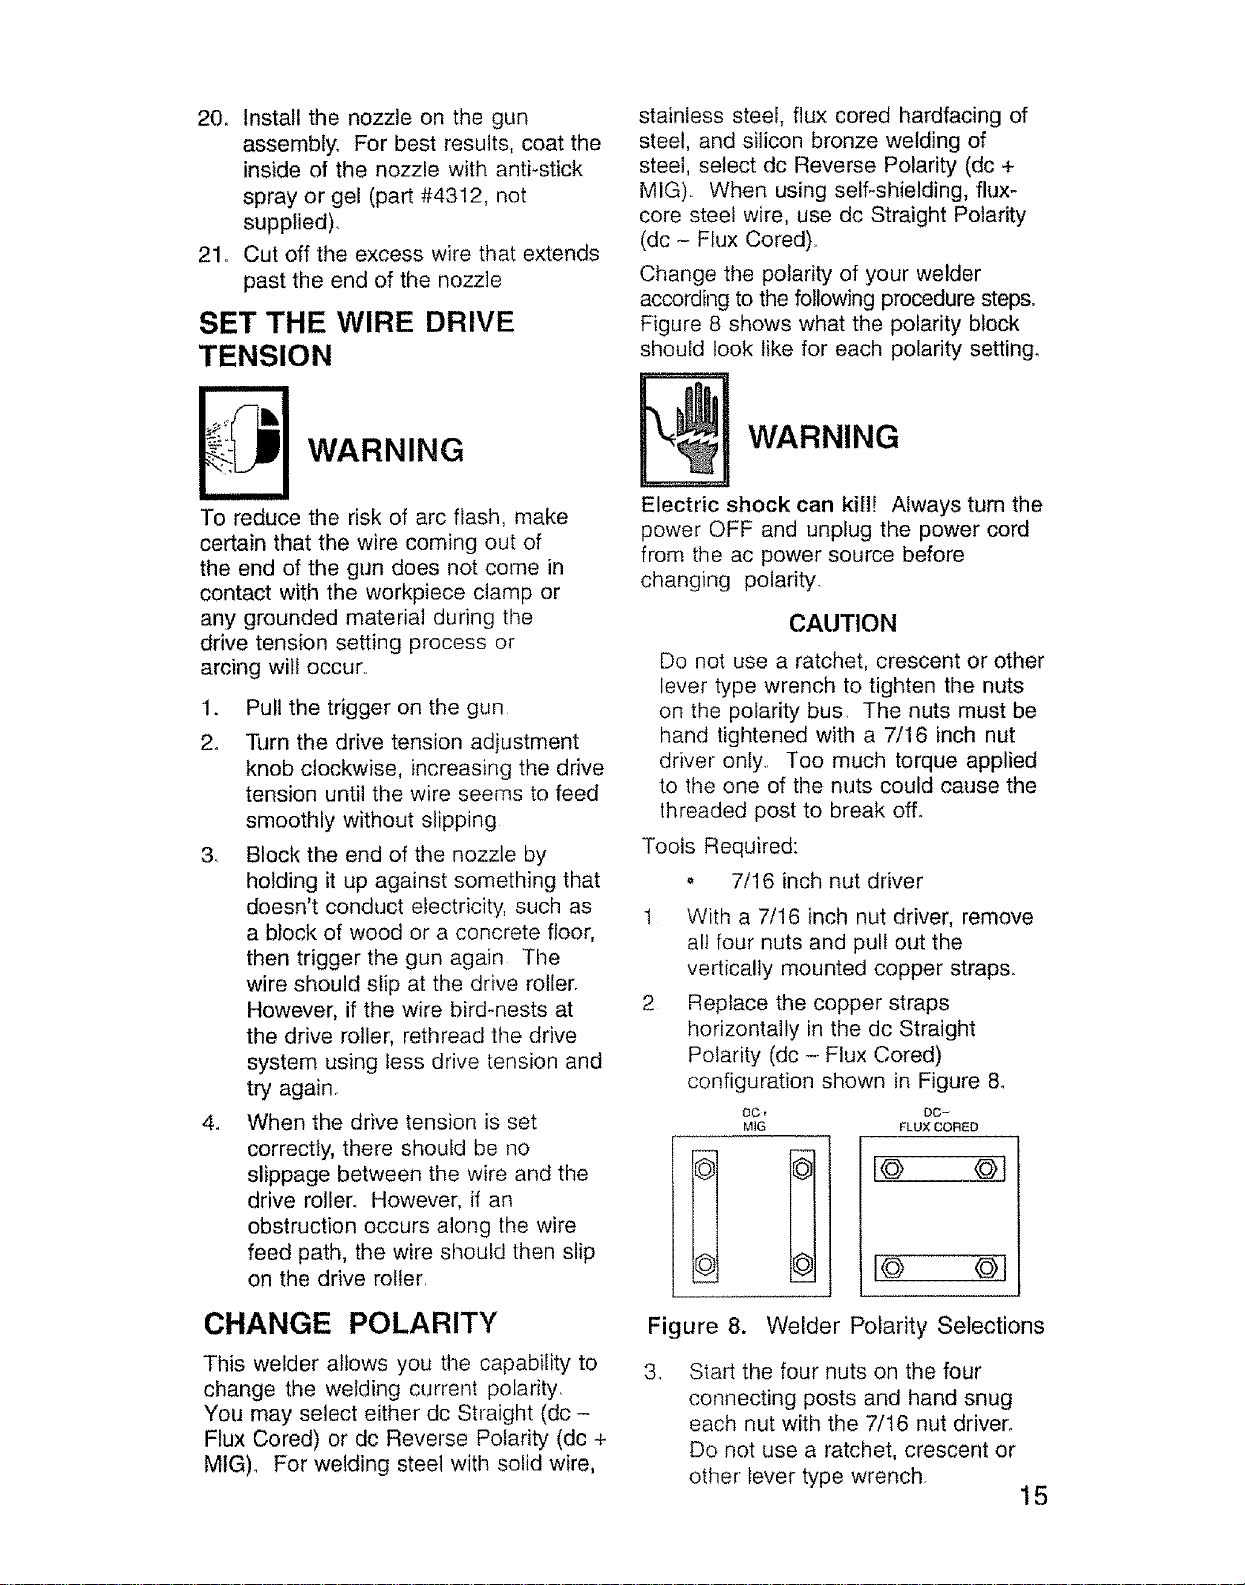
Change the polarity of your welder
according to the following procedure steps°
Figure 8 shows what the polarity block
should took like for each polarity setting,
WARNING
To reduce the risk of arc flash, make
certain that the wire coming out of
the end of the gun does not come in
contact with the workpiece clamp or
any grounded material during the
drive tension setting process or
arcing will occur_
1. Pull the trigger on the gun
2o Turn the drive tension adjustment
knob clockwise, increasing the drive
tension until the wire seems to feed
smoothly without slipping
3. Block the end of the nozzle by
holding it up against something that
doesn't conduct electricity, such as
a block of wood or a concrete floor,
then trigger the gun again The
wire should slip at the drive roller.
However, if the wire bird-nests at
the drive roller, rethread the drive
system using less drive tension and
try again°
4. When the drive tension is set
correctly, there should be no
slippage between the wire and the
drive roller. However, if an
obstruction occurs along the wire
feed path, the wire should then slip
on the drive roller.
WARNING
Electric shock can kill! Always turn the
power OFF and unplug the power cord
from the ac power source before
changing polarity.
CAUTION
Do not use a ratchet, crescent or other
lever type wrench to tighten the nuts
on the polarity bus. The nuts must be
hand tightened with a 7/16 inch nut
driver only.. Too much torque applied
to the one of the nuts could cause the
threaded post to break off.
Tools Required:
o 7/16 inch nut driver
2
With a 7/16 inch nut driver, remove
all four nuts and pull out the
vertically mounted copper straps.
Replace the copper straps
horizontally in the dc Straight
Polarity (dc -. Flux Cored)
configuration shown in Figure &
OC, DC-
MIG FLUX CORED
CHANGE POLARITY
This welder allows you the capability to
change the welding current polarity.
You may select either dc Straight (dc -
Flux Cored) or dc Reverse Polarity (dc +
MIG). For welding steel with solid wire,
Figure 8. Welder Polarity Selections
3, Start the four nuts on the four
connecting posts and hand snug
each nut with the 7/16 nut driver.
Do not use a ratchet, crescent or
other lever type wrench.
15
Loading ...
Loading ...
Loading ...