Loading ...
Loading ...
Loading ...
IMPORTANT - GAS CYLINDER SIZE
RESTRICTION! The tank tray you have
just installed on the back of tile welder
will handle gas cylinders no larger than
20 cubic feet., tf you select a cylinder
larger than 20 cubic feet, it must be
chained to a wall or other fixed support.
2
" 3
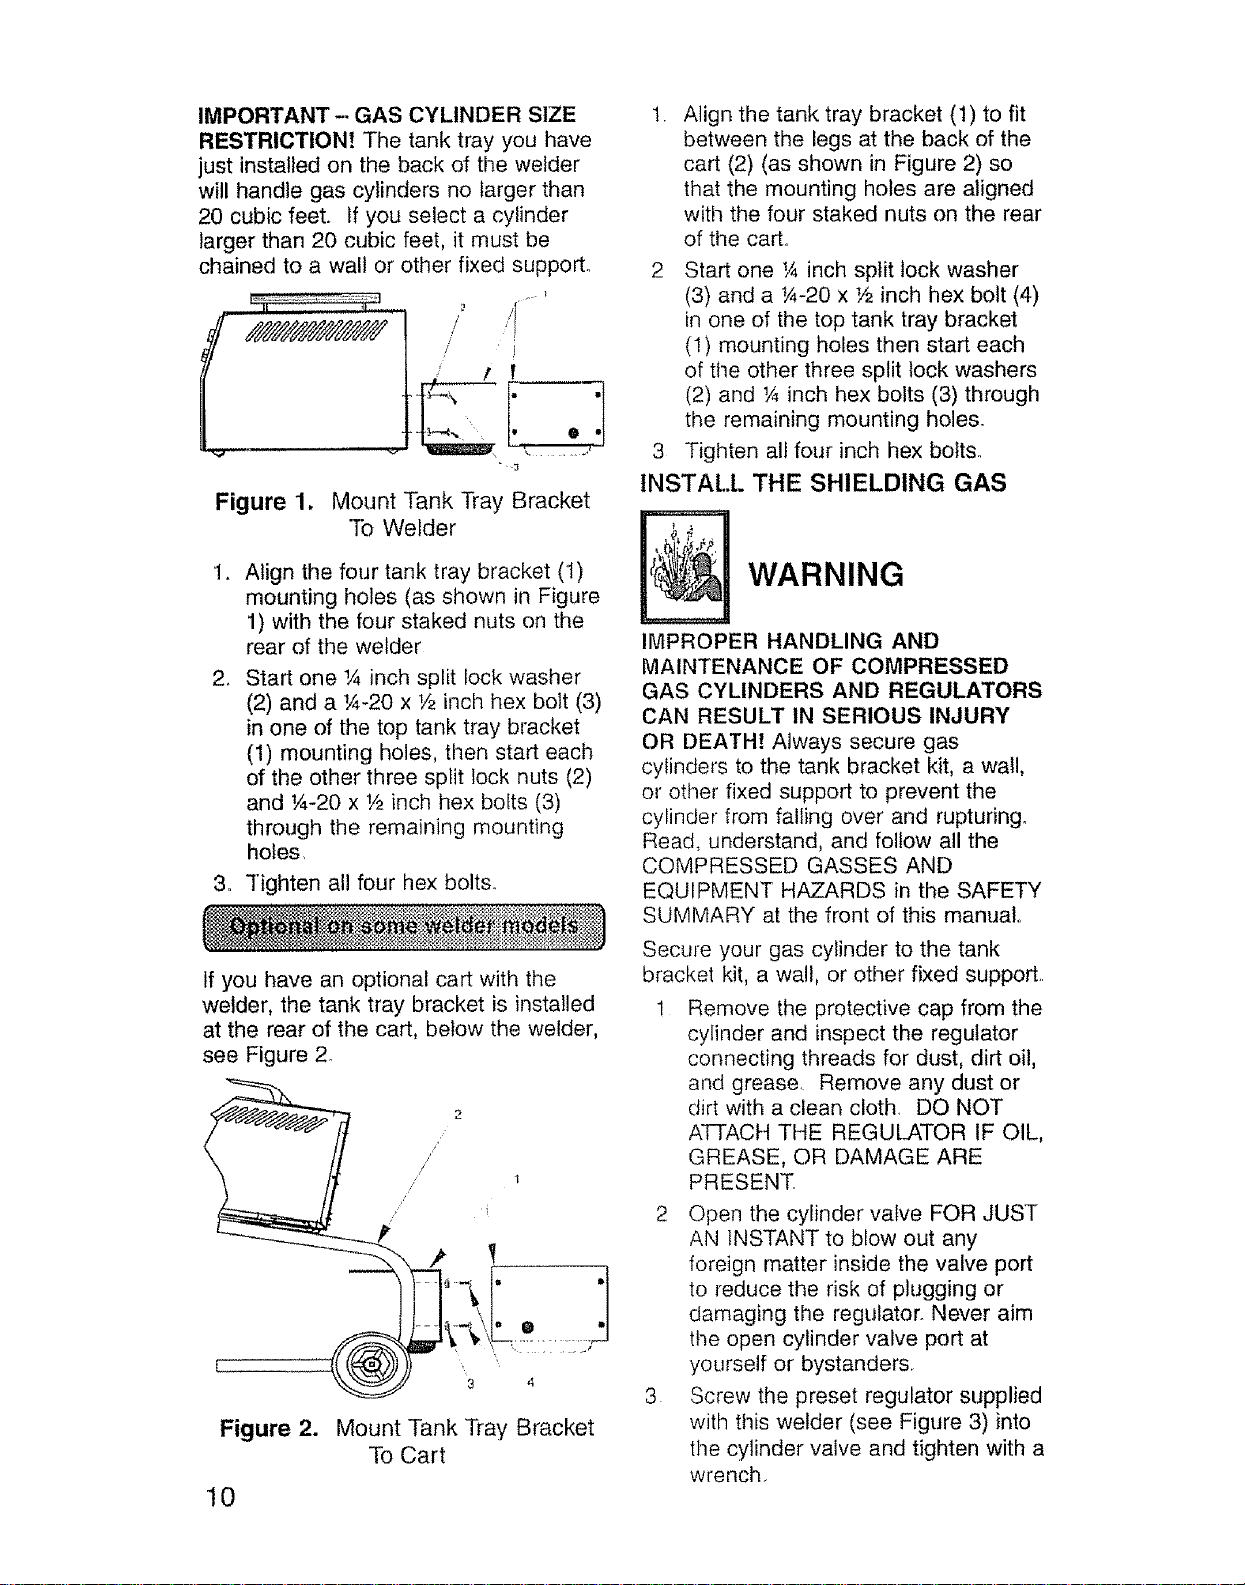
Figure 1, Mount Tank Tray Bracket
-Ib Welder
1.
2_
Align the four tank tray bracket (1)
mounting holes (as shown in Figure
1) with the four staked nuts on the
rear of the welder
Start one 1.4inch split lock washer
(2) and a 1A-20 x 1/2inch hex bolt (3)
in one of the top tank tray bracket
(1) mounting holes, then start each
of the other three split lock nuts (2)
and ¼-20 x 1/2inch hex bolts (3)
through the remaining mounting
holes.
3.. Tighten all four hex bolts..
If you have an optional cart with the
welder, the tank tray bracket is installed
at the rear of the cart, below the welder,
see Figure 2
t
Figure 2.
2
/
/
1
I• :1
\
'3 4
Mount Tank Tray Bracket
To Cart
10
Align the tank tray bracket (1) to fit
between the legs at the back of the
cart (2) (as shown in Figure 2) so
that the mounting holes are aligned
with the four staked nuts on the rear
of the cart.
2 Start one ¼ inch split lock washer
(3) and a ¼-20 x Y2 inch hex bolt (4)
in one of the top tank tray bracket
(1) mounting holes then start each
of the other three split lock washers
(2) and ¼ inch hex bolts (3) through
the remaining mounting holes.
3 Tighten all four inch hex bolts°
INSTALL THE SHIELDING GAS
WARNING
IMPROPER HANDLING AND
MAINTENANCE OF COMPRESSED
GAS CYLINDERS AND REGULATORS
CAN RESULT IN SERIOUS INJURY
OR DEATH! Always secure gas
cylinders to the tank bracket kit, a wail,
or other fixed support to prevent the
cylinder" from falling over and rupturing°
Read, understand, and follow all the
COMPRESSED GASSES AND
EQUIPMENT HAZARDS in the SAFETY
SUMMARY at the front of this manual.
Secure your gas cylinder to the tank
bracket kit, a wall, or other fixed support,.
1 Remove the protective cap from the
cylinder and inspect the regulator
connecting threads for dust, dirt oil,
and grease. Remove any dust or
dirt with a clean cloth. DO NOT
ATTACH THE REGULATOR IF OIL,
GREASE, OR DAMAGE ARE
PRESENT.
2 Open the cylinder valve FOR JUST
AN INSTANT to blow out any
foreign matter inside the valve port
to reduce the risk of plugging or
damaging the regulator° Never aim
the open cylinder valve port at
yourself or bystanders.
3 Screw the preset regulator supplied
with this welder (see Figure 3) into
the cylinder valve and tighten with a
wrench..
Loading ...
Loading ...
Loading ...