Loading ...
Loading ...
Loading ...
UNPACKING
Thisproductrequiresassembly.
[] Carefullylift sawfromthecartonbythecarryinghandle
andthesawbase,andplaceit onatevelworksurface.
NOTE:Thissawisheavy.Toavoidbackinjury,liftwith
yourlegs,notyourback,andget helpwhenneeded.
[] Thissawhasbeenshippedwiththesawarmsecured
inthedownposition.Toreleasethesawarm,push
downonthetopof thesawarm,cutthetie+wrap,and
pulloutonthelockpin.
[] Liftthesawarmbythehandle.Handpressureshould
remainonthesawarmto preventsuddenriseupon
releaseofthetie wrap.
[] hspectthetoolcarefullyto makesurenobreakageor
damageoccurredduringshipping.
[] Donotdiscardthepackingmaterialuntilyouhave
carefullyinspectedandsatisfactorilyoperatedthetool.
[] Thesawisfactorysetforaccuratecutting.After
assemblingit, checkforaccuracy.Hfshippinghas
influencedthesettings,refertospecificprocedures
explainedinthismanual.
[] Hfanypartsaredamagedormissing,pleasecall
1+800+932+3188forassistance.
_ WARNING:Ifanypartsaremissing,do notoperate
thistooluntilthe missingpartsarereplaced.Failure
to do socouldresultin possibleseriouspersonal
injury.
WARNING:Donotattemptto modifythistool
orcreateaccessoriesnotrecommendedfor use
withthistool.Anysuchalterationormodificationis
misuseandcouldresultinahazardouscondition
leadingto possibleseriouspersonalinjury.
WARNING:Donotconnectto powersupplyuntil
assemblyiscomplete.Failureto complycouldresult
inaccidentalstartingandpossibleseriouspersonal
injury.
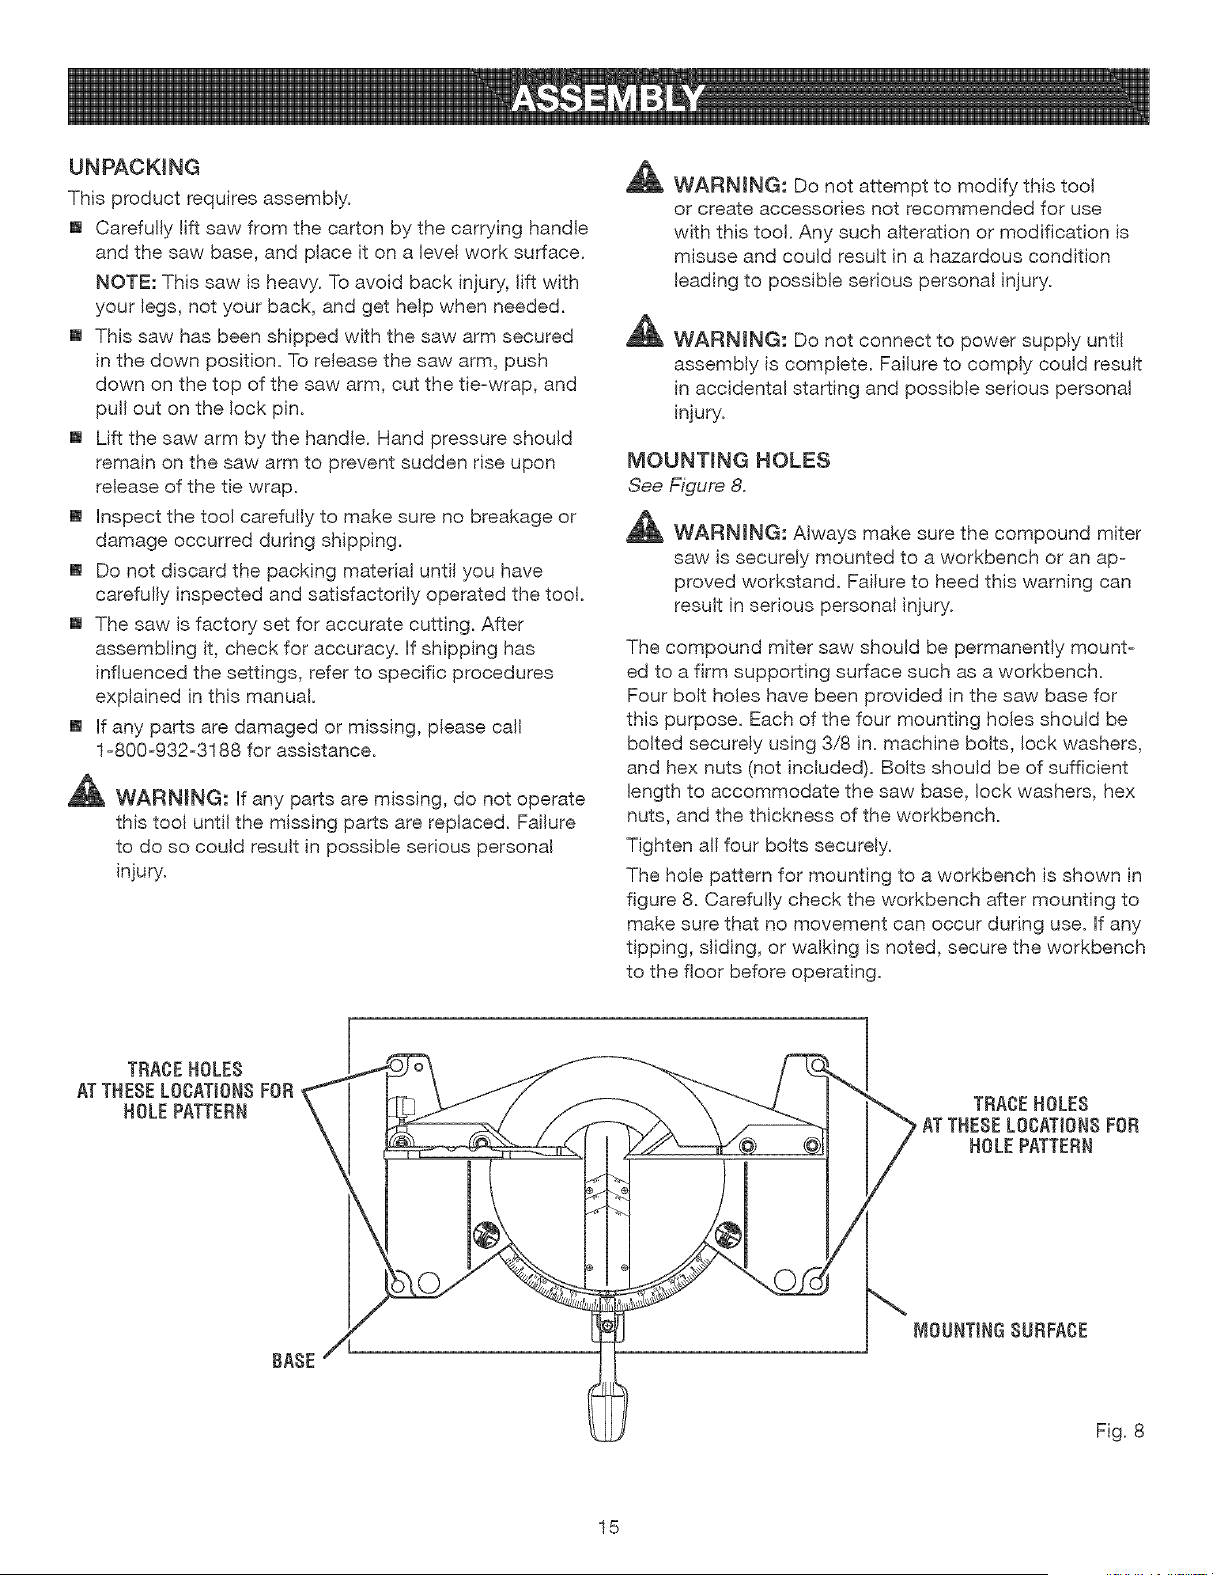
MOUNTINGHOLES
See Figure 8.
_ WARNING: Always make sure the compound miter
saw is securely mounted to a workbench or an ap-
proved workstand. Failure to heed this warning can
result in serious personal injury.
The compound miter saw should be permanently mount-
ed to a firm supporting surface such as a workbench.
Four bolt holes have been provided in the saw base for
this purpose. Each of the four mounting holes should be
bolted securely using 3/8 in. machine bolts, lock washers,
and hex nuts (not included). Bolts should be of sufficient
length to accommodate the saw base, lock washers, hex
nuts, and the thickness of the workbench.
Tighten all four bolts securely.
The hole pattern for mounting to a workbench is shown in
figure 8. Carefully check the workbench after mounting to
make sure that no movement can occur during use. If any
tipping, sliding, or walking is noted, secure the workbench
to the floor before operating.
TRACEHOLES
ATTHESELOCATIONSFOR
HOLEPATTERN
TRACEHOLES
ATTHESELOCATIONSFOR
HOLEPATTERN
BASE
[VIOUNTINGSURFACE
Fig. 8
15
Loading ...
Loading ...
Loading ...