Loading ...
Loading ...
Loading ...
14
2. Stop the auger blade rotation by releasing the (left) auger control lever (handle)
.
3. Remove Engine Safety Switch Key to stop engine operation.
4. Remove snow from all snow thrower surfaces including the auger housing and chute areas.
CLEARING RESTRICTIONS
If the snow discharge chute or auger housing becomes clogged, STOP the engine. Remove the Engine Safety
key and make sure that all rotating parts have come to a complete stop. Use the supplied snow clean out tool to
clear the obstruction. After unclogging, wipe the tool clean, and place it in the holder on top of the auger
housing.
MAINTENANCE
TIRE INFLATION
Before each use of your Snow Thrower, check the tire pressure. The pressure in each tire should be in the range
of 20-24 psi for the best performance. The pressure can be checked using an ordinary
tire pressure gauge. Fill the tires using a small or pressure regulated air compressor.
WARNING! DO NOT OVER-INFLATE THE TIRES.
Over-inflating could
cause a tire to burst and cause severe bodily injury.
SHAVE PLATE REPLACEMENT
Remove both skid shoes and hardware including carriage bolts and nuts which attach
shave plate to snow thrower housing. Reassemble new shave plate, making sure heads
of the carriage bolts are to the inside of the auger housing.
AUGER OR IMPELLER JAMS
WARNING! The auger and impeller rotate at fast speeds which can cause harm or even amputation to a person's
body parts. Even if you do not see the auger or impeller rotating, it may start at any time if the engine is running.
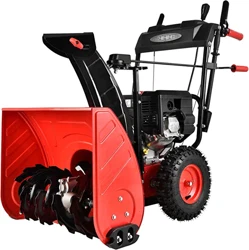
Remove the Safety Key before cleaning the jams.The chute clean-out tool is
fastened to the upper tube with mounting clips.
1.
Always turn OFF the engine before attempting to clear any clogs
or jams.
2.
Keep hands and feet away from rotating parts while the engine is
running.
3.
Do not wear loose fitting clothing that can become entangled in
rotating parts.
4.
Wait until the auger and impeller have come to a full stop.
5.
Clear any visible jams using the clean out tool attached to your machine.
WARNING! DO NOT
try to clear jams with your hands or feet.
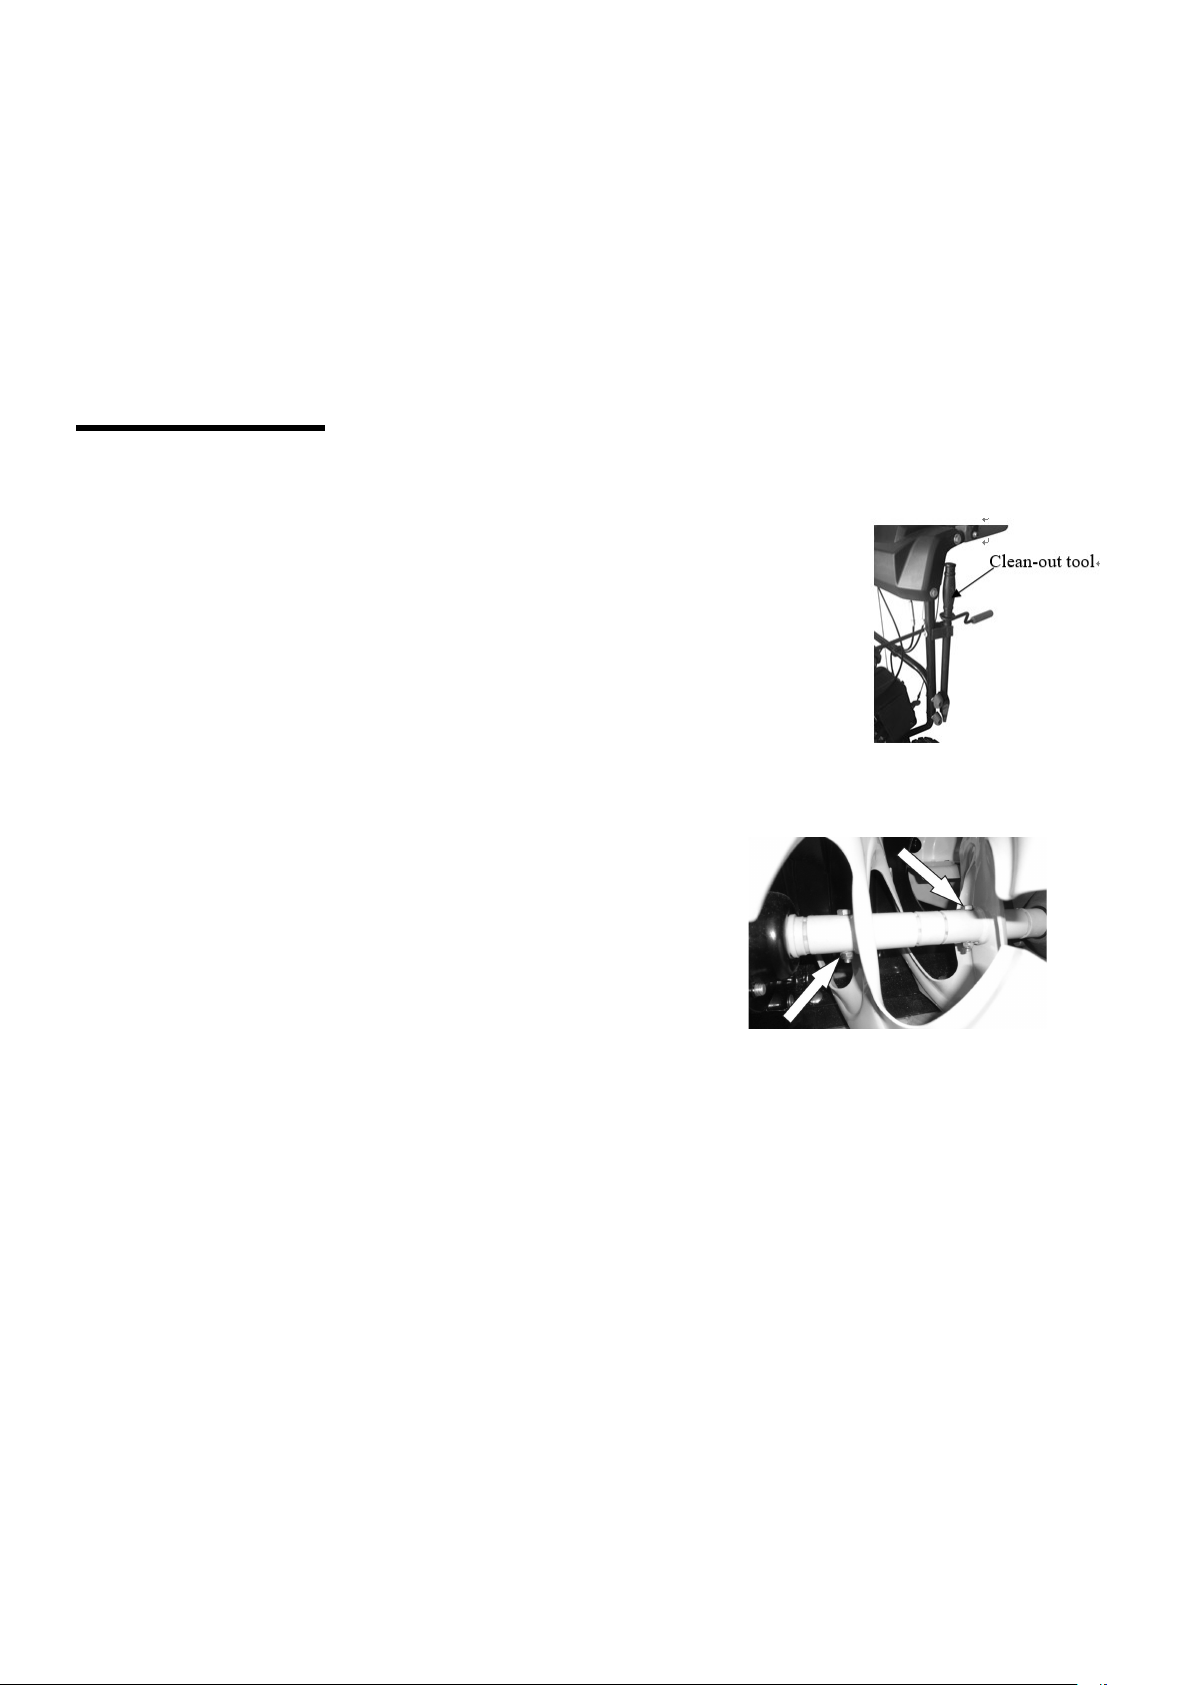
AUGER SHEAR PINS REPLACEMENT
Shear pins are used to attach the auger shaft to the auger blades. Stop the engine by removing the safety key. A
clog or jam in the augers may cause one or multiple shear pins to break. The shear pins are a safety mechanism
and designed to break under high load or impact and protect the auger drive system from damage. Replacement
shear pins and nylon lock nuts are provided with your snow thrower.
For additional replacement shear pins, please call the customer service department at (800)791 9458.
1.
Turn off the engine and wait for all moving parts to come to a complete stop. Remove any
remnants of the broken shear pin. It may be necessary to unscrew the nut from the broken
shear pin and drive out the broken pin.
2.
Insert a new shear pin through the hole in the auger shaft and tighten using the shear pin nylon
lock nut. Do not over-tighten the nylon lock nut.
Note: Never replace the shear pins with
standard pins or fasteners. Damage may occur to the snow blower and drive systems.
Loading ...
Loading ...
Loading ...