Loading ...
Loading ...
Loading ...
www.factorybuysdirect.com
13200253-01D
INSTALLATION
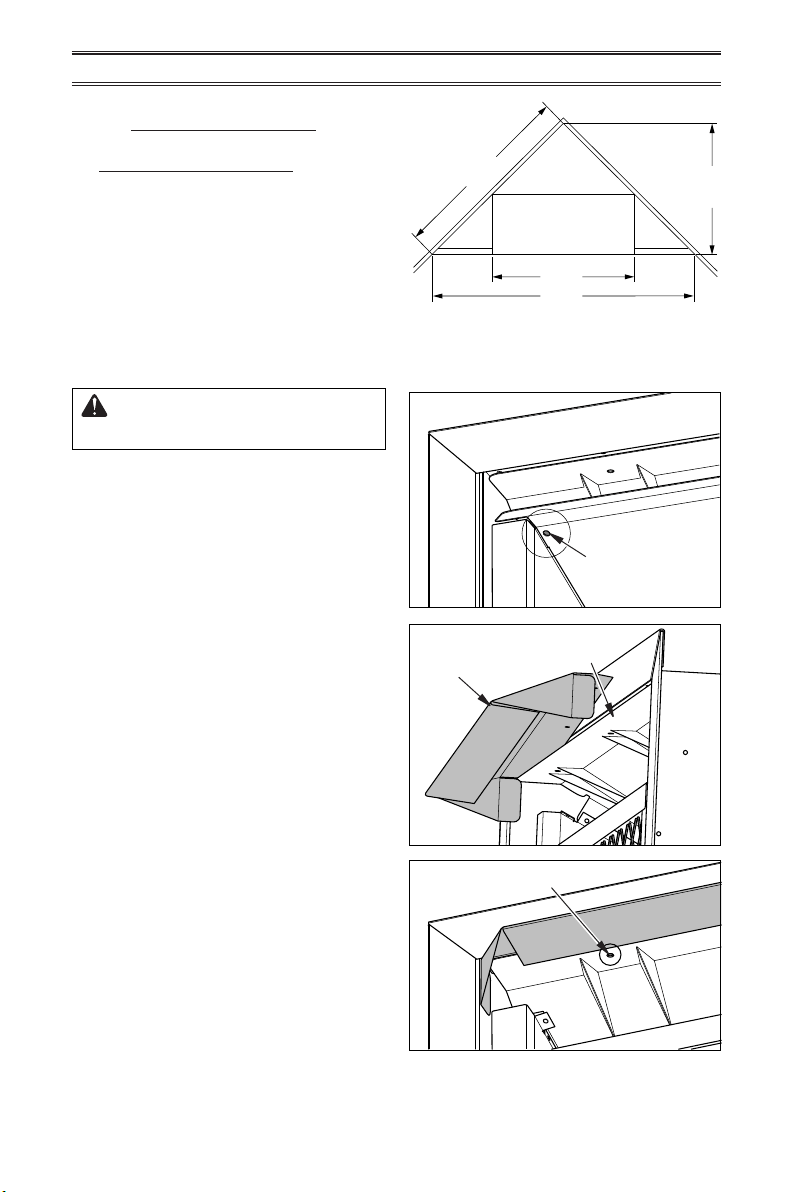
Figure 11 - Hood Installation
Remove 2
Screws from Top
Firebox Panel
Insulation
Board
Replace 2
Screws
Hood
Step 1
Step 2
Step 3
Figure 10 - Rough Opening for Corner
Installation
37.4"
28.75"
53.8"
26.5"
3. Attach gas line to replace gas regulator.
See Connecting to Gas Supply, page 14.
4. Check all gas connections for leaks. See
Checking Gas Connections, page 16.
IMPORTANT: When nishing your rebox,
combustible materials such as wall board,
gypsum board, sheet rock, drywall, plywood,
etc, must have 1/2" clearance to the sides
and top of the rebox. Combustible materials
should never overlap the rebox front.
ASSEMBLING HOOD
CAUTION: Do not operate
replace without hood in place.
1. Fireplace hood is positioned on top of
shipping inner pack.
2. Remove top of rebox by removing 2 screws
located on each end (see Figure 11).
3. Insert the hood along the upper side of
the heat insulation board (see Figure 11).
Attach hood with 3 screws.
4. Reattach rebox top by reinserting the 2
screws from step 2.
Loading ...
Loading ...
Loading ...