Loading ...
Loading ...
Loading ...
I0. Reassemblethehandleandfiller plates#2,#3 and
#12ontheoppositesideof thedoor.
11.Removeandrelocatethe filler plates#7 on the
oppositesideof theovenframe.
12.Removethe latch pin#10 andrelocatelatchon
theoppositesideoftheovendoor.
13.Invertpositionsof #8 and#9 hingefixedparts(ex.
fromtopleftsidebottomrightside).
14.Reassemblethe doorontowall oven;insertdoor
into the fixedlowerhinge,the proceedwith the
reassemblyof theupperhinge.Aligndoorbyusing
availableplayin thehingeholes.
B. Serf Clean ModeJs
The lower front trim is packed separately and should
not be attached until the oven is in place in the
cabinet cutout.
Removing the Oven Door - Oven Door Reversal
The electrical power to the oven must be shut off
when reversing the door opening. Failure to do so
could result in serious injury or death.
The door on this wall oven is equipped with reversible
hinges, therefore allowing the door to be reversed
from a left hand door (right side opening) as shipped
from the factory to a right hand door (left side
opening).
Tools required: No.2 Phillips@ and No.2 Robertson @
screw drivers, 1/2" open key, small flat-blade screw
driver, long nose pliers.
Procedure for Door Reversal
I. Remove moulding from under the door if installed
(held in place with 2 screws).
2. Keep the door closed and use a 1/2" open key or
a No. 2 Robertson@ screw driver to unscrew and
remove the threaded pin from the lower hinge.
Save the pin for later use.
3. Support the weight of the door with one hand and
open the door about 5" (12.7 cm), then slide the
lower end of the door outside the hinge. Save the
washer of the lower hinge. Grasp the door with
both hands and lower the door off the oven.
The door is heavy; hold it firmly.
4. Gently lay the door on a work table. The door
internal panel should lay face down.
5. Remove the nylon slide (and retainer screw) and
save for use later. Remove the other 2 screws in
the underside of the door plus the 3 screws in the
upper side of the door.
6. Grasp the handle. Lift and remove the outer door
assembly (glass/frame/handle).
7. Unscrew and switch the bumper (with screw and
nut) and the ball screw (and nut).
To reverse the door opening, hire an experienced
technician to prevent any damage to parts or door
alignment problems.
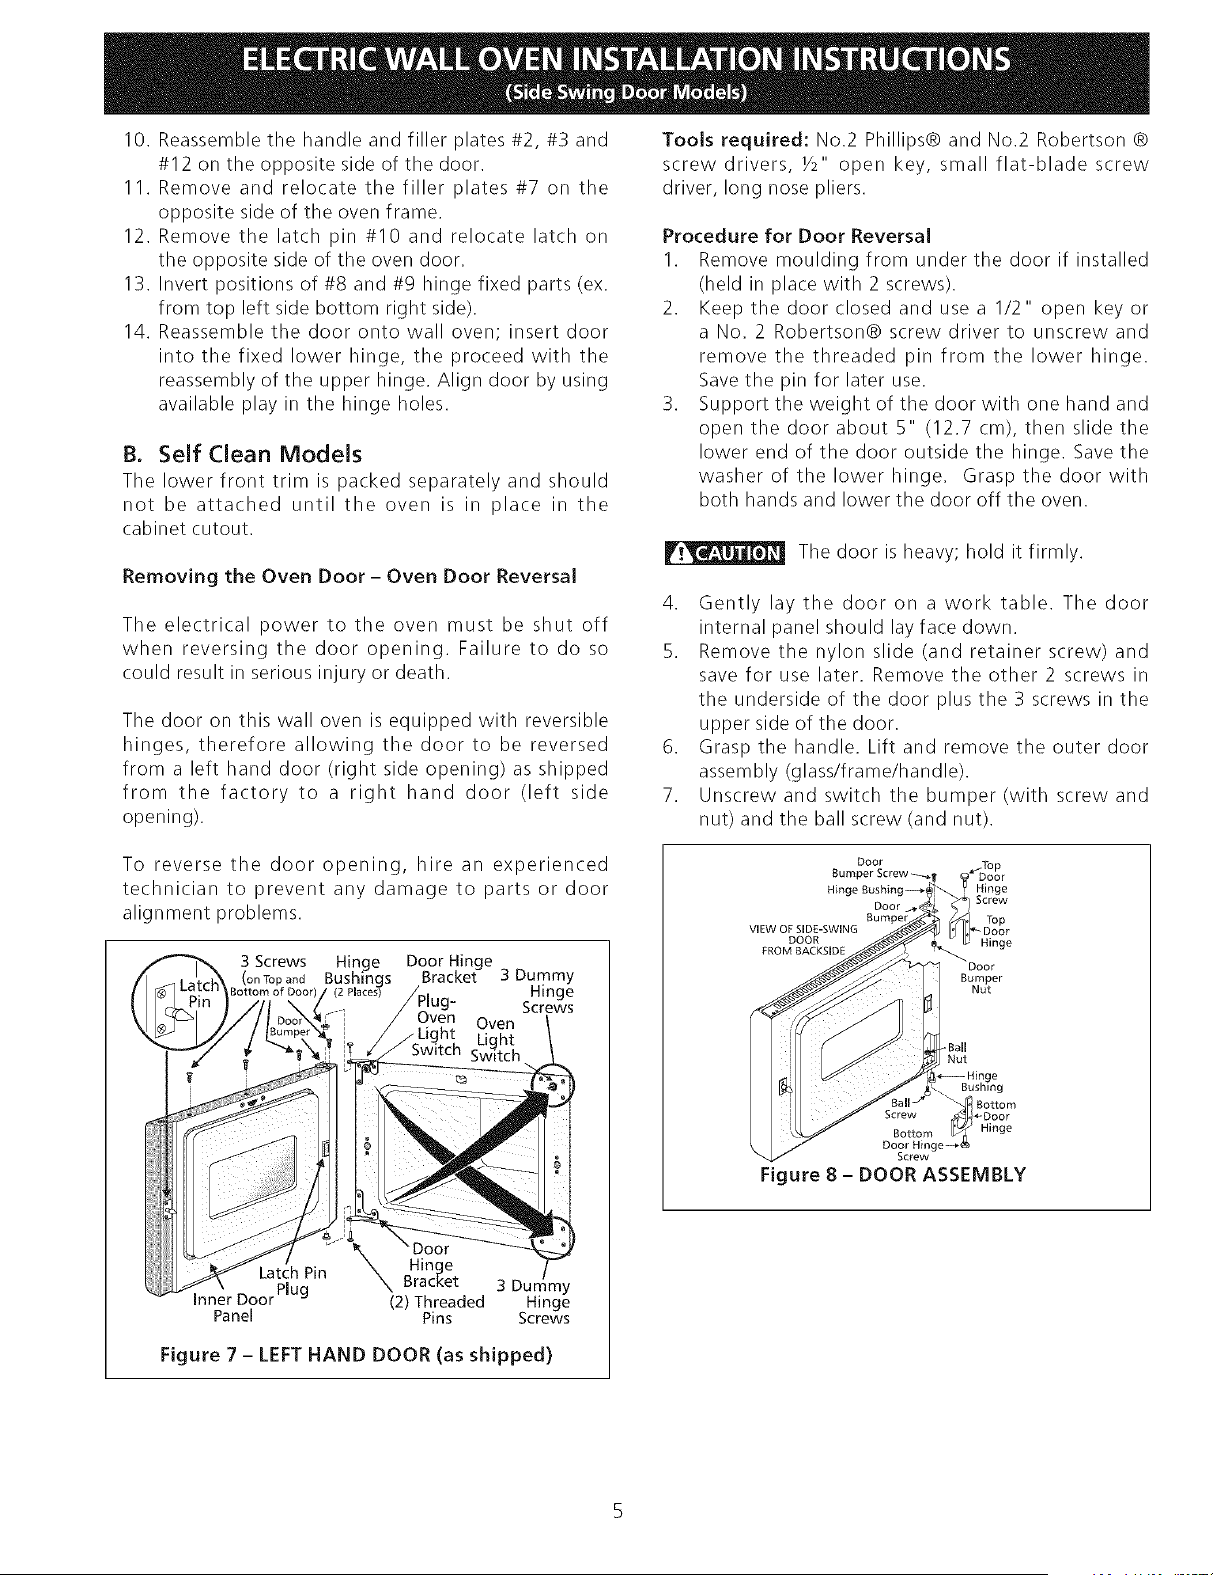
3 Screws
(on Top and
Door Hinge
Bracket 3 Dummy
Hinge
Screws
Oven
Light
Sw_tch
Latch Pin Hinge
Bracket 3 Dummy
Inner Door Plug (2) Threaded Hinge
Panel Pins Screws
Figure 7 - LEFT HAND DOOR (as shipped}
Door Top
Bumper Screw-_-_t _JDoo r
Hinge Bushing_]"_. _ Hinge
Door ' _k_. crew,TopViEW OF SIDE-SWING " Door
DOOR Hinae
FROM BACKSIDE
Door
Bumper
Nut
i Bo,_Nut
_Hinge
k. Bushing
"" , Bottom
Screw _÷Door
Bottom _ Hinge
Door Hinge_
Screw
Figure 8 - DOOR ASSEMBLY
Loading ...
Loading ...
Loading ...