Documents: Go to download!
User Manual
- User Manual - (English, Spanish)
- CMXGTAM202501 - Instructional Manual - Type 2020 - (English)

- Assembly & Set-Up
- Controls and Operation
- Service
- Troubleshooting
Table of contents
User Manual Craftsman CMXGTAMD30SA String Trimmer
Assembly & Set-Up
Thank You
Thank you for purchasing this product. It was carefully engineered to provide excellent performance when properly operated and maintained.
Please read this entire manual prior to operating the equipment. It instructs you how to safely and easily set up, operate and maintain your machine. Please be sure that you, and any other persons who will operate the machine, carefully follow the recommended safety practices at all times. Failure to do so could result in personal injury or property damage.
All information in this manual is relative to the most recent product information available at the time of printing. Review this manual frequently to familiarize yourself with the machine, its features and operation. Please be aware that this
Operator’s Manual may cover a range of product specifications for various models.
Characteristics and features discussed and/or illustrated in this manual may not be applicable to all models. We reserve the right to change product specifications, designs and equipment without notice and without incurring obligation.
If applicable, the power testing information used to establish the power rating of the engine equipped on this machine can be found at www.opei.org or the engine manufacturer’s web site.
If you have any problems or questions concerning the machine, phone an authorized service dealer or contact us directly. Customer Support telephone numbers, website address and mailing address can be found on this page. We want to ensure your complete satisfaction at all times.
Throughout this manual, all references to right and left side of the machine are observed from the operating position
The engine manufacturer is responsible for all engine-related issues with regards to performance, power-rating, specifications, warranty and service. Please refer to the engine manufacturer’s Owner’s/Operator’s Manual, packed separately with your machine, for more information.
Contents of Carton
-
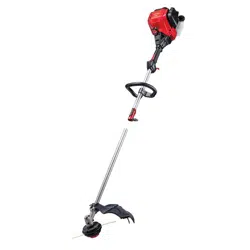
String Trimmer (1)
-
Pack of Trimmer Line (1)
-
Oil (1)
-
String Trimmer Operator’s Manual (1)
-
Engine Operator’s Manual (1)
Assembly
NOTE: This string trimmer is shipped without gasoline or oil in the engine. Fill up the gasoline and oil as instructed in the Engine Operator’s Manual BEFORE operating your machine.
Upper Handle
1. Remove the wing knob (a) and carriage bolt (b) from the left lower handle and the right lower handle. See Figure 2-1.
2. Pivot the upper handle into the operating position. See Figure 2-1.

3. Move the upper handle into one of three positions by pivoting it forward or rearward.
4. Flip the wing knobs (a) and carriage bolts (b) so that the wing knobs are positioned at the outside of the handle when installed.
5. Secure the upper handle to the lower handle using the wing knobs (a) and carriage bolts (b) removed in Step 1. See Figure 2-2.
NOTE: Make sure to use the corresponding hole on the left side as on the right side of the upper handle.

Set-Up
Gas and Oil Fill-Up
Refer to the Engine Operator’s Manual for additional engine information.
-
Add oil provided before starting unit for the first time.
-
Service the engine with gasoline as instructed in the Engine Operator’s Manual.
WARNING: Use extreme care when handling gasoline. Gasoline is extremely flammable and the vapors are explosive. Never fuel the machine indoors or while the engine is hot or running. Extinguish cigarettes, cigars, pipes and any other sources of ignition.
Starter Rope
-
Disconnect the spark plug boot from the spark plug (refer to the Engine Operator’s Manual).
-
Pivot the control handle against the upper handle and pull the rope out of the engine.
-
Loop the rope through the eye bolt. See Figure
-
Tighten the eye bolt to the handle using the lock nut. DO NOT overtighten.

Controls and Operation

Controls
A. Recoil Starter
The recoil starter is attached to the right side of the upper handle. Stand behind the unit and pull the recoil starter rope to start the unit.
B. Engine Control Lever
The control lever must be depressed to start the engine and rotation of trimmer spindle assembly. Releasing the control lever stops the engine and trimmer spindle assembly.
WARNING: This control lever is a safety device. Never attempt to bypass its operations.
C. Drive Control (If Equipped)
The drive control is located at the back of the upper handle and is used to engage the drive. Squeeze the control against the upper handle to engage the drive; release it to slow down or stop the trimmer from propelling.
D. Trimmer Deflector
The trimmer deflector is connected to the trimmer base and it is used to prevent debris from being thrown.
E. Spindle
The spindle rotates the trimmer line.
F. Trimmer Line
The trimmer line is attached to the spindle assembly and it is used to trim grass, vegetation, undergrowth and weeds.
G. Flywheel Screen
Keep the flywheel screen free of grass clippings and debris at all times.
Engine Controls
See the Engine Operator’s Manual for the location and function of the controls on the engine.
Operation
Adjusting the Spindle Height
The spindle height can be adjusted for various applications. To do so, proceed as follows:
-
Loosen the wing nut found on each side of the spindle shaft. NOTE: The wing nuts are designed so that they cannot be removed from the spindle shaft.
-
Slide the spindle upward or downward to the desired position before retightening the wing nuts. See Figure 3-2.

Starting and Stopping Engine
Refer to the Engine Operator’s Manual packed with your string trimmer for instructions on starting and stopping the engine.
Using Your String Trimmer
Be sure trimming area is clear of stones, sticks, wire, or other objects which could damage the string trimmer or engine. Such objects could be accidently thrown by the trimmer in any direction and cause serious personal injury to the operator and others.
WARNING: The operation of any string trimmer can result in foreign objects being thrown into the eyes, which can damage your eyes severely. Always wear safety glasses while operating the string trimmer, or while performing any adjustments or repairs on it.
-
The string trimmer is designed with the spindle offset to the left side, allowing the operator to trim along a fence, landscaping, or a house to his or her’s right side without having to make any adjustments to the machine.
-
Operate the string trimmer at a slower walking speed when trimming tall, thick weeds or grass.
-
Clean the underside of the trimmer after each use to remove any debris build up.
WARNING: Shut the engine off and wait until the trimmer head comes to a complete stop before cleaning the discharge area. The trimmer head continues to rotate for a few seconds after the trimmer head control is released.
-
Do not trim on excessively steep slopes. If a slope is difficult to stand on, do not trim. Do not trim on slopes when the ground is slippery or wet. Trim across the face of a slope, not up and down.
To use the Drive Control (if equipped):
-
Once the engine is running, squeeze the drive control lever against the upper handle to propel the string trimmer.
-
Release the single lever drive control to slow down or stop the string trimmer from driving.
CAUTION: While operating the string trimmer, do not allow the spindle to contact a concrete, asphalt, or gravel surface. Doing so will result in premature wear.
Changing the Trimmer Line
To ease in removing worn trimmer line, change the trimmer line before it becomes too short (i.e. approximately half its original length).
-
Remove the worn trimmer line from the spindle.
-
Fold the replacement trimmer line in half and insert both ends through the loop near the edge of the spindle.
-
Pull the ends of the trimmer line through the loop until the line is securely beneath the metal tab.
-
Cross the line ends and pull each tightly to secure the trimmer line in place. See Figure 3

Service
Maintenance
General Recommendations
-
Always observe safety rules when performing any maintenance.
-
The warranty on this string trimmer does not cover items that have been subjected to operator abuse or negligence. To receive full value from warranty, operator must maintain the string trimmer as instructed here.
-
Changing of engine-governed speed will void engine warranty.
-
All adjustments should be checked at least once each season.
-
Periodically check all fasteners and make sure these are tight.
WARNING: Always stop engine, allow engine to cool, disconnect spark plug, and ground against engine before performing any type of maintenance on your machine.
Lubrication
1. Lubricate pivot points on the engine control lever at least once a season with light oil. This control must operate freely in both directions. See Figure 4-1.

2. On 280 Series models equipped with a drive control, also lubricate pivot points on the drive control lever at least once a season with light oil. This control must operate freely in both directions. See Figure 4-2.

3. Lubricate the wheels at least once a season with light oil (or motor oil). If wheels are removed for any reason, lubricate surface of the axle bolt and inner surface of the wheel with light oil. See Figure 4-1.
4. Follow the Engine Operator’s Manual for lubrication schedule and instruction for engine lubrication.
Deck Care
Clean underside of the machine after each use to prevent build-up of grass clippings or other debris.
1. Allow engine to run until it is out of fuel. Do not attempt to pour fuel from the engine. Disconnect spark plug wire.
2. Tip trimmer so that it rests on its side. Keep the side with the air cleaner facing up. Hold trimmer firmly.
WARNING: Never tip the trimmer more than 90o in any direction and do not leave the trimmer tipped for any length of time. Oil can drain into the upper part of the engine causing a starting problem.
3. Scrape and clean the underside of the machine with a suitable tool. Do not spray with water.
IMPORTANT: Do not use a pressure washer or garden hose to clean the machine. These may cause damage to the engine. The use of water will result in shortened life and reduce serviceability.
4. Put the trimmer back on its wheels on the ground.
Engine Care
A list of key engine maintenance jobs required for good performance by the trimmer is given below. Follow the accompanying engine manual for a detailed list and instructions.
-
Maintain oil level as instructed in Engine Operator’s Manual.
-
Service air cleaner every 25 hours under normal conditions. Clean every few hours under extremely dusty conditions. Poor engine performance and flooding usually indicates that the air cleaner should be serviced. To service the air cleaner, refer to the
-
Engine Operator’s Manual.
-
Clean spark plug and reset the gap once a season. Spark plug replacement is recommended at the start of each mowing season. Check Engine Operator’s Manual for correct plug type and gap specifications.
-
Clean engine regularly with a cloth or brush.
-
Keep the top of the engine clean to permit proper air circulation. Remove all grass, dirt and debris from muffler area.
-
Engines stored between 30 and 90 days need to be treated with a gasoline stabilizer to prevent deterioration and gum from forming in fuel system or on essential carburetor parts.
Off-Season Storage
Take the following steps to prepare your trimmer for storage. Refer to Engine Operator’s Manual for specific engine storage instructions.
-
Clean and lubricate trimmer.
-
Store trimmer in a dry, clean area. Do not store next to corrosive materials, such as fertilizer.
-
Using a light oil or silicone, coat the equipment, especially cables and all moving parts of your string trimmer.
Troubleshooting
Engine fails to start
1. Control lever disengaged.
-
Engage control lever.
2. Spark plug boot disconnected.
-
Connect wire to spark boot.
3. Fuel tank empty or stale fuel.
-
Fill tank with clean, fresh gasoline.
4. Engine not primed (if equipped with primer).
-
Prime engine as instructed in the Operation section.
5. Faulty spark plug.
-
Clean, adjust gap, or replace.
6. Blocked fuel line.
-
Clean fuel line.
7. Engine flooded.
-
Wait a few minutes to restart, but do not prime.
8. Fuel valve (if equipped) closed.
-
Open fuel valve. See Engine Operator’s Manual.
9. Engine not choked (if equipped with choke).
-
Choke engine. See Engine Operator’s Manual.
Engine runs erratic
1. Spark plug boot loose.
-
Connect and tighten spark plug boot.
2. Blocked fuel line or stale fuel.
-
Clean fuel line; fill tank with clean, fresh gasoline.
3. Vent in gas cap plugged.
-
Clear vent.
4. Water or dirt in fuel system.
-
Drain fuel tank. Refill with fresh fuel.
5. Dirty air cleaner.
-
Refer to Engine Operator’s Manual.
6. Unit running with CHOKE (if equipped) applied.
-
Push CHOKE knob in.
Engine overheats
1. Engine oil level low.
-
Fill crankcase with proper oil.
2. Air flow restricted.
-
Clean area around and on top of engine.
Occasional skips hesitates) at high speed
1. Spark plug gap too close
-
Adjust gap to .030”.
Idles poorly
1. Spark plug fouled, faulty, or gap too wide.
-
Reset gap to .030” or replace spark plug.
2. Dirty air cleaner.
-
Refer to Engine Operator’s Manual.
Excessive vibration
1. Spindle wing nuts loose.
-
Tighten wing nuts.
2. Spindle damaged.
-
See an authorized service dealer.
Poor trimming performance
1. Trimmer line too short or worn.
-
Replace trimmer line
2. Worn or damaged spindle belt.
-
Replace spindle belt.
See other models: CMXGZAM110090 CMCF930D1 CMCF810C1 CMXGMAM201103 CMR44A10

