Loading ...
Loading ...
Loading ...
Hewto Convert the Rangefor UsewithLPGasor NaturalGas <continued)
Step :2
Converting Surface Burners on Models
Equipped with Sealed Burners (See Step 3
if range is equipped with dual burners.)
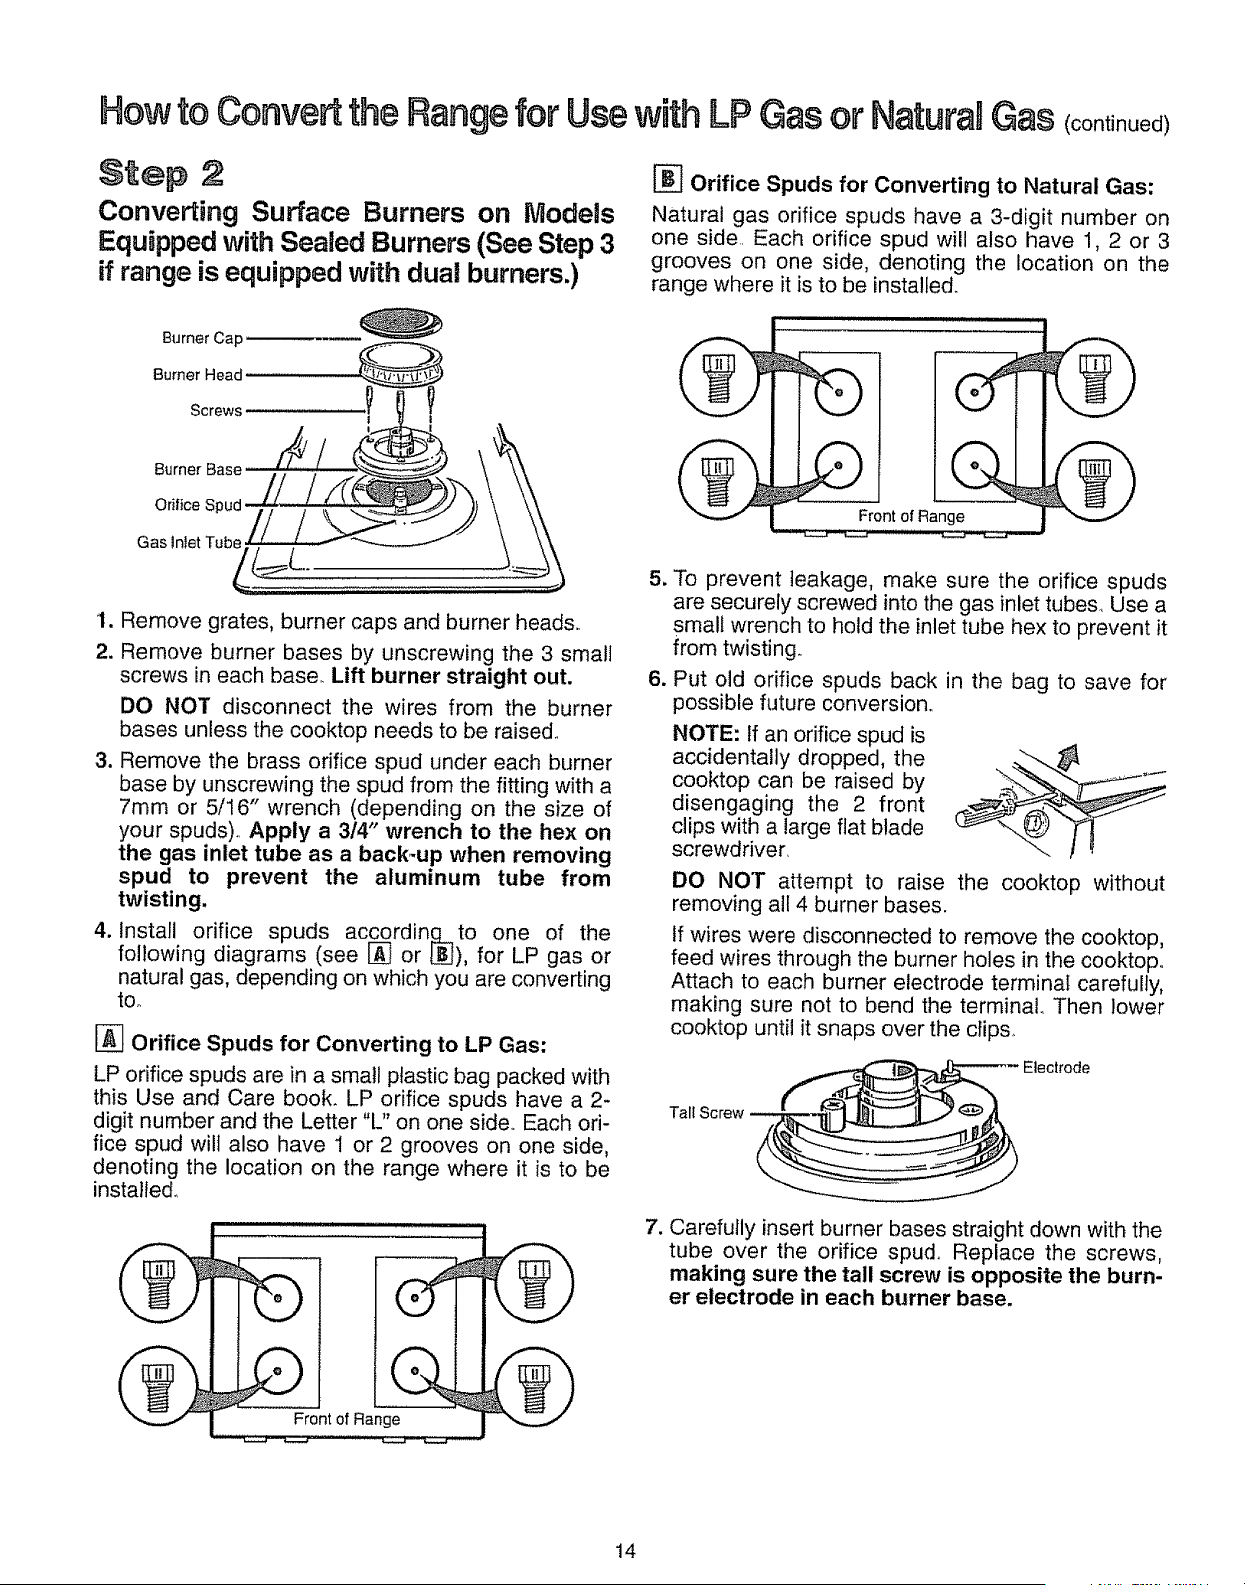
Burner Cap
Burner Head
Screws
!
Burner Base
Orifice Spud
1. Remove grates, burner caps and burner heads.
2. Remove burner bases by unscrewing the 3 small
screws in each base. Lift burner straight out.
DO NOT disconnect the wires from the burner
bases unless the cooktop needs to be raised,
3. Remove the brass orifice spud under each burner
base by unscrewing the spud from the fitting with a
7mm or 5/16" wrench (depending on the size of
your spuds), Apply a 314" wrench to the hex on
the gas inlet tube as a back_up when removing
spud to prevent the aluminum tube from
twisting.
4. install orifice spuds acc__qording,to one of the
following diagrams (see _ or L_), for LP gas or
natural gas, depending on which you are converting
tOo
_-_ Orifice Spuds for Converting to LP Gas:
LP orifice spuds are in a small plastic bag packed with
this Use and Care book. LP orifice spuds have a 2-
digit number and the Letter "L" on one side° Each ori-
fice spud will also have I or 2 grooves on one side,
denoting the location on the range where it is to be
installed.
Orifice Spuds for Converting to Natural Gas:
Natural gas orifice spuds have a 3-digit number on
one side.. Each orifice spud will also have 1, 2 or 3
grooves on one side, denoting the location on the
range where it is to be installed.
m !
Front of Range
5_
6_
To prevent leakage, make sure the orifice spuds
are securely screwed into the gas inlet tubes_ Use a
small wrench to hold the inlet tube hex to prevent it
from twisting..
Put old orifice spuds back in the bag to save for
possible future conversion,.
NOTE: If an orifice spud is
accidentally dropped, the
cooktop can be raised by
disengaging the 2 front
clips with a large flat blade
screwdriver.
DO NOT attempt to raise the cooktop without
removing all 4 burner bases.
if wires were disconnected to remove the cooktop,
feed wires through the burner holes in the cooktop.
Attach to each burner electrode terminal carefully,
making sure not to bend the terminal. Then lower
cooktop until it snaps over the clips_
Tall Screw
| o I
Front of Range
7. Carefully insert burner bases straight down with the
tube over the orifice spud,. Replace the screws,
making sure the tall screw is opposite the burn-
er electrode in each burner base.
14
Loading ...
Loading ...
Loading ...