Loading ...
Loading ...
Loading ...
5
English
Proper Hand Position (Fig. H)
WARNING: To reduce the risk of serious
personal injury, ALWAYS use proper hand position
as shown.
WARNING: To reduce the risk of serious
personal injury, ALWAYS hold securely in anticipation
of a suddenreaction.
Proper hand position requires one hand on the main
handle
5
and one hand on the auxiliary handle
6
.
WARNING: Always use proper eye
protection that conforms to ANSI Z87.1 (CAN/CSA
Z94.3) while operating thisappliance.
CAUTION: Before you begin trimming, only
use the appropriate type of cutting line.
CAUTION: Inspect area to be trimmed and
remove any wire, cord, or string-like objects which
could become entangled in the rotating line or spool.
Be particularly careful to avoid any wire which might
be bent outwardly into the path of the trimmer, such
as barbs at the base of a chain linkfence.
OPERATION
WARNING: To reduce the risk of
serious personal injury, turn unit off and
disconnect it from power source before making
any adjustments or removing/installing
attachments or accessories. An accidental start-up
can causeinjury.
Releasing the Cutting Line
For shipping purposes, the cutting line is taped to the
spoolhousing.
1. Remove the tape holding the cutting line to the
spoolhousing.
2. See Replacing the Spool for instructions for removing
thespool.
Attaching Extension Cord (Fig. A)
An extension cord retainer
3
is built into the switch handle
that prevents the cord from comingunplugged.
1. To use this feature, simply double the extension cord
about 8" (203mm) from the end, and loop it around the
cord retainer
3
. Gently tug on the cord to insure that it
is firmly retained in the trimmer’shandle.
2. Plug the receptacle end of the extension cord into the
power cord plug
4
in the trimmer.
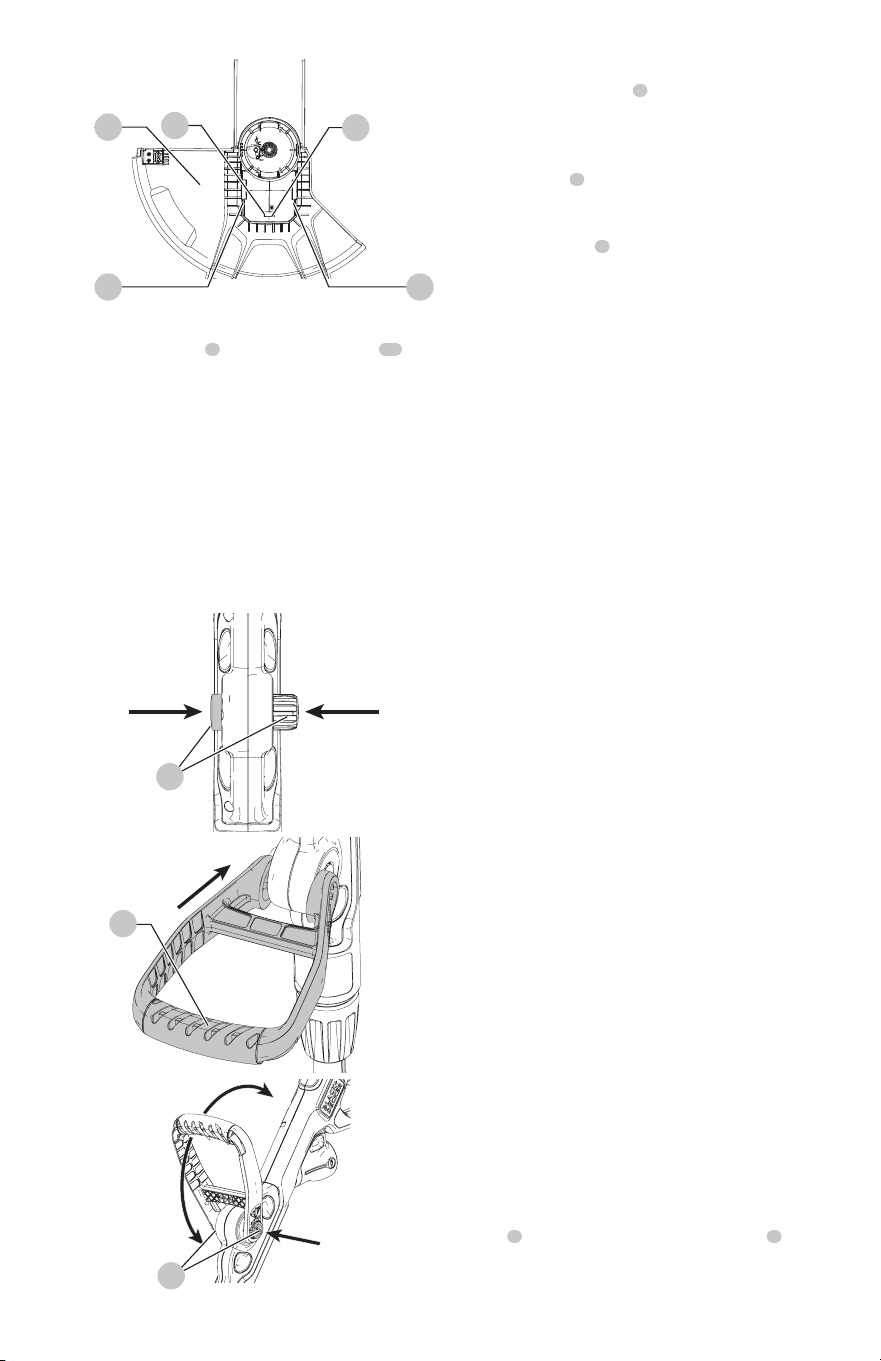
Attaching the Auxiliary Handle (Fig. E, F, G)
1. To attach the handle
6
, press in on the buttons
16
on
both sides of the upper housing as shown in Fig. E.
2. Position the handle as shown in Fig. F, matching up the
grooved side of the handle with the grooved button.
Partially push the handle on so that it will hold the
buttons in when you release them with your hand.
3. Push the handle completely onto the housing and
position it slightly until it “snaps” into place.
4. To adjust the handle up or down, press in on the
button and raise or lower the handle as shown in Fig. G.
5. The handle should be adjusted so that your front arm is
straight when the trimmer is in the workingposition.
Fig. E
16
Fig. F
6
Fig. G
16
Fig. D
9
14
12 12
15
Loading ...
Loading ...
Loading ...