Loading ...
Loading ...
Loading ...
CAREANDCLEANING
RemovableParts
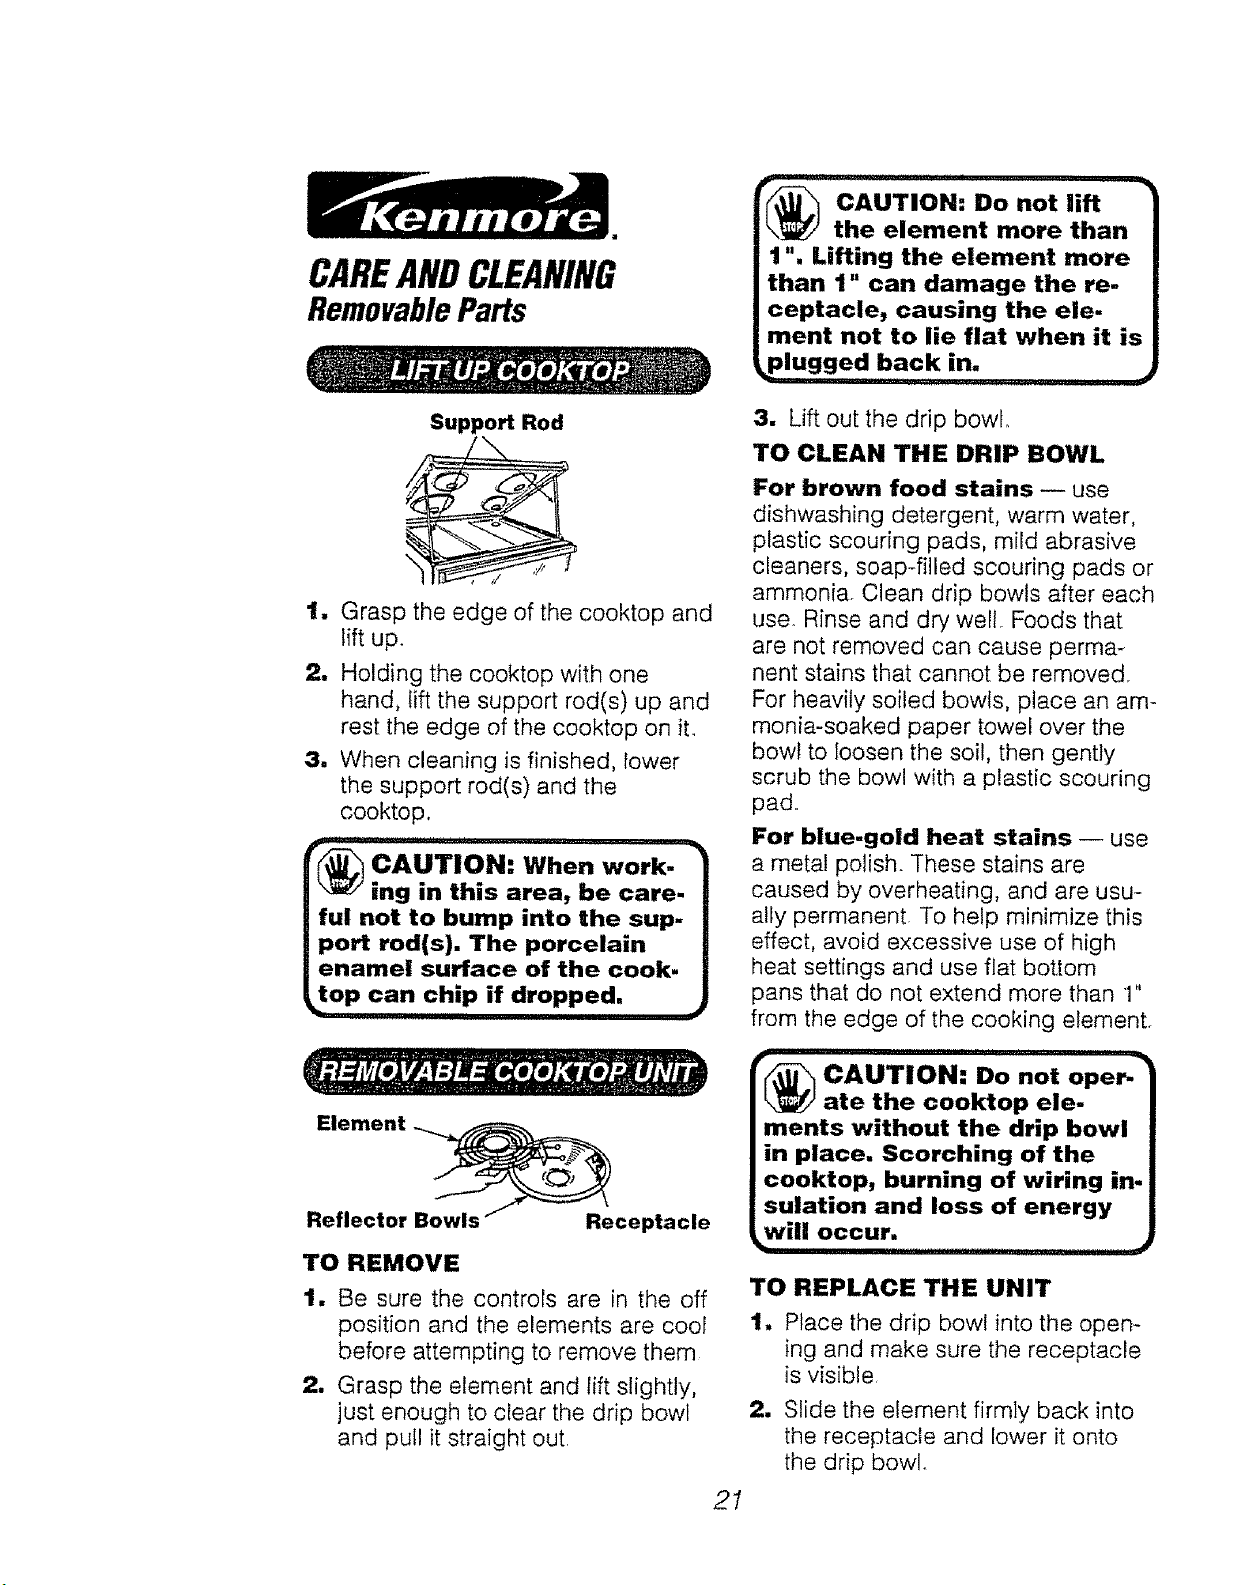
Suppo_ Rod
_ AUTION: Do not lift
the element more than
1 ", Lifting the element more
than 1" can damage the re-
ceptacle, causing the ele-
ment not to lie flat when it is
_plugged back in.
i -, .......................... 4
1. Grasp the edge of the cooktop and
lift up.
2. Holding the cooktop with one
hand, lift the support rod(s) up and
rest the edge of the cooktop on it,
3. When cleaning is finished, lower
the support rod(s) and the
cooktop,
r(_ CAUTION: When work-"
ing in thin area, be care.
ful not to bump into the sup-
port rod(s). The porcelain
enamel surface of the cook-
_top can chip if dropped,
i1,11111,1111,1111ii,,, i
TO REMOVE
1. Be sure the controls are in the off
position and the elements are cool
before attempting to remove them
2. Grasp the element and lift slightly,
just enough to clear the drip bowl
and pull it straight out.
3. Lift out the drip bowl,.
TO CLEAN THE DRIP BOWL
For brown food stains -- use
dishwashing detergent, warm water,
plastic scouring pads, mild abrasive
cleaners, soap-filled scouring pads or
ammonia. Clean drip bowls after each
use. Rinse and dry well Foods that
are not removed can cause perma-
nent stains that cannot be removed.
For heavily soiled bowls, place an am-
monia-soaked paper towel over the
bowl to loosen the soil, then gently
scrub the bowl with a plastic scouring
pad.
For blue-gold heat stains -- use
a metal polish. These stains are
caused by overheating, and are usu-
ally permanent To help minimize this
effect, avoid excessive use of high
heat settings and use flat bottom
pans that do not extend more than 1"
from the edge of the cooking element.
lip,,, ii
r_ CAUTION: Do not oper-
ate the cooktop ele-
ments without the drip bowl
in place. Scorching of the
cooktop, burning of wiring in-
sulation and loss of energy
_will occur.
TO REPLACE THE UNIT
1. Place the drip bowl into the open-
ing and make sure the receptacle
is visible.
2. Slide the element firmly back into
the receptacle and lower it onto
the drip bowl.
2I
Loading ...
Loading ...
Loading ...