Loading ...
Loading ...
Loading ...
G. Hood
1. Remove agitator speed actuator button.
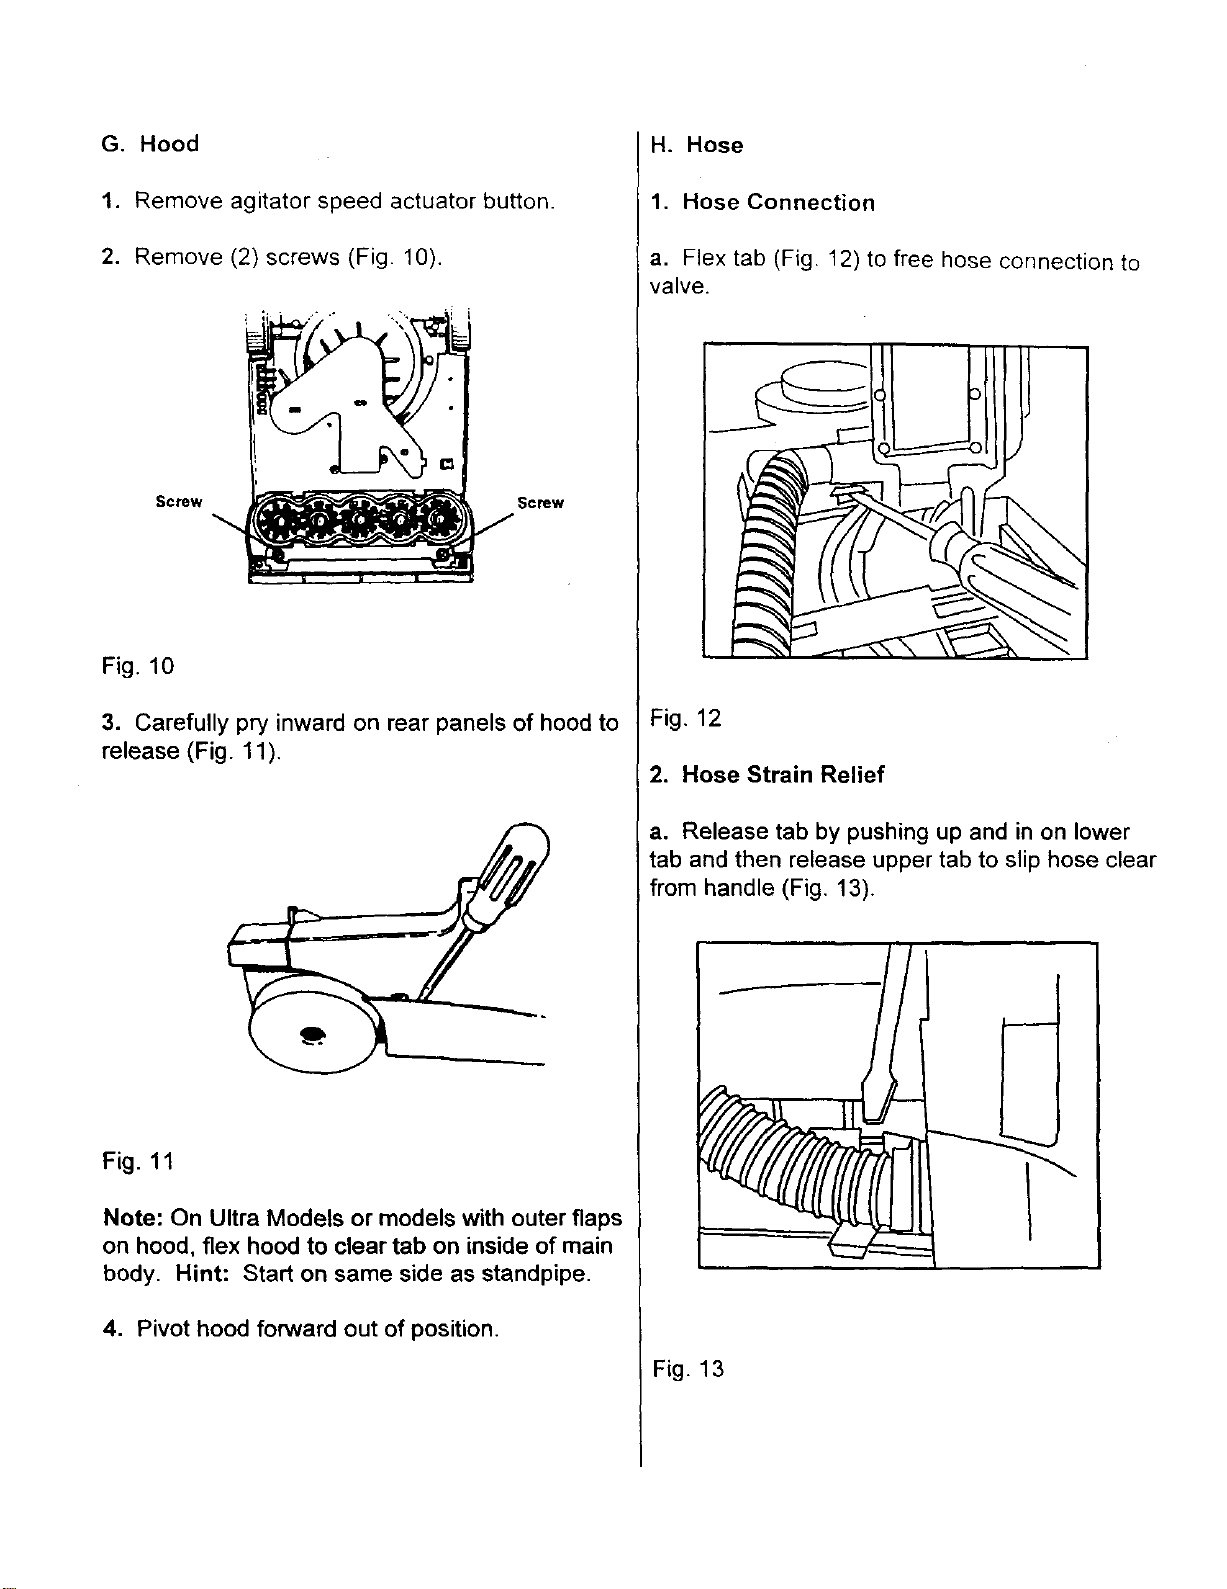
2. Remove (2) screws (Fig. 10).
Screw
_crew
Fig. 10
3. Carefully pry inward on rear panels of hood to
release (Fig. 11).
Fig. 11
Note: On Ultra Models or models with outer flaps
on hood, flex hood to clear tab on inside of main
body. Hint: Start on same side as standpipe.
4. Pivot hood forward out of position.
H. Hose
1. Hose Connection
a. Flex tab (Fig. 12) to free hose connection to
valve.
Fig. 12
2. Hose Strain Relief
a. Release tab by pushing up and in on lower
tab and then release upper tab to slip hose clear
from handle (Fig. 13).
Fig. 13
Loading ...
Loading ...
Loading ...