Loading ...
Loading ...
Loading ...
7
STEP 2 Set up the Laser Cinema
To begin setting up the Laser Cinema, we strongly recommend that TWO people move it from one place
to another because of the weight. Be sure to protect the lens when you handle this device.
STEP 1 Mount the Screen
If you purchased a screen from Hisense to include with your Laser Cinema, then refer to the Screen
Installation Guide that’s included in the package.
1. Now, to get started, we recommend that you connect all cables to the
ports on the back of the Laser Cinema before you position it. (Audio,
video, Ethernet cables and external devices are not included.)
2. Position the Laser Cinema so it is parallel with the screen surface.
We recommend the distance from the back panel of the Laser
Cinema to the wall to be 8 1/8 inches.
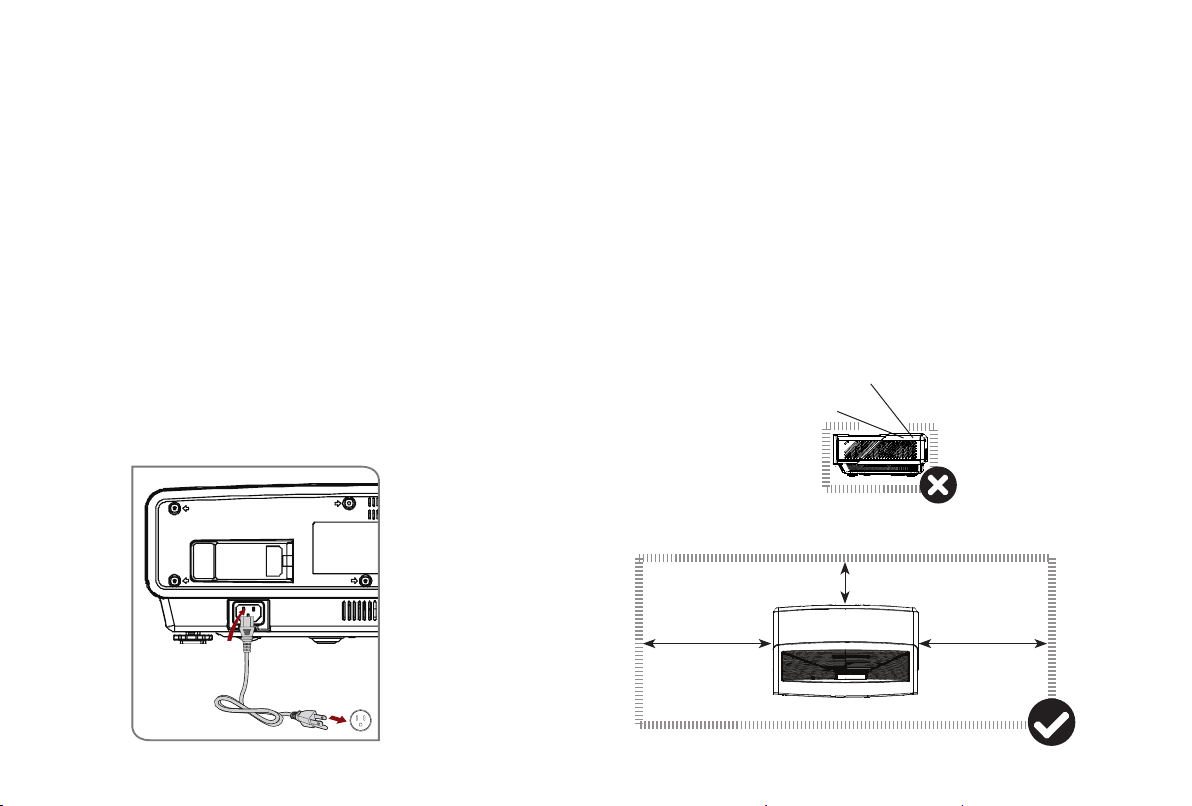
3. Plug the power cord into a wall outlet.
4. Press the POWER button to turn on the Laser Cinema.
Power Cord
Wall Outlet
8 in8 in
2 in
WARNING: Insufficient ventilation space will cause this
device to overheat or become damaged.
• Do not block the air vents or place any object on this device.
• Do not place this device in any narrow, enclosed or poorly
ventilated space.
At a minimum, leave the amount of space shown in the diagram
below for this device to have proper ventilation.
Laser beam
Loading ...
Loading ...
Loading ...