Loading ...
Loading ...
Loading ...
15
ninjakitchen. co.uk
14
ninjakitchen. co.uk
1 Plug in motor base and place on a
clean, dry, level surface such as a
worktop or table.
2 Add ingredients to the Single-Serve
Cup. DO NOT add ingredients past
the MAX LIQUID line.
3 Install the Pro Extractor Blades®
Assembly onto the top of the cup. Twist
the lid clockwise until it’s sealed tightly.
4 Turn the cup upside down and install on
the motor base. Align the tabs on the cup
with the slots on the base, then rotate
cup clockwise until it clicks into place.
Once the cup is locked in place, press
the Power button to turn unit on. The
available program buttons will illuminate
and the unit will be ready for use.
IMPORTANT: Review all warnings on
pages 4–7 before proceeding.
IMPORTANT: If the control panel is
flashing, this means the lid is not locked
in place correctly. Review the steps
2-4 to ensure you are installing the
disc adapter, ingredients, disc and lid
correctly.
NOTE: Auto-IQ® programs have pauses
and changes in speed throughout
the cycle.
USING THE SINGLE-SERVE CUP
5a If using an Auto-IQ® program, first select
the program that best suits your recipe.
The preset feature will automatically
stop at the end of the program. To stop
the unit at any time, press the currently
active program again.
5b If using a manual program, select your
desired speed. Once the ingredients
have reached your desired consistency,
press the active button again and wait
for the unit to come to a complete stop.
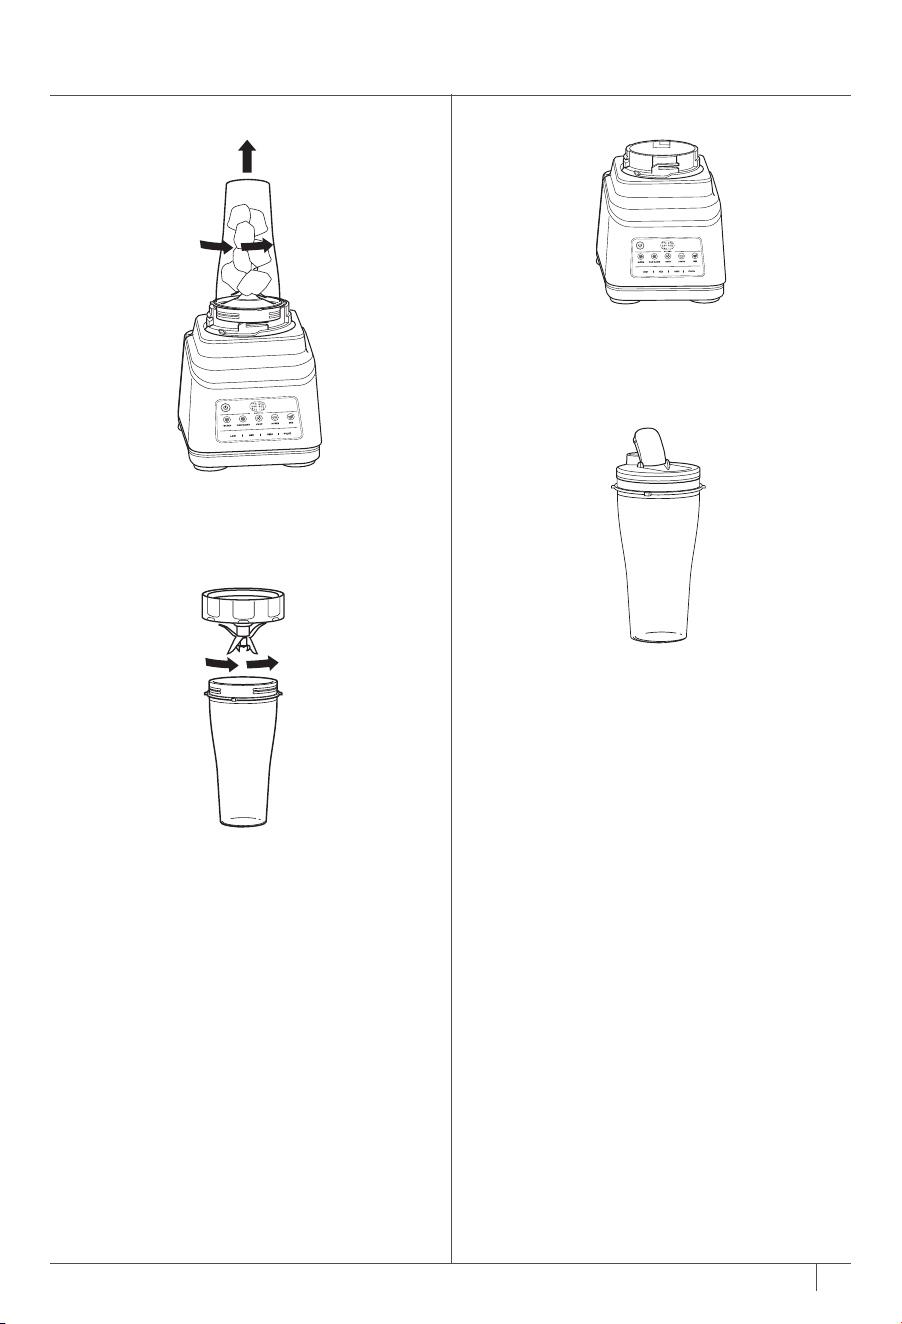
6 To remove the cup from the motor
base, turn the cup anti-clockwise and
then lift up.
7 Remove the Pro Extractor Blades®
Assembly by twisting the lid anti-
clockwise. DO NOT store blended
contents with Pro Extractor Blades®
Assembly attached. Exercise care when
handling the blade assembly, as the
blades are sharp.
8 Turn the unit o by pressing the Power
button. Unplug the unit when finished.
Refer to the Care & Maintenance section
for cleaning and storage instructions.
9 To enjoy your drink on the go, place
the Spout Lid onto the Single-Serve
Cup and twist lid clockwise until firmly
sealed. For storing ingredients in the
cup, use only the Spout Lid to cover.
Loading ...
Loading ...
Loading ...