Loading ...
Loading ...
Loading ...
REPLACESPARKPLUG
Replacethesparkplugeach.yearto
ensuretheenginestartseasierand
runsbetter.Setsparkpluggapat
0.025in. Ignitiontimingisfixed and
nonadjustable.
1. Twist, then pull off spark plug boot.
2. Remove spark plug from cylinder
and discard.
3. Replace with Champion RCJ-TY
spark plug and tighten with a 3/4
in. socket wrench (10-12 ft.-Ibs).
4. Reinstall the spark plug boot.
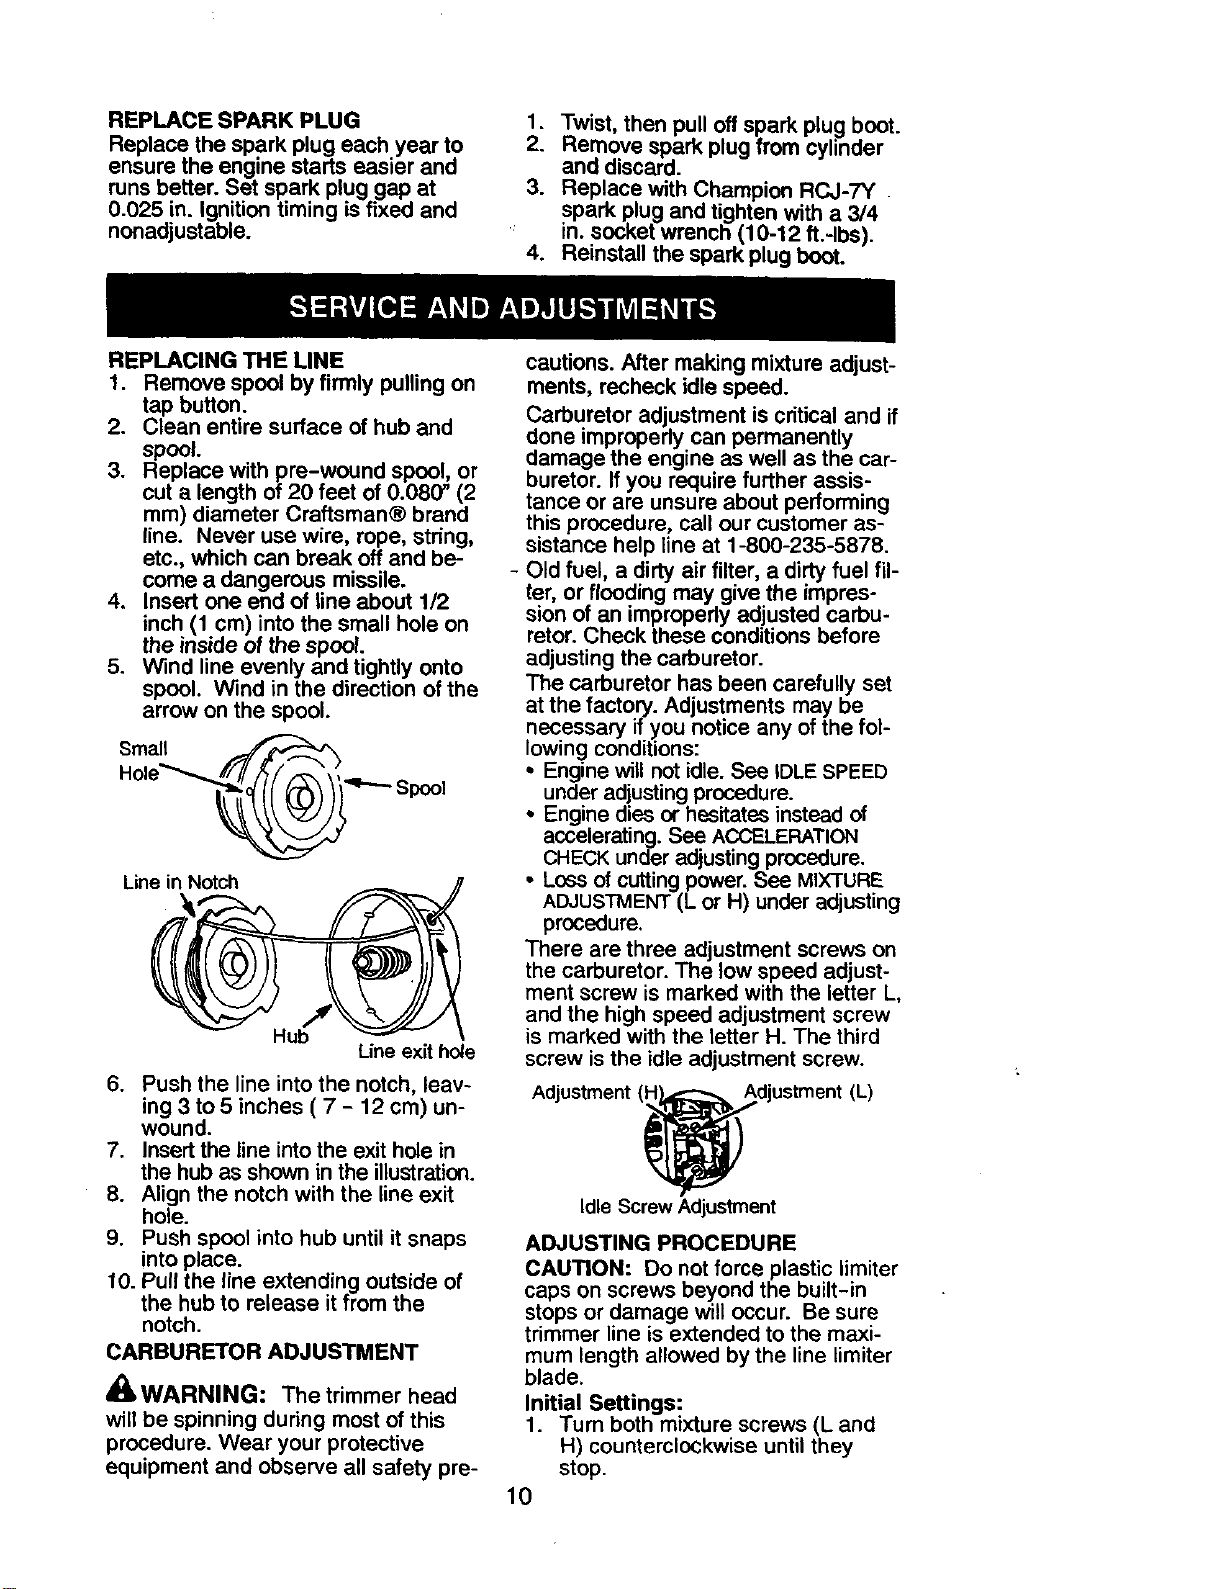
REPLACING THE LINE
1. Remove spool by firmly pulling on
tap button.
2. Clean entire surface of hub and
spool.
3. Replace with pre-wound spool, or
cut a length of 20 feet of 0.08(7' (2
ram) diameter Craftsman® brand
line. Never use wire, rope, string,
etc., which can break off and be-
come a dangerous missile.
4. Insert one end of line about 1/2
inch (1 cm) into the small hole on
the inside of the spool.
5. Wind line evenly and tightly onto
spool. Wind in the direction of the
arrow on the spool
Small
Hole'--_,t///_(_l.,_.." Spool
Line in Notch
Hub
Line exit hole
6. Push the line into the notch, leav-
ing 3 to 5 inches ( 7 - 12 cm) un-
wound.
7. Insert the line into the exit hole in
the hub as shown in the illustration.
8. Align the notch with the line exit
hole.
9. Push spool into hub until it snaps
into place.
t0. Pull the line extending outside of
the hub to release it from the
notch.
CARBURETOR ADJUSTMENT
_;_ WARNING: The trimmer head
will be spinning during most of this
procedure. Wear your protective
equipment and observe all safety pre-
cautions. After making mixture adjust-
ments, recheck idle speed.
Carburetor adjustment is critical and if
done improperly can permanently
damage the engine as well as the car-
buretor. If you require further assis-
tance or are unsure about performing
this procedure, call our customer as-
sistance help line at 1-800-235-5878.
Old fuel, a dirty air filter, a dirty fuel fil-
ter, or flooding may give the impres-
sion of an improperly adjusted carbu-
retor. Check these conditions before
adjusting the carburetor.
The carburetor has been carefully set
at the factory. Adjustments may be
necessary if you notice any of the fol-
lowing conditions:
• Engine will not idle. See IDLE SPEED
under adjusting procedure.
• Engine dies or hesitates instead of
accelerating. See ACCELERATION
CHECK under adjusting procedure.
• Loss of cutting power. See MIXTURE
ADJUSTMENT (L or H) under adjusting
procedure.
There are three adjustment screws on
the carburetor. The low speed adjust-
ment screw is marked with the letter L,
and the high speed adjustment screw
is marked with the letter H. The third
screw is the idle adjustment screw.
Adjustment (_djustment (L)
Idle Screw Adjustment
ADJUSTING PROCEDURE
CAUTION: Do not force plastic limiter
caps on screws beyond the built-in
stops or damage will occur. Be sure
trimmer line is extended to the maxi-
mum length allowed by the line limiter
blade.
Initial Settings:
1. Turn beth mixture screws (L and
H) counterclockwise until they
stop.
10
Loading ...
Loading ...
Loading ...