User Manual Craftsman 917378644 Lawn Mower
ACCESSORIES
These accessories were available when this lawn mower was produced. They are not shipped with your mower. They are also available at most Sears retail outlets and service centers. Some of these accessories may not apply to your lawn mower.
LAWN MOWER PERFORMANCE

LAWN MOWER MAINTENANCE

ASSSEMBLY/ PRE - OPERATION
Read these instructions and this manual in its entirety before you attempt to assemble or operate your new lawn mower.
IMPORTANT: This lawn mower is shipped WITHOUT OIL OR GASOLINE in the engine.
Your new lawn mower has been assem- bled at the factory with the exception of those parts left unassembled for shipping purposes. All parts such as nuts, washers, bolts, etc., necessary to complete the as- sembly have been placed in the parts bag. To ensure safe and proper operation of your lawn mower, all parts and hardware you assemble must be tightened securely. Use the correct tools as necessary to ensure proper tightness.
TO REMOVE LAWN MOWER FROM CARTON
- Remove loose parts included with mower.
- Cut down two end corners of carton and lay end panel down flat.
- Remove all packing materials except padding between upper and lower handle and padding holding operator presence control bar to upper handle.
- Roll lawn mower out of carton and check carton thorougly for additional loose parts.
HOW TO SET UPYOUR LAWN MOWER TO UNFOLD HANDLE
IMPORTANT: Unfold handle carefully so as not to pinch or damage control cables.
- Raise handles until lower handle sec- tion locks into place in mowing position.
- Remove protective padding, raise up- per handle section into place on lower handle and tighten both handle knobs.
- Remove handle padding holding operator presence control bar to upper handle.
Your lawn mower handle can be adjusted for your mowing comfort. Refer to "AD-JUST HANDLE" in the Service and Adjust- ments section of this manual.

TO ASSEMBLE GRASS CATCHER
- Put grass catcher frame into grass bag with rigid part of bag on the bottom. Make sure the frame handle is outside of the bag top.
- Slip vinyl bindings over frame.
NOTE: If vinyl bindings are too stiff, hold them in warm water for a few minutes. If bag gets wet, let it dry before using.

TO INSTALL ATTACHMENTS
Your lawn mower was shipped ready to be used as a mulcher. To convert to bag- ging, see "TO CONVERT MOWER" in the Operation section of this manual.
OPERATATION
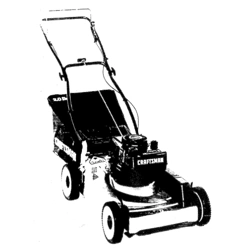
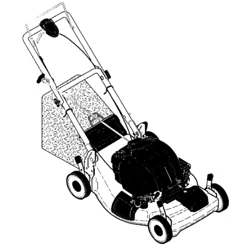
KNOW YOUR LAWN MOWER
READ THIS OWNER'S MANUAL AND ALL SAFETY RULES BEFORE OPERATING YOUR LAWN MOWER. Compare the illustrations with your lawn mower to familiarize yourself with the location of various controls and adjustments. Save this manual for future reference.
These symbols may appear on your lawn mower or in literature supplied with the product. Learn and understand their meaning.


IMPORTANT: This lawn mower is shipped WITHOUT OIL OR GASOLINE in the engine.
MEETS CPSC SAFETY REQUIREMENTS
Sears rotary walk-behind power lawn mowers conform to the safety standards of the American National Standards Institute and the U.S. Consumer Product Safety Com- mission. The blade turns when the engine is running.
Operator presence control bar - must be held down to the handle to start the engine. Release to stop the engine.
Starter handle - used for starting engine.
Primer - pumps additional fuel from the carburetor to the cylinder for use when starting a cold engine.
Drive control bar - used to engage power-propelled forward motion of lawn mower.
Throttle control - used for starting the engine and allows you to select either FAST or SLOW engine speed.
 The operation of any lawn mowercan result inforeign objects thrown intothe eyes,which can result in severe eye damage. Always wear safety glassesor eye shields while operating your lawn mower or performing any adjustments or repairs. We recommend standard safety glasses or a wide vision safety mask worn over spectacles.
HOW TO USE YOUR LAWN MOWER ENGINE SPEED
The engine speed is controlled by a throttle control located on the side of the upper handle. FAST position is for starting, normal cutting, trimming and better grass bagging. SLOW position is for light cutting, trimming and fuel economy.

ENGINE ZONE CONTROL
CAUTION: Federal regulations require an engine control to be installed on this lawn mower in order to minimize the risk of blade contact injury. Do not under any circumstances attempt to defeat the function of the operator control. The blade turns when the engine is running.
- Your lawn mower is equipped with an operator presence control bar which requires the operator to be positioned behind the lawn mower handle to start and operate the lawn mower.
DRIVE CONTROL
- Self-propelling is controlled by hold- ing the operator presence control bar down to the handle and pulling the drive control bar up to the handle. The closer to the handle the bar is pulled, the faster the unit will travel.
- Forward motion will stop when either the operator presence control bar or drive control bar are released. To stop forward motion without stopping engine, release the drive control bar only. Hold operator presence control bar down against handle to continue mowing without self- propelling.
NOTE: If after releasing the drive control the mower will not roll backwards, push the mower forward slightly to disengage drive wheels.
- To keep drive control engaged when turning corners, push down on the handle to lift the front wheels off the ground while turning lawn mower.
DRIVE CONTROL ADJUSTMENT
Over time, the drive control system may become "loose", resulting in decreased speed. There is a thumbscrew on the underside of the drive control housing to increase tension on the drive cable. Proceed as follows:
- Turn unit off and disconnect spark plug wire from spark plug.
- Rotate thumbscrew counter-clockwise to tighten the drive cable.
- Operate mower to test drive speed.
- If condition fails to improve after the above steps (forward speed remains the same), your drive belt is worn and should be replaced.
NOTE: If mower begins to "creep" forward, the drive cable is too tight. Rotate thumb- screw clockwise to loosen drive cable.

TO ADJUST CUTTING HEIGHT
Raise wheels for low cut and lower wheels for high cut, adjust cutting height to suit your requirements. Medium position is best for most lawns.
- To change cutting height, squeeze ad- juster lever toward wheel. Move wheel up or down to suit your requirements. Be sure all wheels are in the same setting.
NOTE: Adjuster is properly positioned when plate tab inserts into hole in lever. Also, 9-position adjusters (if so equipped) allow lever to be positioned between the plate tabs.

TO CONVERT MOWER
Your lawn mower was shipped ready to be used as a mulcher. To convert to bagging:
- Lift rear door of the lawn mower and place the grass catcher frame hooks onto the door pivot pins.
- To convert to mulching operation, re- move grass catcher and close rear door.
CAUTION: Do not run your lawn mower without rear door closed, clipping deflector or approved grass catcher in place. Never attempt to operate the lawn mower with the rear door removed or propped open.

TO EMPTY GRASS CATCHER
- Lift up on grass catcher using the frame handle.
- Remove grass catcher with clippings from under lawn mower handle.
- Empty clippings from bag using both frame handle and bag handle.
NOTE: Do not drag the bag when empty- ing; it will cause unnecessary wear.

BEFORE STARTING ENGINE ADD OIL
Your lawnmower is shipped without oil in the engine. For type and grade of oil to use, see "ENGINE" in the Maintenance section of this manual.
CAUTION: DO NOT overfill engine with oil, or it will smoke heavily from the muffler on startup.
- Be sure lawnmower is level.
- Remove oil dipstick from oil fill spout.
- You receive a container of oil with the unit. Slowly pour the entire container down the oil fill spout into the engine.
- Insert and tighten dipstick.
IMPORTANT:
- Check oil level before each use. Add oil if needed. Fill to full line on dipstick.
- Change the oil after every 25 hours of operation or each season. You may need to change the oil more often under dusty, dirty conditions. See "TO CHANGE ENGINE OIL' in the Mainte- nance section of this manual.
ADD GASOLINE
- Fill fuel tank to bottom of tank filler neck. Do not overfill. Use fresh, clean, regular unleaded gasoline with a minimum of octane. Do not mix oil with gasoline. Purchase fuel in quantities that can be used within 30 days to assure fuel fresh- Bess.
CAUTION: Wipe off any spilled oil or fuel. Do not store, spill or use gasoline near an open flame.
CAUTION: Alcohol blended fuels called gasohol or using ethanol or metha- nol) can attract moisture which leads to separation and formation of acids during storage. Acidic gas can damage the fuel system of an engine while in storage. To avoid engine problems, the fuel system should be emptied before storage of 30 days or longer. Empty the gas tank, start the engine and let it run until the fuel lines and carburetor are empty. Use fresh fuel next season. See Storage Instructions for additional information. Never use engine or carburetor cleaner products in the fuel tank or permanent damage may occur.

TO STOP ENGINE
- To stop engine, release operator pres- ence control bar.
TO START ENGINE
NOTE: Due to protective coatings on the engine, a small amount of smoke may be present during the initial use of the prod- uct and should be considered normal.
- To start a cold engine, push primer three times before trying to start. Use a firm push. This step is not usually necessary when starting an engine which has al- ready run for a few minutes.
- Move throttle control to FAST position.
- Hold operator presence control bar down to the handle and pull starter handle quickly. Do not allow starter rope to snap back.
NOTE: Incooler weather it may be necessary to repeat priming steps. In warmer weather over priming may cause flooding and engine will not start. If you do flood engine, wait a few minutes before attempting to start and do not repeat priming steps.
MOWING TIPS
CAUTION: Do not use de-thatcher blade attachments on your mower. Such attachments are hazardous, will damage your mower and could void your warranty.
- Under certain conditions, such as very tall grass, it may be necessary to raise the height of cut to reduce pushing effort and to keep from overloading the engine and leaving clumps of grass clip- pings. It may also be necessary to re- duce ground speed and/or run the lawn mower over the area a second time.
- For extremely heavy cutting, reduce the width of cut by overlapping previously cut path and mow slowly.
- For better grass bagging and most cut- ting conditions, the engine speed should be set in the FAST position.
- When using a rear discharge lawn mower in moist, heavy grass, clumps of cut grass may not enter the grass catcher. Reduce ground speed (pushing speed) and/or run the lawn mower over the area a second time.
- If a trail of clippings is left on the right side of a rear discharge mower, mow in a clockwise direction with a small overlap to collect the clippings on the next pass.
- Pores in cloth grass catchers can be- come filled with dirt and dust with use and catchers will collect less grass. To prevent this, regularly hose catcher off with water and let dry before using.
- Keep top of engine around starter clear and clean of grass clippings and chaff. This will help engine air flow and extend engine life.
MULCHING MOWING TIPS
IMPORTANT: For best performance, keep mower housing free of built-up grass and trash. See "CLEANING" in the Mainte- nance section of this manual.
- The special mulching blade will recut the grass clippings many times and reduce them in size so that as they fall onto the lawn they will disperse into the grass and not be noticed. Also, the mulched grass will biodegrade quickly to provide nutrients for the lawn. Always mulch with your highest engine (blade) speed as this will provide the best recut- ting action of the blades.
- Avoid cutting your lawn when it is wet. Wet grass tends to form clumps and interferes with the mulching action. The best time to mow your lawn is the early afternoon. At this time the grass has dried, yet the newly cut area will not be exposed to direct sunlight.
- For best results, adjust the lawn mower cutting height so that the lawn mower cuts off only the top one-third of the grass blades. If the lawn is overgrown it will be necessary to raise the height of cut to reduce pushing effort and to keep from overloading the engine and leaving clumps of mulched grass. For extremely heavy grass, reduce your width of cut by overlapping previously cut path and mow slowly.

- Certain types of grass and grass conditions may require that an area be mulched a second time to completely hide the clippings. When doing a second cut, mow across (perpendicular) to the first cut path.
- Change your cutting pattern from week to week. Mow north to south one week then change to east to west the next week. This will help prevent matting and graining of the lawn.
MAINTENACE

GENERAL RECOMMENDATIONS
The warranty on this lawn mower does not cover items that have been subjected to operator abuse or negligence. To receive full value from the warranty, operator must maintain unit as instructed in this manual. Some adjustments will need to be made periodically to properly maintain your unit.
- At least once a season, check to see if you should make any of the adjustments described in the Service and Adjustments section of this manual.
- At least once a year, replace the spark plug, clean or replace air filter element and check blade for wear. A new spark plug and clean/new air filter element assure proper air-fuel mixture and help your engine run better and last longer.
- Follow the maintenance schedule in this manual.
BEFORE EACH USE
- Check engine oil level.
- Check for loose fasteners.
LUBRICATION
Keep unit well lubricated
See "LUBRICATION CHART").
LUBRICATION CHART

- Spray lubricant
- See "ENGINE" in Maintenance section.
IMPORTANT: Do not oil or grease plastic wheel bearings. Viscous lubricants will attract dust and dirtthatwill shorten the life of the self-lubricating bearings. If you feel they must be lubricated, use only a dry, powdered graphite type lubricant sparingly.
LAWN MOWER
Always observe safety rules when per- forming any maintenance.
TIRES
- Keep tires free of gasoline, oil, or insect control chemicals which can harm rubber.
- Avoid stumps, stones, deep ruts, sharp objects and other hazards that may cause tire damage.
DRIVE WHEELS
Check front drive wheels each time before you mow to be sure they move freely. The wheels not turning freely means trash, grass cuttings, etc. are in the drive wheel area and must be cleaned to free drive wheels. If necessary to clean the drive wheels, be sure to clean both front wheels.
- Remove hubcaps, Iocknuts & washers.
- Remove wheels from wheel adjusters.
- Remove any trash or grass cuttings from inside the dust cover, pinion and/ or drive wheel gear teeth.
- Put wheels back in place.
NOTE: If after cleaning, the drive wheels do not turn freely, contact a Sears or other qualified service center.
BLADE CARE
For best results, mower blade must be kept sharp. Replace a bent or damaged blade.
TO REMOVE BLADE
1. Disconnect spark plug wire from spark plug and place wire where it cannot come in contact with spark plug.
2. Turn lawn mower on its side. Make sure air filter and carburetor are up.
3. Use a wood block between blade and mower housing to prevent blade from turning when removing blade bolt.
NOTE: Protect your hands with gloves and/or wrap blade with heavy cloth.
4. Remove blade bolt by turning counter- clockwise.
5. Remove blade and attaching hard- ware (bolt, lock washer and hardened washer).
TO REPLACE BLADE
1. Position blade on the blade adapter aligning the two (2) holes in the blade with the raised lugs on the adapter.
2. Be sure the trailing edge of blade (op- posite sharp edge) is up toward the engine.
3. Install the blade bolt with the lock washer and hardened washer into blade adapter and crankshaft.
4. Use block of wood between blade and lawn mower housing and tighten the blade bolt, turning clockwise.
- The recommended tightening torque is ft. Ibs.
IMPORTANT: Blade bolt is heat treated. If bolt needs replacing, replace only with approved bolt shown in the Repair Parts section of this manual.

TO SHARPEN BLADE
NOTE: We do not recommend sharpening the blade - but if you do, be sure the blade is balanced. Care should be taken to keep the blade balanced. An unbalanced blade will cause eventual damage to lawn mower or engine.
- The blade can be sharpened with a file or on a grinding wheel. Do not attempt to sharpen while on the mower.
- To check blade balance, drive a nail into a beam or wall. Leave about one inch of the straight nail exposed. Place center hole of blade over the head of the nail. If blade is balanced, it should remain in a horizontal position. If either end of the blade moves downward, sharpen the heavy end until the blade is balanced.
GRASS CATCHER
- The grass catcher may be hosed with water, but must be dry when used.
- Check your grass catcher often for dam- age or deterioration. Through normal use it will wear. If catcher needs replac- ing, replace only with approved replace- ment catcher shown in the Repair Parts section of this manual. Give the lawn mower model number when ordering.
GEAR CASE
- To keep your drive system working properly, the gear case and area around the drive should be kept clean and free of trash build-up. Clean under the drive cover twice a season.
- The gear case is filled with lubricant to the proper level at the factory.The only time the lubricant needs attention is if service has been performed on the gear case.
- If lubricant is required,useonly ELF MultisEP00. Do not substitute.
ENGINE LUBRICATION
Use only high quality detergent oil rated with API service classification SF-SJ. Select the oil's SAE viscosity grade according to your expected operating temperature.

NOTE: Although multi-viscosity oils (W30, 10W30 etc.) improve starting in cold weather, these multi-viscosity oils will result in increased oil consumption when used above 32°E Check your engine oil level more frequently to avoid possible engine damage from running low on oil. Change the oil after every 25 hours of operation or at least once a year if the lawn mower is not used for 25 hours in one year. Check the crankcase oil level before starting the engine and after each five (5) hours of continuous use. Tighten oil plug securely each time you check the oil level.
TO CHANGE ENGINE OIL
NOTE: Before tipping lawn mower to drain oil, empty fuel tank by running engine until fuel tank is empty.
1. Disconnect spark plug wire from spark plug and place wire where it cannot come in contact with spark plug.
2. Remove engine oil cap; lay aside on a clean surface.
3. Tip lawn mower on its side as shown and drain oil into a suitable container. Rock lawn mower back and forth to re- move any oil trapped inside of engine.

4. Wipe off any spilled oil from lawn mower or side of engine.
5. Slowly pour oil down the oil fill spout, stopping every few ounces to check the oil level with the dipstick.
6. Stop adding oil when you reach the FULL mark on the dipstick. Wait a minute to allow oil to settle.
7. Continue adding small amounts of oil, rechecking the dipstick until oil level settles at FULL. DO NOT overfill, or engine will smoke heavily from the muffler on startup.
8. Always be sure to retighten oil dipstick before starting engine.
9. Reconnect spark plug wire to plug.
AIR FILTER
Your engine will not run properly using a dirty air filter. Clean the foam pre-cleaner after every 25 hours of operation or every season. Replace paper cartridge every hours of operation or every season, whichever occurs first. Service air cleaner more often under dusty conditions.
1. Loosen screws and remove cover.
2. Carefully remove cartridge.
3. Clean by gently tapping on a flat sur- i face. If very dirty, replace cartridge.
CAUTION: Petroleum solvents, such as kerosene, are not to be used to clean car- tridge. They may cause deterioration of the cartridge. Do not oil cartridge. Do not use pressurized air to clean or dry cartridge.
4. Install cartridge, then replace cover.

MUFFLER
Inspect and replace corroded muffler as it could create a fire hazard and/or damage.
SPARK PLUG
Replace spark plug at the beginning of each mowing season or after every 100 hours of operation, whichever occurs first. Spark plug type and gap setting are shown in the "PRODUCT SPECIFIC ATIONS" section of this manual.
CLEANING
IMPORTANT: For best performance, keep mower housing free of built-up grass and trash. Clean the underside of your mower after each use.
CAUTION: Disconnect spark plug wire from spark plug and place wire where it cannot come in contact with spark plug.
- Clean the underside of your lawn mower by scraping to remove build-up of grass and trash.
- Clean engine often to keep trash from accumulating. A clogged engine runs hotter and shortens engine life.
- Keep finished surfaces and wheels free of all gasoline, oil, etc.
- We do not recommend using a garden hose to clean lawn mower unless the electrical system, muffler, air filter and carburetor are covered to keep water out. Water in engine can result in short- ened engine life.
CLEAN UNDER DRIVE COVER
Clean under drive cover at least twice a season. Scrape underside of cover with putty knife or similar tool to remove any build-up of trash or grass on underside of drive cover.
SEVICE AND ADJUSTMENTS
WARNING: To avoid serious injury, before performing any service or adjust- ments:
- Release control bar and stop engine.
- Make sure the blade and all moving parts have completely stopped.
- Disconnect spark plug wire from spark plug and place wire where it cannot come in contact with spark plug.
LAWN MOWER
TO ADJUST CUTTING HEIGHT
See "TO ADJUST CUTTING HEIGHT" in the Operation section of this manual.
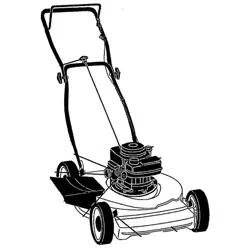
REAR DEFLECTOR
The rear deflector, attached between the rear wheels of your mower, is provided to minimize the possibility that objects will be thrown out of the rear of the mower into the operator's mowing position. If the deflector becomes damaged, it should be replaced.
TO REMOVE DRIVE BELT
- Remove drive cover and belt keeper.
- Remove belt from gearcase pulley by pushing down on pulley and rolling belt off it.
- Turn lawn mower on its side with air filter and carburetor down.
- Remove blade and debris shield.
- Remove belt from engine pulley on crankshaft.
TO REPLACE DRIVE BELT
- Install new belt on engine pulley.
- Reinstall debris shield and blade.
- Return mower to upright position.
- Install new belt on gearcase pulley.
- Reinstall belt keeper and drive cover.
NOTE: Always use factory approved belt to assure fit and long life.

TO ADJUST HANDLE
The handle can be mounted in a high or low position. The mounting holes in the bottom of lower handle are off center for raising or lowering the handle.
- Remove upper handle and all parts attached to lower handle.
- Remove hairpin cotters from lower handle bracket mounting pin.
- Squeeze lower handle in to remove it from mounting pins.
- Turn lower handle over to raise or lower handle.
- Squeeze lower handle in and position holes onto mounting pins on handle bracket.
- Reassemble upper handle and all parts removed from lower handle.

ENGINE
ENGINE SPEED
Your engine speed has been factory set. Do not attempt to increase engine speed or it may result in personal injury. If you believe that the engine is running too fast or too slow, take your lawn mower to a Sears or other qualified service center for repair and adjustment.
CARBURETOR
Your carburetor is not adjustable. If your engine does not operate properly due to suspected carburetor problems, take your lawn mower to a Sears or other qualified service center for repair and/or adjust- ment.
IMPORTANT: Never tamper with the engine governor, which is factory set for proper engine speed. Overspeeding the engine above the factory high speed setting can be dangerous. If you think the engine-governed high speed needs adjusting, contact a Sears or other qualified service center, which has proper equipment and experience to make any necessary adjustments.
STORAGE
Immediately prepare your lawn mower for storage at the end of the season or if the unit will not be used for 30 days or more.
LAWN MOWER
When mower is to be stored for a period of time, clean it thoroughly, remove all dirt, grease, leaves, etc. Store in aclean, dryarea.
- Clean entire lawn mower (See CLEANING" in the Maintenance sec- tion of this manual).
- Lubricate as shown in the Maintenance section of this manual.
- Be sure that all nuts, bolts, screws, and pins are securely fastened. Inspect moving parts for damage, breakage and wear. Replace if necessary.
- Touch up all rusted or chipped paint surfaces; sand lightly before painting.
HANDLE
You can fold your mower handle for storage.
NOTE: The upper handle has an "anti-fold" bracket located on the right side of the handle. This bracket prevents the upper handle from folding forward, which helps protect control cable(s) from damage.
- Squeeze the bottom ends of the lower handle toward each other until the lower handle clears the handle bracket, then move handle forward.
- Loosen upper handle mounting bolts enough to allow upper handle to be folded back.
IMPORTANT: When folding the handle for storage or transportation, be sure to fold the handle as shown or you may damage the control cables.
- When setting up your handle from the storage position, the lower handle will automatically lock into mowing position.

ENGINE
FUEL SYSTEM
IMPORTANT: It is important to prevent gum deposits from forming in essential fuel system parts such as carburetor, fuel filter, fuel hose, or tank during storage. Also, alcohol blended fuels (called gasohol or using ethanol or methanol) can attract moisture which leads to separation and formation of acids during storage. Acidic gas can damage the fuel system of an engine while in storage.
- Empty the fuel tank by starting the en- gine and letting it run until the fuel lines and carburetor are empty.
- Never use engine or carburetor cleaner products in the fuel tank or permanent damage may occur.
- Use fresh fuel next season.
NOTE: Fuel stabilizer is an acceptable alternative in minimizing the formation of fuel gum deposits during storage. Add stabilizer to gasoline in fuel tank or stor- age container. Always follow the mix ratio found on stabilizer container. Run engine at least 10 minutes after adding stabilizer to allow the stabilizer to reach the car- buretor. Do not empty the gas tank and carburetor if using fuel stabilizer.
ENGINE OIL
Drain oil (with engine warm) and replace with clean engine oil. (See "ENGINE" in the Maintenance section of this manual).
CYLINDER
- Remove spark plug.
- Pour one ounce (29 ml) of oil through spark plug hole into cylinder.
- Pull starter handle slowly a few times to distribute oil.
- Replace with new spark plug.
OTHER
- Do not store gasoline from one season to another.
- Replace your gasoline can if your can starts to rust. Rust and/or dirt in your gasoline will cause problems.
- If possible, store your unit indoors and cover it to protect it from dust and dirt.
- Cover your unit with a suitable protective cover that does not retain moisture. Do not use plastic. Plastic cannot breathe, which allows condensation to form and will cause your unit to rust.
IMPORTANT: Never cover mower while engine and exhaust areas are still warm.
CAUTION: Never store the lawn mower with gasoline in the tank inside a building where fumes may reach an open flame or spark. Allow the engine to cool before stor- ing in any enclosure.
TROUBLESHOOTING
- See appropriate section in manual unless directed to a Sears Service Center.
Does not start
1. Dirty air filter.
- Clean/replace air filter.
2. Out of fuel.
3. Stale fuel.
- Empty fuel tank and refill tank with fresh, clean gasoline.
4. Water in fuel.
- Empty fuel tank and refill tank with fresh, clean gasoline.
5. Spark plug wire is disconnected.
6. Bad spark plug.
7. Loose blade or broken blade adapter.
- Tighten blade bolt or replace blade adapter.
8. Control bar in released position.
- Depress control bar to handle.
9. Control bar defective.
10. Fuel valve lever (if so equipped) in OFF position.
- Turn fuel valve lever to the ON position.
11. Weak battery (if equipped).
12. Disconnected battery connector (if equipped).
- Connect battery to engine.
Loss of power
1. Rear of mower housing or blade dragging in grass.
2. Cutting too much grass.
3. Dirty air filter.
- Clean/replace air filter.
4. Buildup of grass, leaves, and trash under mower
- Clean underside of mower housing..
5. Too much oil in engine.
6. Walking speed too fast.
- Cut at slower walking speed. blade dragging in grass.
Poor cut -uneven
1. Worn, bent or loose blade.
- Replace blade. Tighten blade bolt.
2. Wheel heights uneven.
- Set all wheels at same height.
3. Buildup of grass, leaves and trash under mower.
- Clean underside of mower housing.
Excessive vibration
1. Worn, bent or loose blade.
- Replace blade. Tighten blade bolt.
2. Bent engine crankshaft.
- Contact a Sears or other qualified service center.
Starter rope hard to pull
1. Engine flywheel brake is on when control bar is released.
- Depress control bar to upper handle before pulling the starter rope.
2. Bent engine crankshaft.
- Contact a Sears or other qualified service center.
3. Blade adapter broken.
4. Blade dragging in grass.
- Move lawn mower to cut grass or to hard surface.