
Loading ...
Loading ...
Loading ...
Page. 20
4. If appliance leaks, repair all gas leaks immediately. Do
not over-torque the junctions, orifices or nuts, or bend
the gas tubes.
5. If applicable, repeat for the auxiliary bake orifice.
6. If the appliance has been satisfactorily leak checked,
turn off the gas and electric supplies. Reinstall the
auxiliary bake burner mounting bracket, if applicable,
and continue to “Checking the flame and burner
performance”.
Checking the flame and burner
performance
Checking the STAR
®
burner performance
9 WARNING
When cooking with the STAR burners, the burner
flame size should be adjusted so it does not extend
beyond the edge of the cooking utensil. This
instruction is based on safety considerations.
To observe the burner flames, it may be necessary to turn
off lights or close window blinds to darken the room for
easier viewing of the flame.
Reassemble the rangetop as follows:
TIP: Use the burner venturi as a centering guide when
remounting the burner pedestals. If the pedestals are
centered, the venturi will slide in and out easily after the T-
30 torx head screw has been secured. If the pedestals are
not centered properly, loosen the mounting screw and
recenter the burner until the venturi slides freely.
Checking the STAR
®
burner ignition and flame
1. Push in the burner control knob and turn it to HI.
• The igniter electrode and spark module will
produce a clicking sound. Once the air has been
purged from the supply lines, the burner should
light within four seconds.
• The flames should be stable, with no excessive
noise. The inner cones of the individual flames
should be defined and separate from each other.
Portions of the flame, along the burner, should not
exhibit excessive or continuous indications of
“lifting” or “lazy flame”.
NOTE: It is normal for slight yellow tipping of the flames
to appear after a few minutes of operation using Propane
(LP) gas. Orange-colored streaks in the flame are
produced from burning airborne debris; this is normal
during initial start up and should dissipate within a few
minutes of operation.
2. Adjust the burner’s control valve to LO to see that the
flame continues to wrap around the burner. Blow out
the flame, or use a quick fan motion from a writing
tablet or piece of cardboard to extinguish the flame.
Observe the burner’s ability to reignite and wrap
around (also called “carry-over”) the burner within
several seconds. This flame “carry-over” is essential
for proper burner ignition and re-ignition.
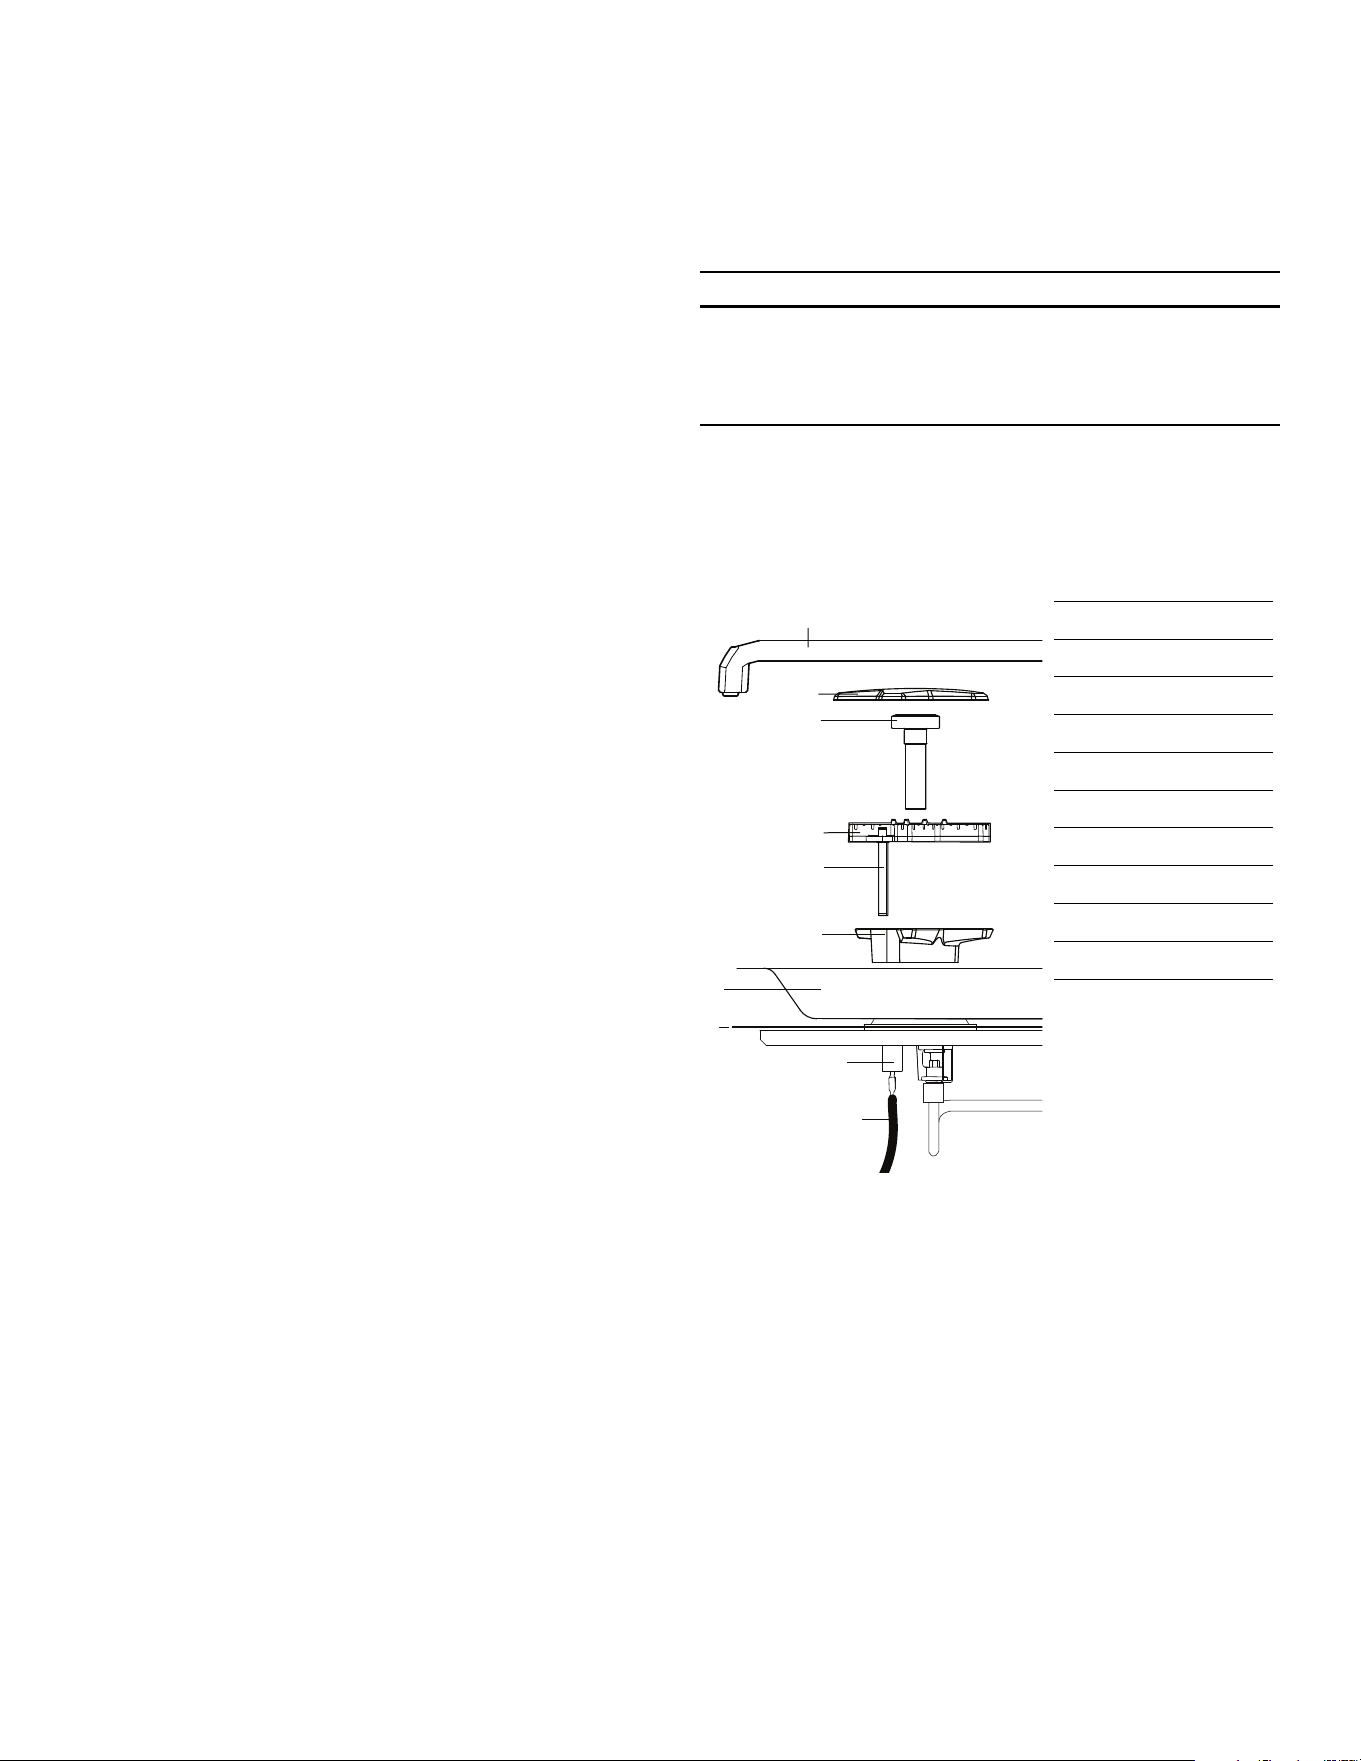
a. Grate
b. Burner cap
c. Venturi
d. Burner base
e. Electrode
f. Burner pedestal
g. Spill tray
h. Heat shield
i. Igniter housing
j. Igniter wire
d
b
a
e
f
g
h
c
i
j
a. Dark blue
b. Secondary cone
c. Light blue
d. Primary cone
Yellow flames:
Further adjustment is
required.
Yellow tips on outer cones:
Normal for LP gas
Soft blue flames:
Normal for natural gas
aaa
bb
cc
dd
Loading ...
Loading ...
Loading ...