
Loading ...
Loading ...
Loading ...
Page. 18
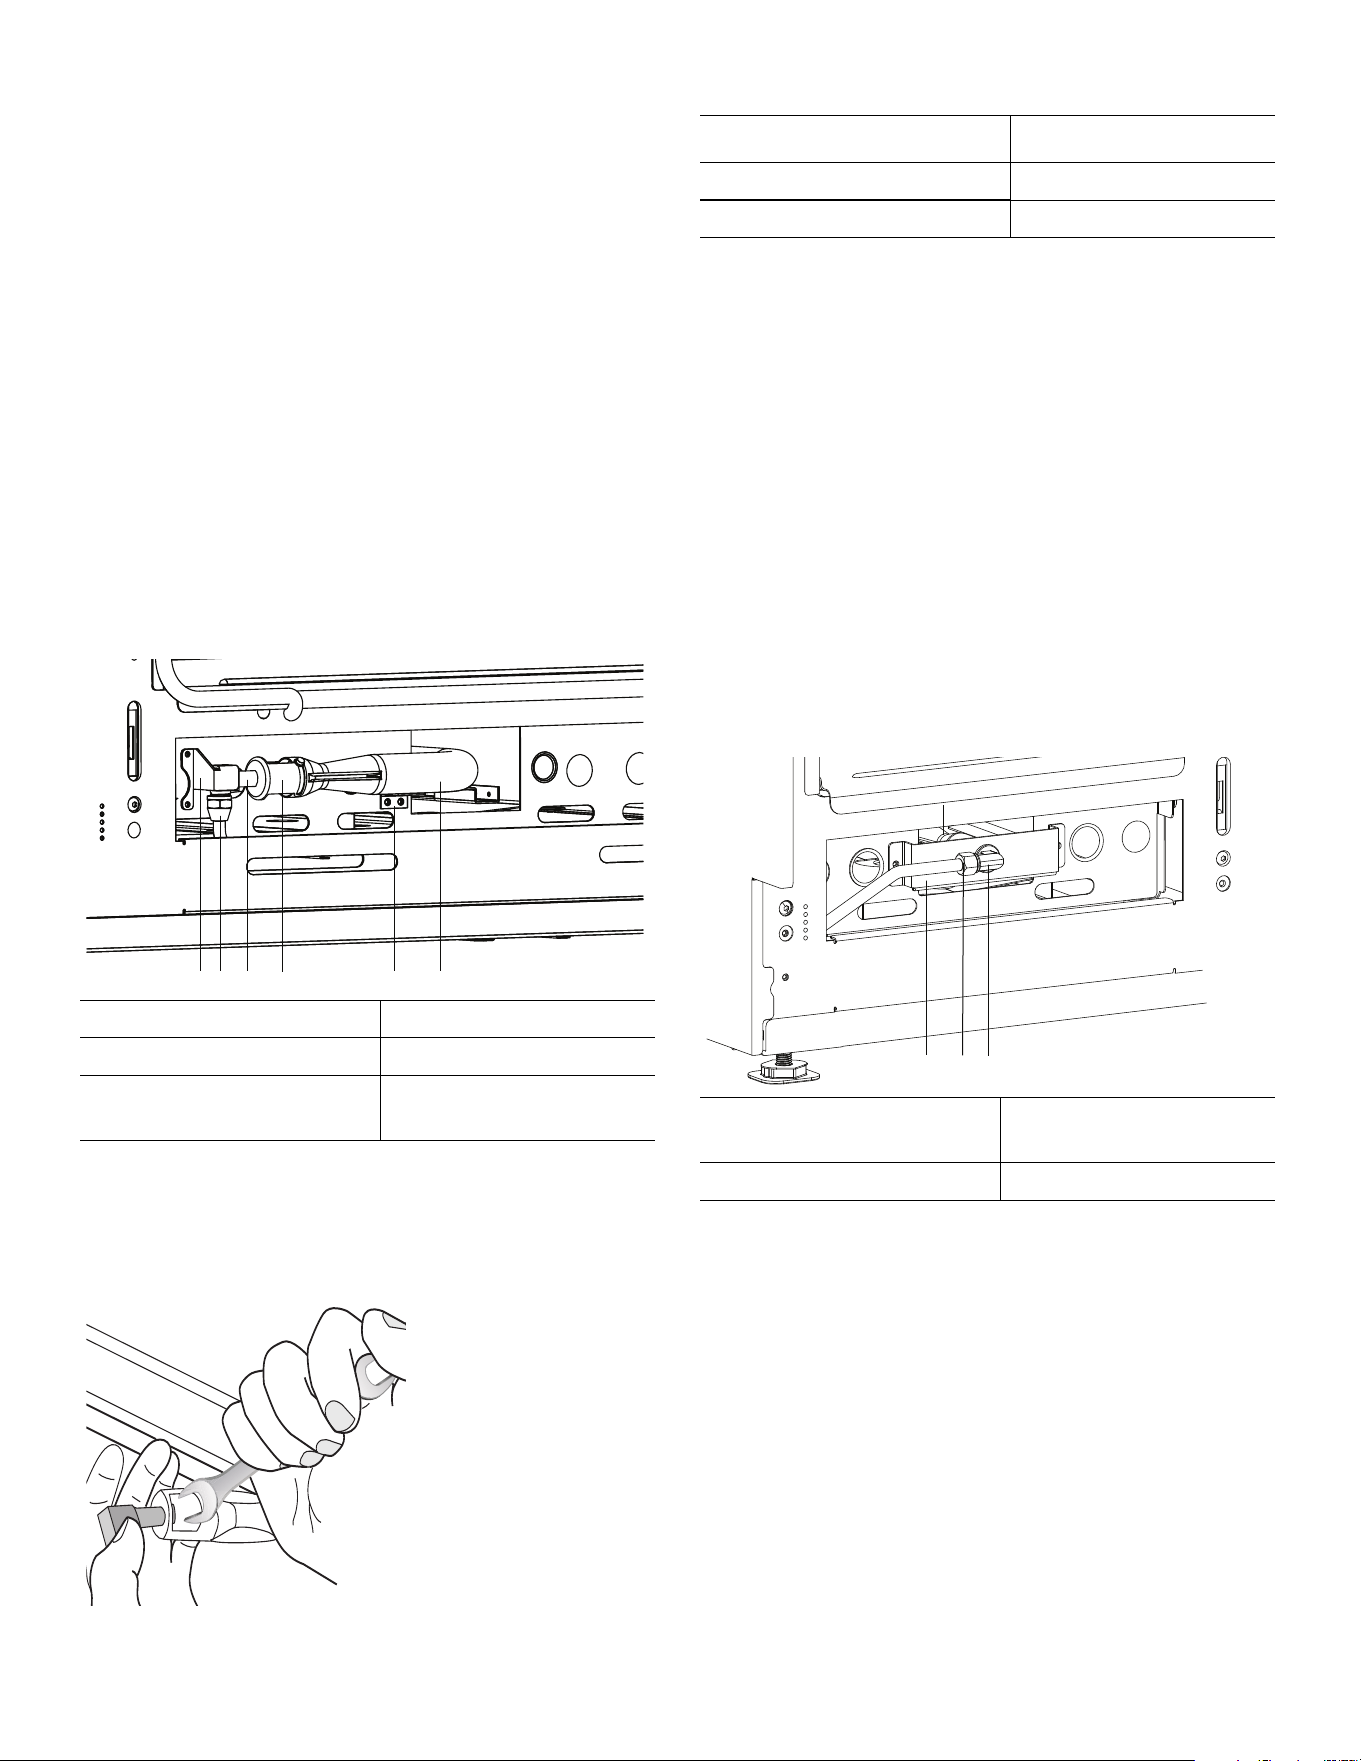
1. Remove the bake gas line using a 13/16'' box end
wrench.
2. Remove the two screws from the bake burner tube
mounting bracket with a T-20 torx driver.
4. Replace the orifice as indicated in the table.
5. Ensure that the bake orifice is aligned to the center of
the burner tube inlet. Reinstall the bake burner tube
beneath the oven. If necessary, use a flashlight to aid
in seeing the locating slot where the burner tube sits
at the backside of the burner cavity.
6. Slide the elbow fitting back into the anti-rotation
bracket. Reattach the two bake burner mounting
bracket screws and tighten the gas line.
7. If the gas range is a single oven, perform a gas
leakage check of the orifice and associated supply
tube fittings per “Checking for gas leaks” on page 19.
If the gas range has an auxiliary oven, proceed with
the following instructions.
Changing the auxiliary oven bake burner
orifice
IMPORTANT:
• Do not bend the bake burner tube.
• Do not bend the bake burner gas tube.
• The bake burner air shutter should remain fully open.
If the air shutter is not fully open, loosen the shutter
screw and adjust it to the position shown. Re-tighten
the screw to secure the shutter.
1. Remove the two screws from the auxiliary bake burner
mounting bracket with a T-20 torx driver. Pull the
bracket and gas line carefully towards you.
NOTE: It is not necessary to loosen the auxiliary oven
bake gas line.
2. With an adjustable wrench, restrain the elbow fitting.
With a 1/2'' offset wrench, unscrew the auxiliary bake
burner orifice.
For your convenience, note the orifice sizes and
locations in the following table.
3. Replace the orifice as indicated in the table.
NOTE: The replacement bake orifices have straight
threads (not tapered threads) and DO NOT require thread
sealing compound.
4. Before reattaching the auxiliary bake burner mounting
bracket, perform a gas leakage check of the orifice
and associated supply tube fittings per “Checking for
gas leaks”.
3. Insert a 1/2'' offset
wrench into the
shutter opening to
restrain the bake
orifice while hand
twisting the orifice
elbow
counterclockwise.
Description Main oven bake
Pro Grand 1.46 mm (146)
Pro Harmony 1.34 mm (134)
a. Auxiliary bake burner
mounting bracket
b. Aux oven bake gas
line
c. Elbow fitting d. Bake burner tube
a
c
b
d
Main oven bake Aux oven bake
Description Auxiliary oven bake
Pro Grand 1.13 mm (113)
Pro Harmony 1.13 mm (113)
Loading ...
Loading ...
Loading ...