Loading ...
Loading ...
Loading ...
13
INSTALLING THE COOKTOP FRONT GUARD
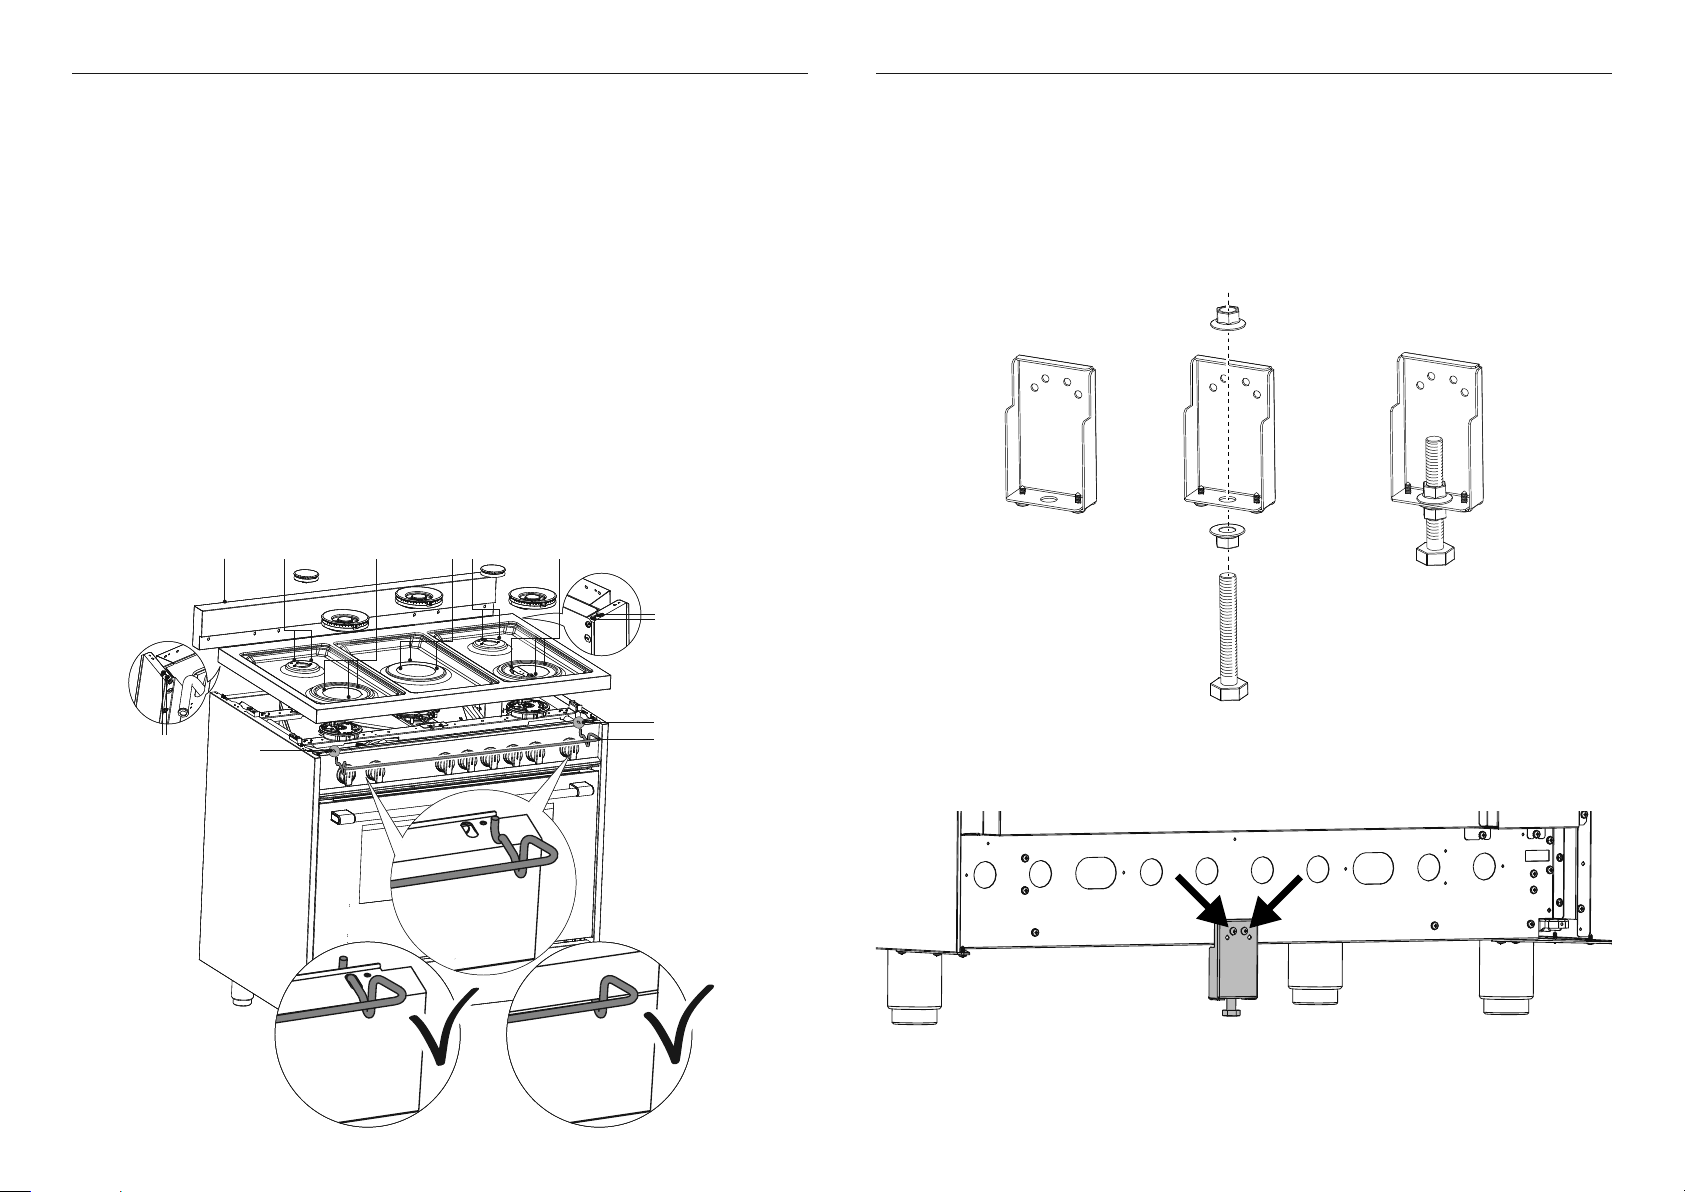
INSTALLING THE ANTI-TIP BRACKET
Models without hob rail only
To increase the clearance between the front edge of the cooktop and
the burners it is possible to install the cooktop front guard supplied with the appliance.
IMPORTANT
To install or remove the guard it is necessary to remove the cooktop.
Attempting to install or remove the guard without disassembling the cooktop will result
in permanent damage to the appliance.
Install the front guard as shown:
1 Remove the backguard or island trim A (see ‘Fitting the optional backguard’)
2 Remove the grates, the burner caps and the flame spreaders.
3 Unscrew cooktop fixing screws B and C.
4 Remove the cooktop. Note: Take extra care not to damage the gaskets fitted above
the burner cups (below the cooktop). If they are damaged they must be replaced.
5 Install the front guard D by inserting the wire terminals into the corresponding holes
above the control panel E.
6 Reassemble the cooktop and the other components.
Note: Take extra care not to damage the gaskets fitted above the burner cups
(below the cooktop). If they are damaged they must be replaced.
The anti-tip bracket has two components:
z
the adjustable bracket
z
the stability bracket
IMPORTANT!
You must install both parts of the anti-tip bracket and ensure they are properly fitted
together to prevent the range from tipping.
To fit the anti-tip bracket
123
1 Thread the bolt through the adjustable bracket and fix in place using the two supplied
nuts. Ensure the nuts are well tightened.
2 Fix the adjustable bracket to the back of the range (centered on the lower edge) using
the two supplied screws and washers.
CC
A BBBBB
C
E
E
D
C
Loading ...
Loading ...
Loading ...