Loading ...
Loading ...
Loading ...
8. PREPARING THE HEAT GUN
To remove the battery from the battery charger:
− Supporting the battery charger with hand, pull
out the battery from the battery charger.
Caution: If the battery charger has been in
continuous use it will be hot. Once the charging
has been completed, leave the charger 15 minutes
to cool until next use.
If the battery is charged when it is warm due to
battery use or exposure to sunlight, the battery will
not be recharged. In such a case, let the battery
cool before charging.
If the red indicator flickers rapidly at 0.2 second
intervals, check or and remove any foreign objects
in the charger’s battery slot. If there are no foreign
objects, it is probable that the battery or charger is
malfunctioning. Allow battery/charger to normalise
and try again. If a fault remains after trying this
then contact Draper Tools.
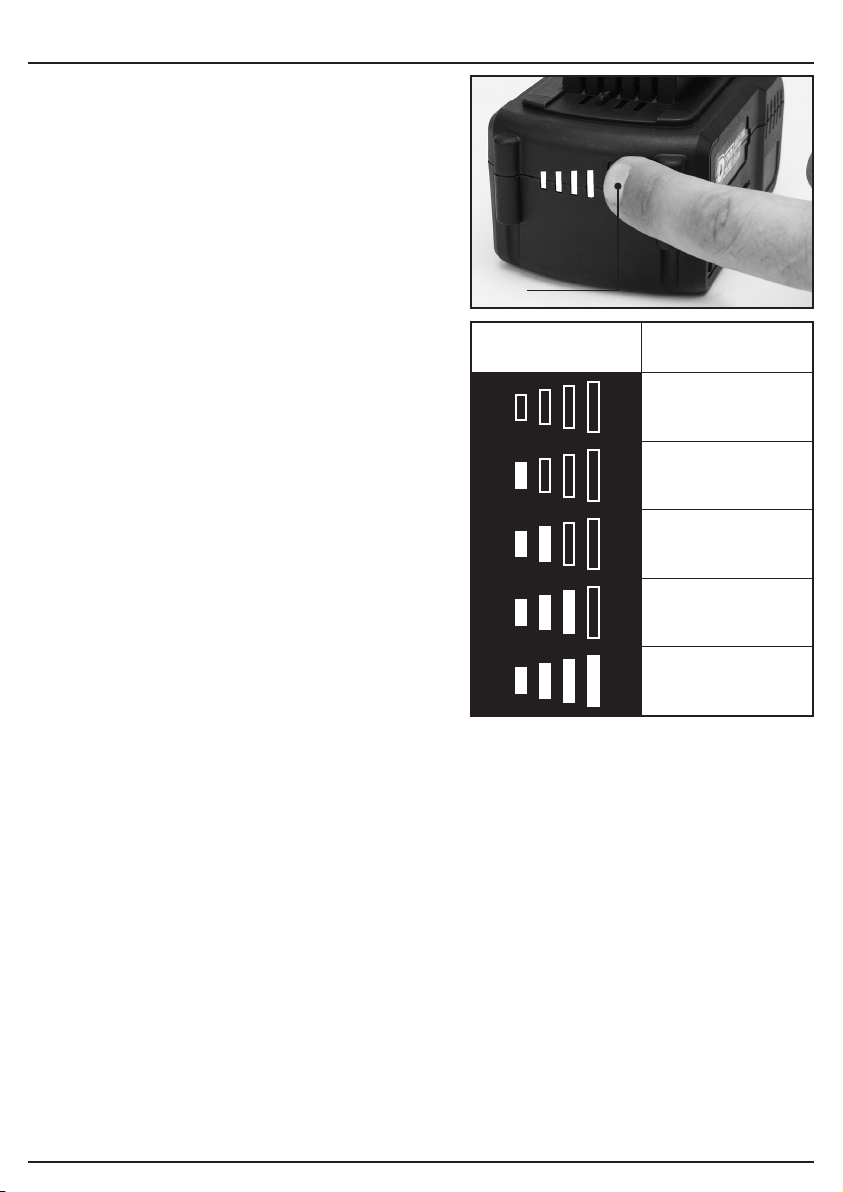
8.2 BATTERY PACK CHARGE
STATUS – FIG. 3
To display the amount of charge left in the battery
pack, press the charge level indicator button
(24.2).
8.3 BATTERY PACK PROTECTION
FEATURES
Overcharging protection: This feature that
ensures that the battery pack can never be
overcharged. When the battery pack reaches full
charge capacity, the transformer/charger will
automatically shut off, protecting the internal
components from being damaged.
Over-discharging protection: This feature will
stop the battery pack from discharging beyond the
recommended lowest safety voltage.
Overheating protection: The battery pack
contains an internal thermistor cut-off sensor which
shuts off the battery pack should it become too hot
during operation. This can happen if the tool is
overloaded or being used for extended periods.
Up to 30 minutes cooling time may be required,
depending on ambient temperature.
Current protection: Should the battery be
overloaded and the maximum current draw be
exceeded, the battery will shut off to protect the
internal components. The battery pack will resume
working once excessive current draw has returned
to normal, safe level.
– 13 –
(24.2)
Charge level
indicator
Amount of charge
remaining
0 – 10%
10 – 25%
25 – 50%
50 – 75%
75 – 100%
3 FIG.
Loading ...
Loading ...
Loading ...