Loading ...
Loading ...
Loading ...
– 12 –
2 FIG.
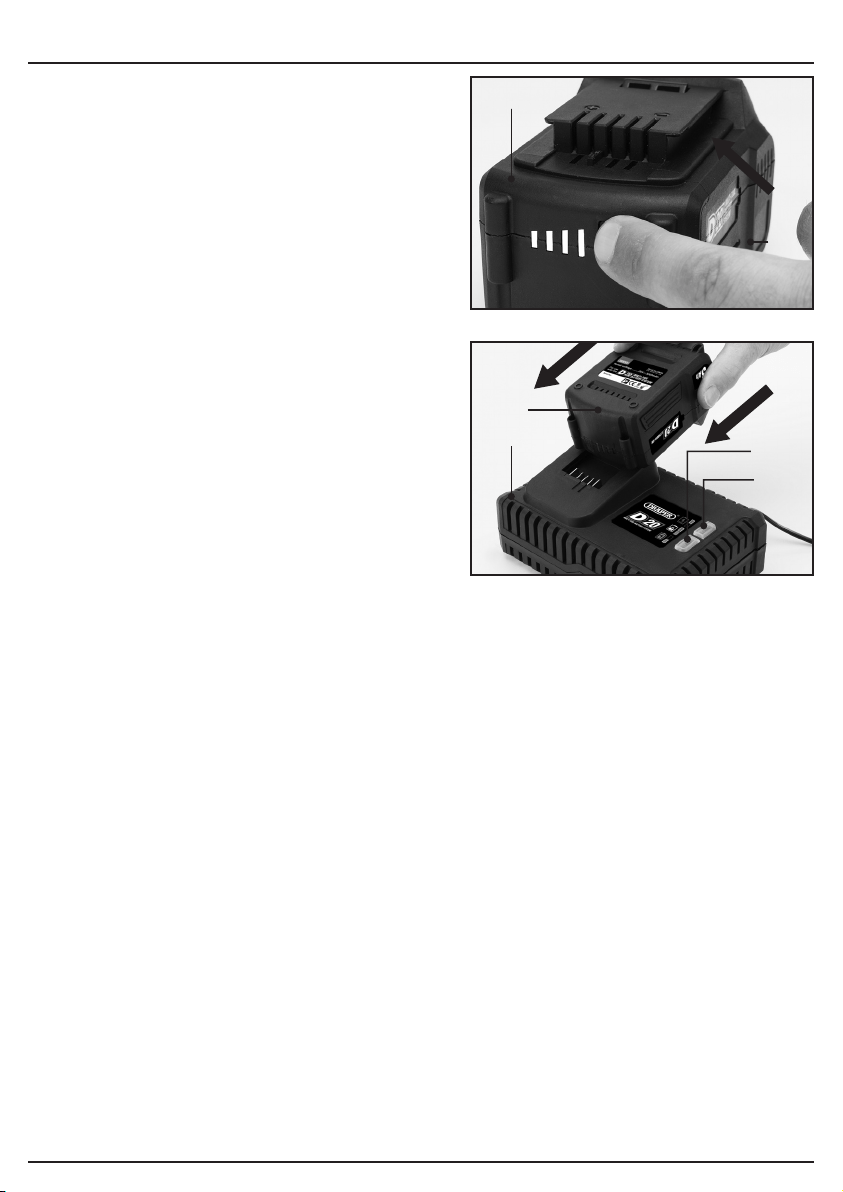
1 FIG.
8.1 BATTERY PACK CHARGING –
FIGS. 1 – 2
This power product is supplied “bare”, without
battery pack or charger. Compatible batteries,
chargers and accessories are available through
Draper Tools stockists.
Important: Only Draper designated battery packs
and chargers can be used in conjunction with this
product. Use of any other third party battery packs/
chargers with this product is considered misuse
and will invalidate the product’s warranty.
Once connected to the mains supply, recharging of
the battery can be left generally unsupervised,
requiring minimal attention. Complex circuit
construction monitors the battery condition,
adjusting the recharge current to suit. When the
recharge cycle is complete, to maintain the full
capacity, a low output current will continue as
required.
Warning! Check the condition of the charger and
battery prior to each charge. If there is any sign of
damage then do not commence charging, seek
advice from Draper Tools.
The battery pack is supplied un-charged and must
be charged before initial use.
To charge the battery pack (24), it must first be
removed from the tool.
To release the battery pack:
− Press the battery release button (24.1) and
gently slide the battery pack off (Fig.1).
− Plug the battery charger (23) unit into a 230V/
AC 13amp three pin supply socket.
− The red LED (23.1) will illuminate to show the
charger has power.
− Slide the battery into the charger (the battery is
shaped to fit into the charger one way only.
− After a few seconds delay, the red LED (23.1)
will flash to show that charging has begun, then
illuminate solid red.
− Whilst the battery is charging, the green LED
(23.2) will flash, (the red LED will go from
flashing to constant red).
− When the battery is fully charged when the
green LED stops flashing and remains a
constant green. The red LED will extinguish.
Caution: Do not pull the plug out of the power
supply by pulling on the cord. Make sure to grasp
the plug when removing from power supply to
avoid damaging the cord.
8. PREPARING THE HEAT GUN
– 12 –
(24)
(24)
(23)
(24.1)
(23.1)
(23.2)
Loading ...
Loading ...
Loading ...