Loading ...
Loading ...
Loading ...
19
The water heater should be drained if being shut down during
freezing temperatures. Also, periodic draining and cleaning of
sediment from the tank may be necessary.
1. Before beginning, turn “OFF” the electric power supply to the
water heater.
2. Open a nearby hot water faucet until the water is no longer hot.
3. Close the cold water inlet valve.
4. Connect a hose to the drain valve and terminate it to an
adequate drain or external to the building.
5. Open the water heater drain valve and allow all of the water
to drain from the tank. Flush the tank with water as needed
to remove sediment.
NOTE: If the water heater is going to be shut down and
drained for an extended period, the drain valve should be
left open with hose connected allowing water to terminate
to an adequate drain.
6. Close the drain valve, refi ll the tank, and restart the heater as
directed in this manual.
Never use this water heater unless it is completely full of water.
To prevent damage to the tank and heating element, the tank
must be fi lled with water. Water must fl ow from the hot water
faucet before turning “ON” power.
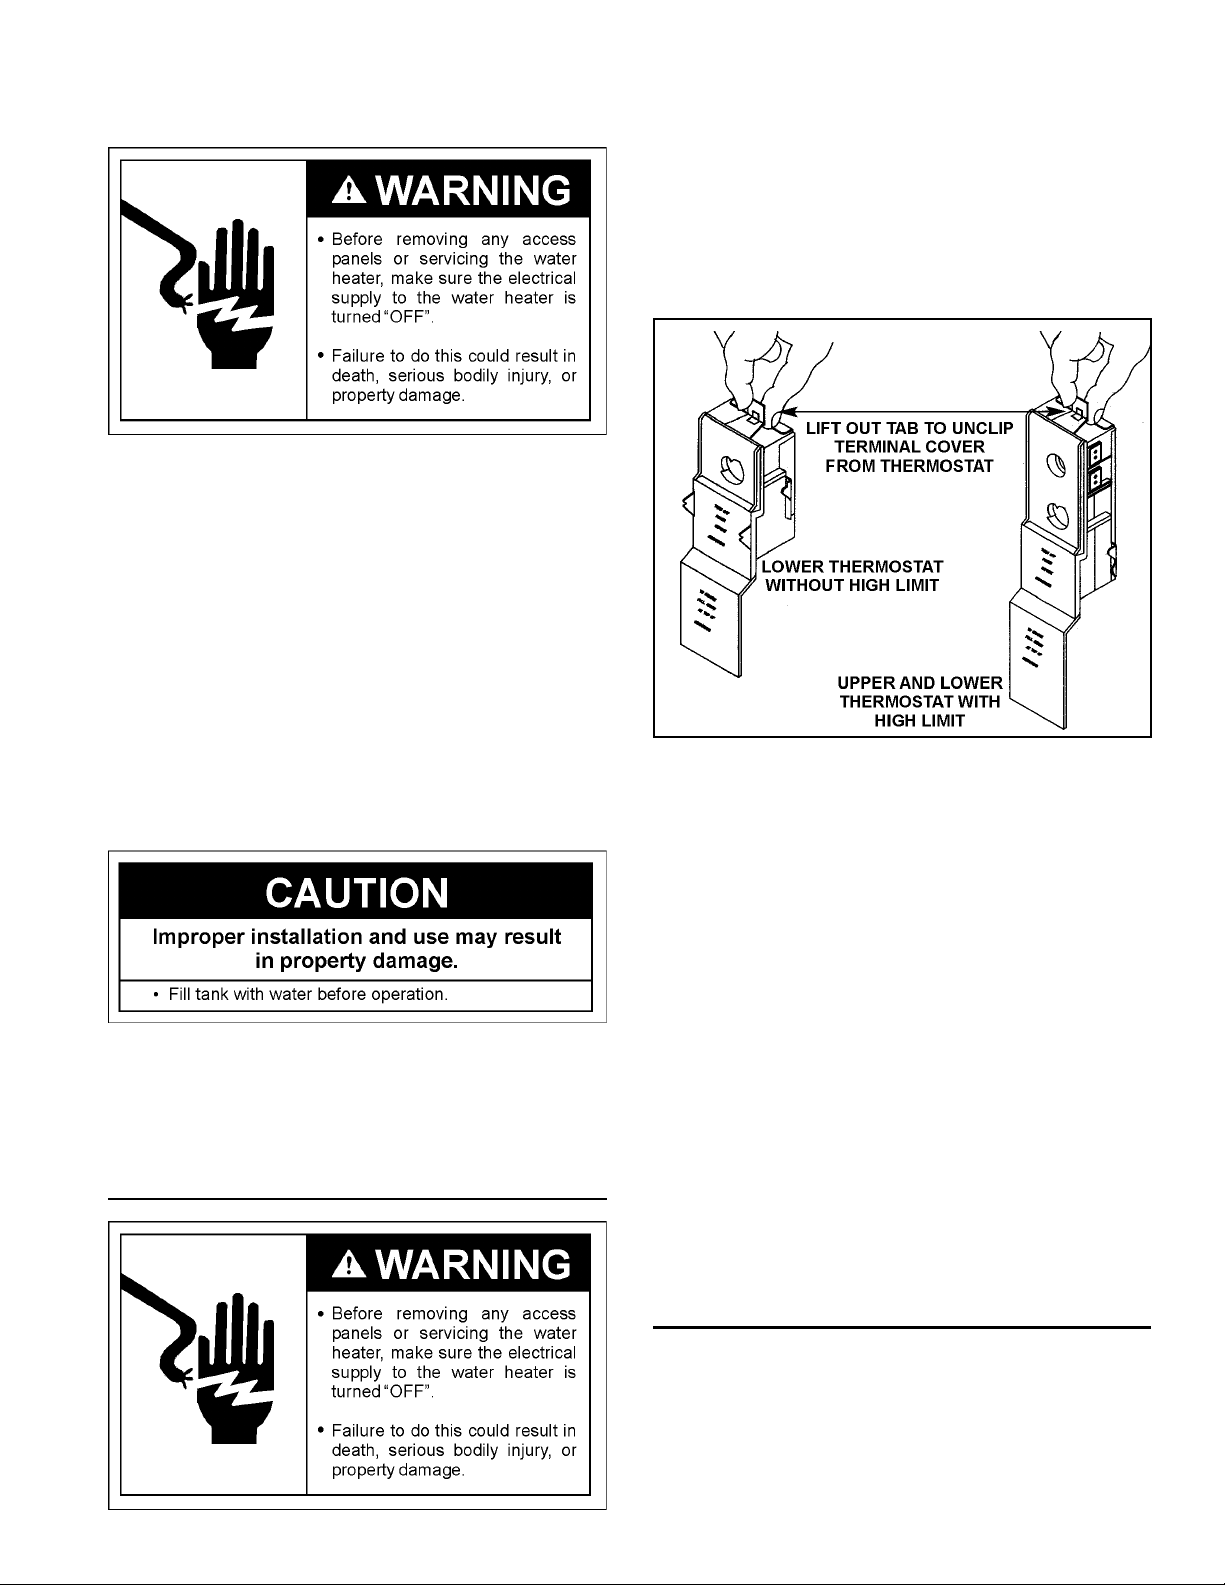
Thermostat Removal/Replacement
1. Turn “OFF” the electrical power to the water heater at the
junction box.
2. Remove the access panel, then fold the insulation back to
expose the thermostat.
3. Lift out the tab as shown below to unclip the terminal cover
from the thermostat. The terminal cover can now be removed
from the thermostat.
FIGURE 29.
4. Disconnect wires from the thermostat.
5. Remove the thermostat from behind the thermostat
bracket.
6. Place the new thermostat in the bracket making sure it fi ts
fi rmly against the tank.
7. Attach the wires to the new thermostat.
NOTE: Some of the terminals may require straight-in wiring
through an eye-opening. If wires are now looped, recut and
strip wire 3/8” to a straight length and insert.
8. Put plastic terminal cover back in place.
9. Replace the insulation to cover the thermostat.
10. Replace access panel, then turn the electric power on.
Element Cleaning/Replacement
NOTE: These instructions are written for element cleaning and
element replacement for the lower element. If it is necessary
to clean or replace the upper element, then repeat these
instructions.
To remove the element from your tank in order to clean or
replace it:
Loading ...
Loading ...
Loading ...