Loading ...
Loading ...
Loading ...
page 5
5. Fan Assembly. (cont.)
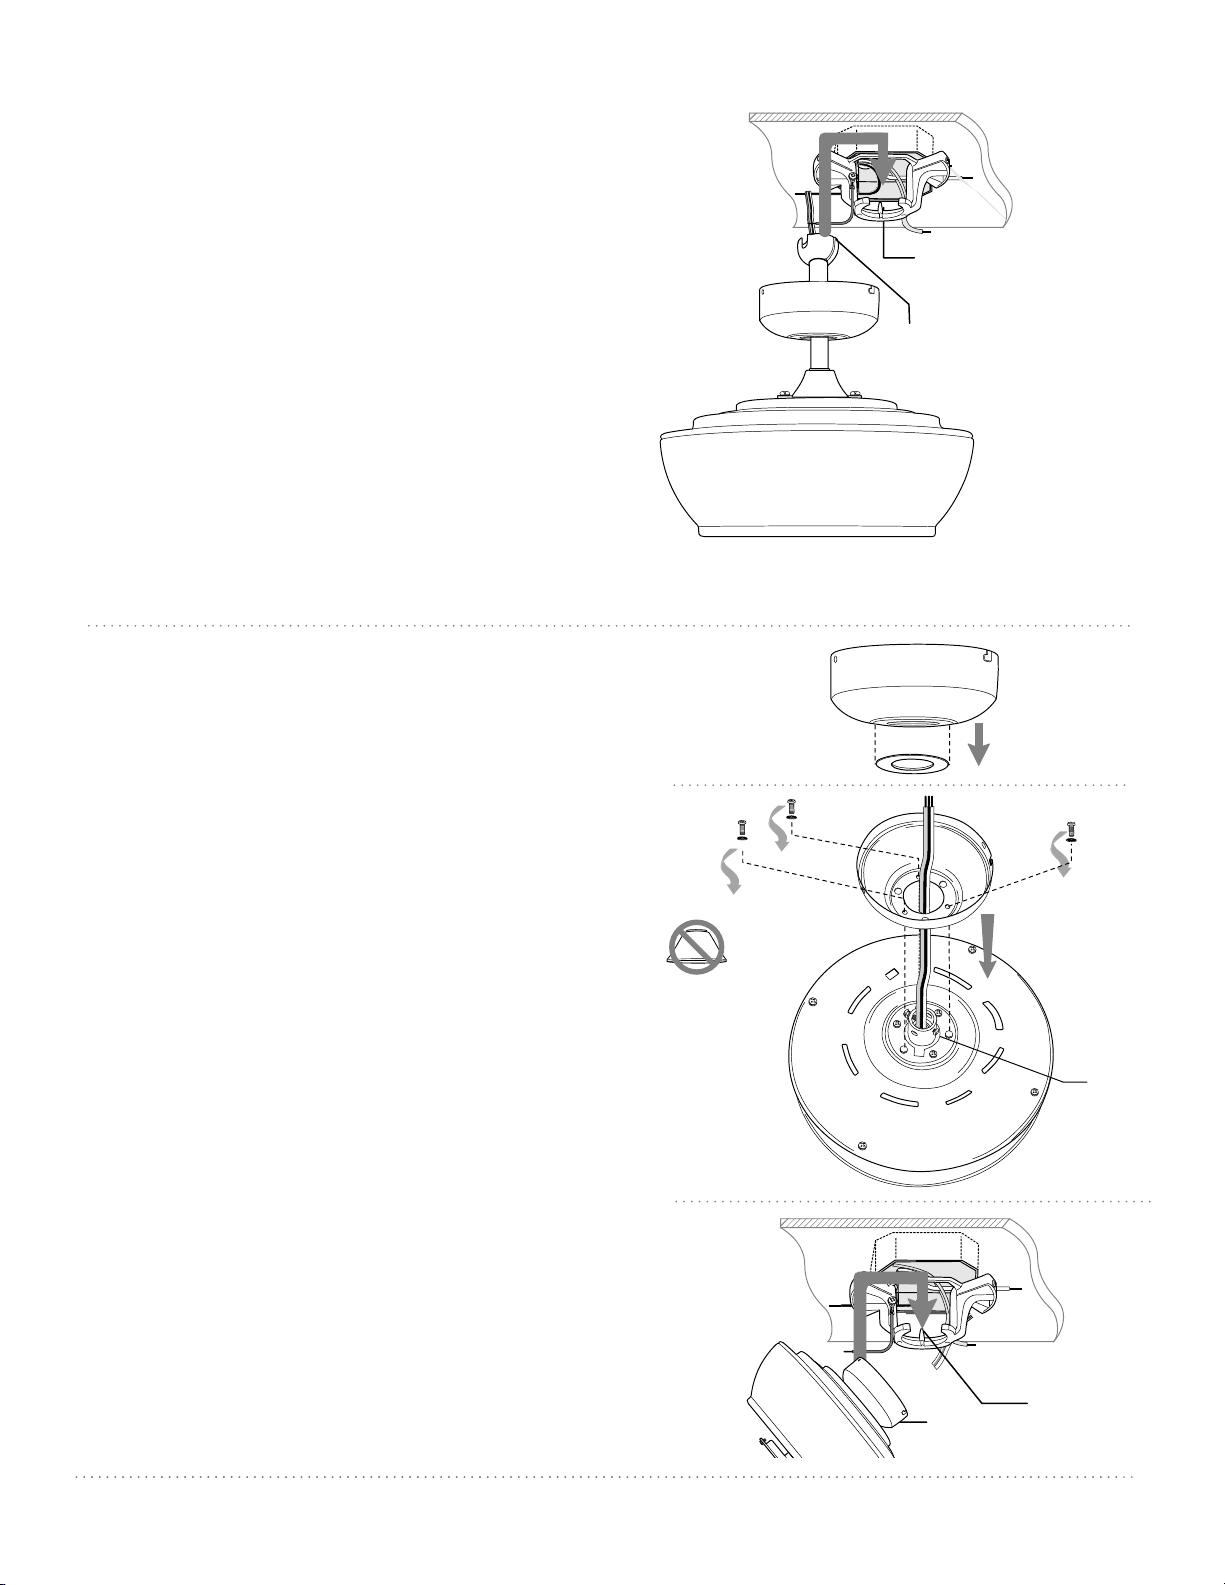
6. Fan Assembly (flushmount).
Remove and set aside canopy cover to reveal
6 holes. Notice that 3 of these holes are
larger.
Note: Yoke cover will not be used with this
type of installation.
There are 6 screws in top of motor housing,
remove every other screw and lock washer.
Thread wiring through canopy. Place canopy
over yoke, aligning larger holes in canopy
with the 3 existing screws in top of motor
housing. Insert the 3 screws and 3 lock
washers that were removed into the
remaining holes. Securely tighten these
screws.
To prepare the fan for wiring, hang fan onto
hanging bracket by sliding the canopy over
the hanging bracket tab. (Use one of the
non-slotted holes on the rim of the canopy
to do so.)
With the hanging bracket secured to the outlet box
and able to support the fan, you are now ready to
hang your fan. Grab the fan firmly with two hands.
Slide downrod through opening in hanging bracket
and let hanging ball rest on the hanging bracket. Turn
the hanging ball slot until it lines up with the hanging
bracket tab.
WARNING: Failure to align slot in hanging ball with
tab in hanging bracket may result in serious injury or
death.
Tip: Seek the help of another person to hold the
stepladder in place and to help lift the fan up to you
once you are set on the ladder.
Continue to "Wiring" section on page 6 for wiring
diagram.
canopy
motor housing
yoke
motor housing
canopy
canopy cover
yoke cover
canopy
motor
housing
hanging
bracket
tab
hanging ball slot
hanging bracket tab
Loading ...
Loading ...
Loading ...