Loading ...
Loading ...
Loading ...
7
Installation Procedures
Caution:
Choose a suitable installation location.
Avoid places with high salinity (salt water) and high sulfur gas. Unit will corrode and damage will not be covered by
warranty.
Avoid excess oil (including mechanical oil) and steam. This can reduce efciencies and product performance.
Avoid areas where machines generate high frequency electromagnetic waves. They can cause control issues.
Warning:
protect the machine from winds or earthquake, install according to regulations. Improper installation will cause
accidents due to unit coming loose and falling.
(1) where there is enough room for the machine above the ceiling;
(2) where the drainpipes can be well positioned;
(3) where the distance between the air outlet port of the machine
and the oor is not more than 8.86ft(2.7m);
(4) where air inlet & outlet of the indoor units are not blocked;
(5) where it is sturdy enough to bear the weight of the unit;
(6) where there are no televisions, pianos or other valuables under
the indoor units as to avoid condensate dropping down, causing
damage.
(7) Where it is over 3.28ft(1m) away from the television and radio
as to avoid the interference from television and radio.
Select the following places to install indoor units.
Ensure the required space for installation and maintenance (refer to the following drawings).
The installation height should be kept within 8.86ft(2.7m).
When the height of the ceiling exceeds 8.86ft(2.7m), the warm air is harder to blow to the ground.
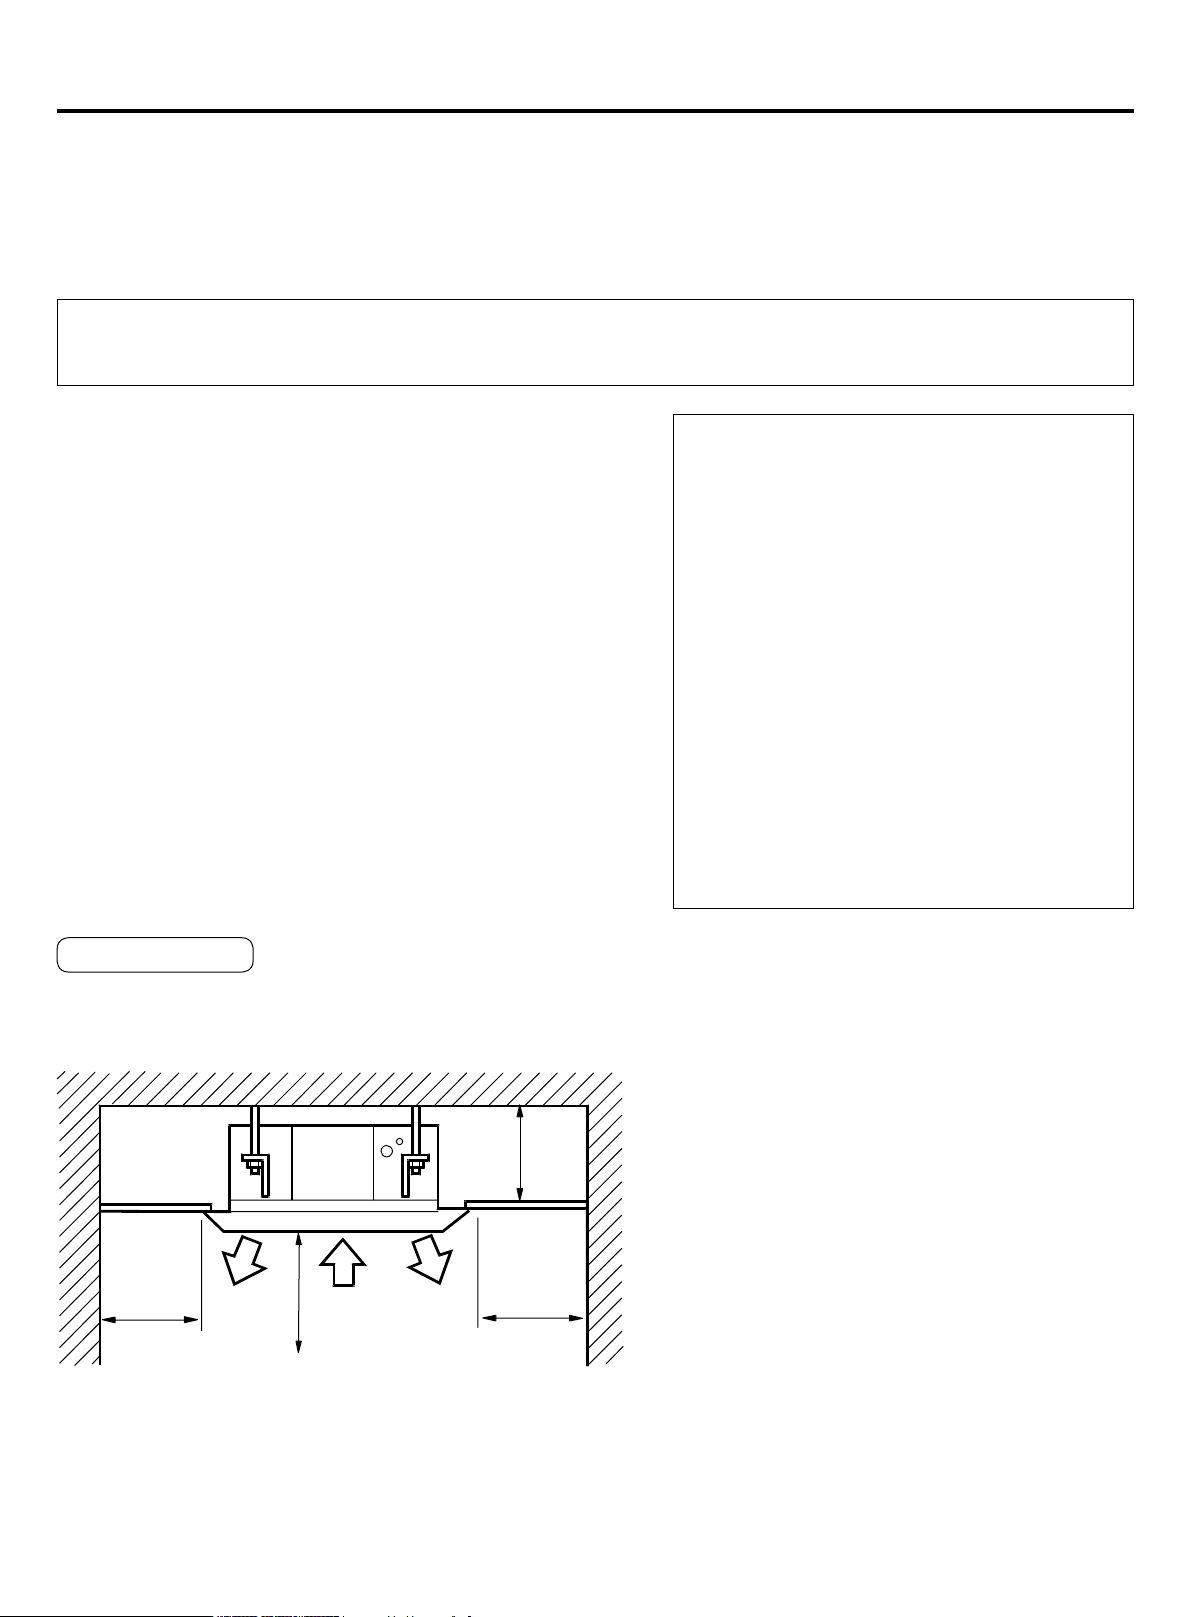
Installation Space
Outlet
59in(1500mm) 59in(1500mm)
12.6in
(320mm)
Over 98in(2500mm)
OutletInlet
Required Tools for Installation
• Brazing torch
• 15% silver phosphorous copper brazing alloy
• Wire stripper
• Soap-and-water solution or gas leakage detector
• Torque wrench
• 17mm, 22mm, 26mm
• Tubing cutter
• Reaming tool
• Flaring tool
• Razor knife
• Measuring tape
• Level
• Vacuum pump
• Micron gauge
• Nitrogen
• Mini-Split AD-87 Adapter (1/4” to 5/16”)
• Non-adhesive Tape
• Adhesive Tape
• Electrical wiring
Loading ...
Loading ...
Loading ...