Loading ...
Loading ...
Loading ...
8
Installation Procedures
Note:
Before suspending the indoor unit, select an installation location according to the piping and wiring in the ceiling, and
determine the direction of the piping. Prepare all pipes (refrigeration and drainage) and wiring (power supply,
communication and control) to be ready to connect once unit is installed.
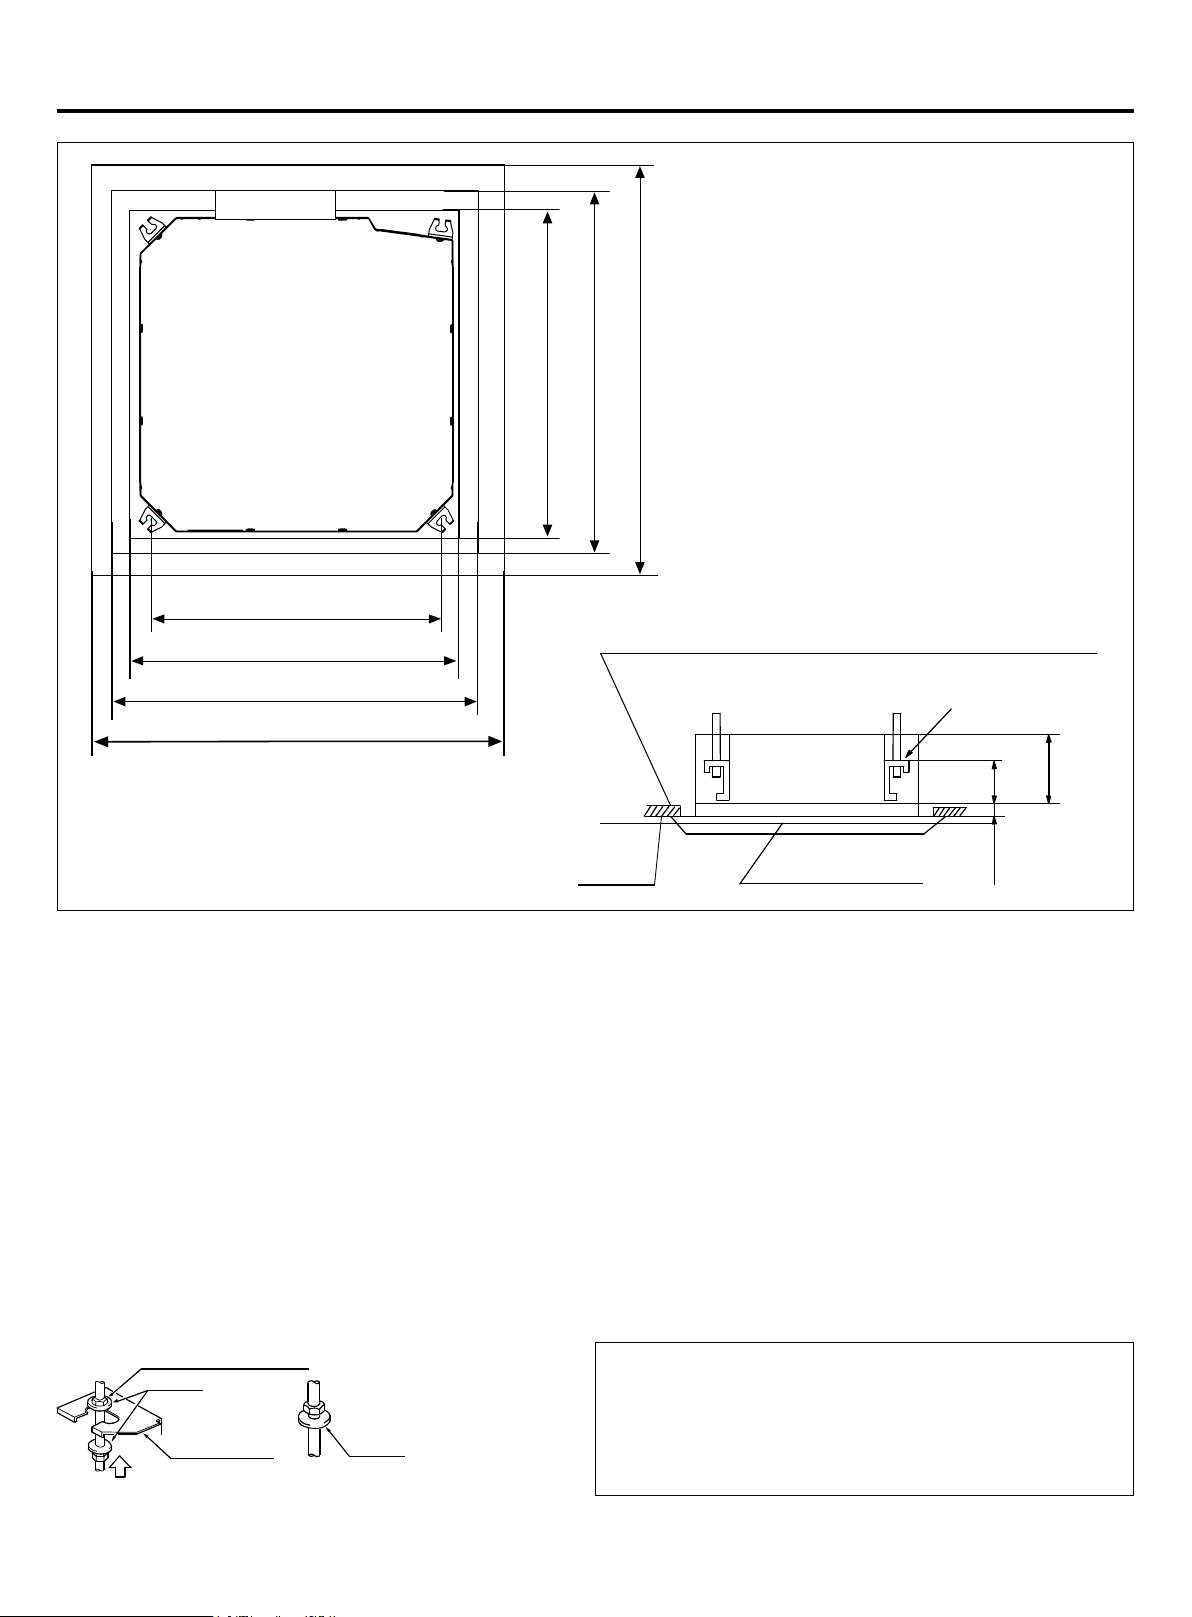
gap between studs 21in(535mm)
ceiling 23.2 in(590mm)
ceiling 23.2in(590mm)
decorated board 24.4in(620mm)
decorated board 24.4in(620mm)
indoor unit 22.4in(570mm)
indoor unit 22.4in(570mm)
The ceiling and decorated board overlapping part should
be more than 0.98in(25mm)
ceiling
decorated board
5.9in
(150mm)
10.2in
(260mm)
1.2in
(30mm)
1. Use cardboard template to locate desired location. Mark the mounting positions of the threaded rods using the guides
on the cardboard template.
2. Install 3/8in threaded rods to structure using appropriate fasteners.
3. Add nuts and washers at approximate height.
4. Lift the cassette and position the threaded rods into the 4 mounting clips on each corner of the cassette unit.
5. Adjust the height of the unit so that bottom surface is recessed 1 inch from ceiling surface.
6. Using a level, adjust the nuts on the threaded rods to obtain a level reading across the bottom of the cassette unit.
7. Tighten the top nuts to lock unit into place. An additional nut on top and bottom of bracket may be added to jam against
the installation nuts to prevent them from loosening due to unit vibration.
Hanging Unit
Tighten the nut on the washer.
nut (provided on site)
washer
hoisting foot
washer
tightening (dual nuts)
[secure hoisting foot] [secure washer foot]
• Check if the indoor unit is level with the water level and
that the polythene tube drains with water. Check if the
size of the ceiling hole is correct. Remove any water
before mounting the decorated board.
• Fasten the screws to make the height difference between
the two sides of the indoor unit less than 0.2in(5mm).
Loading ...
Loading ...
Loading ...