Loading ...
Loading ...
Loading ...
29
Shelves with under-shelf lighting (on some models)
By moving LED lighting to a new spot under the shelves, this
leading-edge technology improves interior refrigerator lighting
and aids in locating storage items.
Pull-Out Tray
To remove and replace the pull-out tray:
1. Pull the tray to the fully open position or when it stops.
2. Lift up and out of gliders toward the front of the refrigerator.
3. Replace the tray by placing it on the bottom tray guide and
pushing it past the tray stop into position.
FreshSeal™ Crisper Drawers
These upgraded crisper drawers use a gasket seal to maintain
the ideal temperature and humidity levels to keep produce fresh
longer. These drawers also feature premium soft-close glides
that provide the best extension for easy access and maximum
visibility to your produce items.
To remove and replace the drawers:
1. Grasp the handle at the bottom of the drawer and slide the
drawer straight out to the stop. Lift the drawer off the bottom
guide.
2. Replace the drawer by placing it on the bottom drawer guide
and pushing it past the drawer stop into position.
To remove the crispers cover (can remove only if platter
pocket is removed first):
1. Remove the platter pocket rst.
2. Holding the glass insert rmly with one hand, press up in
center of glass insert until it rises above the plastic frame.
Gently slide the glass insert forward to remove.
To replace crisper(s) cover(s):
1. Remove the crisper pan, platter pocket, and crisper glass
before removing the crisper.
2. Fit back of cover frame into supports on side walls of the
refrigerator and lower the front of the cover frame into place.
3. Slide rear of glass insert into cover frame and lower front into
place.
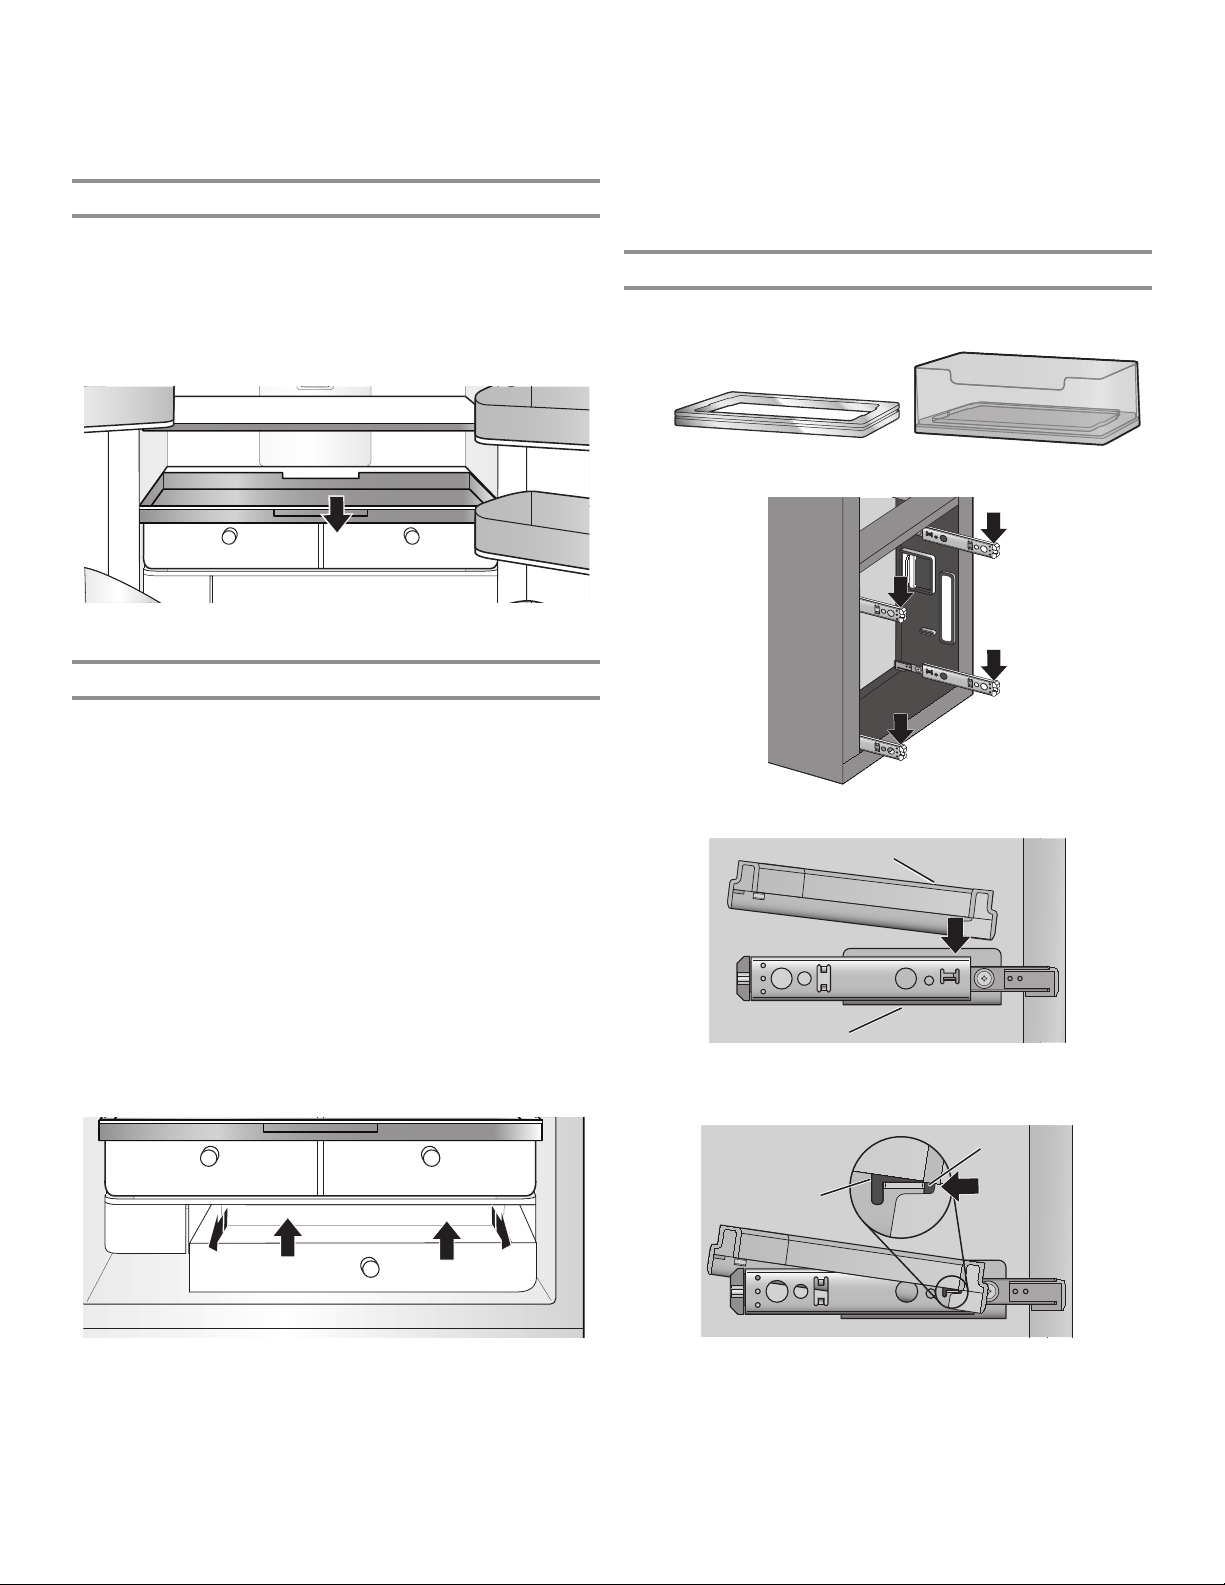
Pullout Bin Installation
NOTE: Install bins on the right side of the refrigerator with the
inner door closed and the outer door open.
1. Slide out all four bin glides.
2. Angle the plastic trim frame and place it onto the bin glide.
Plastic trim frame
Bin glide
Pull the front edge of the plastic trim frame as far forward as
possible to engage the glide tab.
Trim
groove
Glide
tab
Plastic trim frame Pullout bin
Loading ...
Loading ...
Loading ...