Loading ...
Loading ...
Loading ...
20 www.electrolux.com
NOTE:
• Unscrew the drain cap of continuous
drain outlet (Fig.20)�
• Connect one end of the garden hose
(sold separately) or drain hose to the
drain outlet then lead the other end
into a drain that is lower than the unit
(Fig.21)�
• Condensate may ow out after removing
the drain cap, if the unit is running in
Cool or Auto mode� When you want to
remove the hose, prepare a drip tray (not
supplied) to collect the condensate from
the drain outlet�
• Please be sure that the height of the
drain and section of the drain hose
should not be higher than that of the
drain outlet, or the continous drainage
may not work properly�
• During Cool or Auto mode, it is
recommended to disable continuous
drainage by replacing the drain cap to
the drain outlet, to reach the maximum
performance
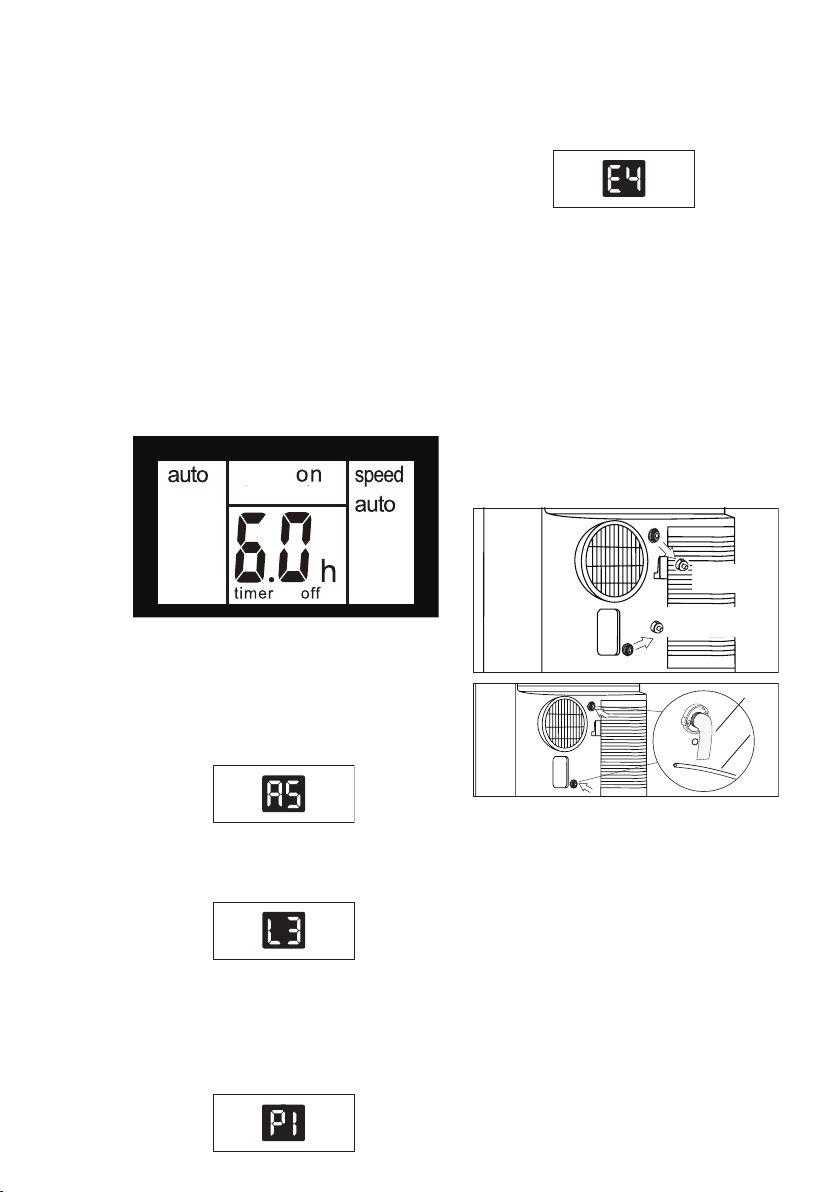
How to delay shutdown (Timer off)
You can delay shutdown when the unit is
on� Press the “timer” button, the screen
will display “timer”and “h”, and the “off” will
ashing�
Tap or hold the UP "
+
" or DOWN "
-
"
button to change delay stop timer at 0�5
hour increments up to 10 hours, then at
1 hour increments up to 24 hours� After 3
seconds, the setting will be memorized,
and the display will show the time
remaining until the unit shuts down�You
can also press the “timer” button again
directly and the “off” will stop ashing
immediately�
To cancel the setting, press the “timer”
button again�
If the display reads "AS" , "CS" and "ES",
the temperature sensor has failed� Contact
your Authorised Electrolux Service Centre�
If the display reads "L3" , the condenser
DC fan motor has failed� Contact your
Authorised Electrolux Service Centre�
If the display reads "E4" , the
communication between display PCB and
main control PCB is faulty� Contact your
Authorised Electrolux Service Centre�
If the display reads "P1" , bottom tray
is full� Carefully move the unit to a drain
location, remove the bottom drain plug
and let the water drain away� Restart the
machine until the "P1" symbol disappears�
If error repeats, call for service�
7.3
Fault code
Fig. 20
Drain cap
for Dry mode
Drain cap
for Heat Pump mode
Garden hose
Drain hose
Fig. 21
Continuous Drainage
During the DRY mode or heat pump
model, you will need a garden hose (sold
separately) or drain hose to drain the
condensate from the unit�
Follow the steps below:
7.4
Drainage instruction
Loading ...
Loading ...
Loading ...