Loading ...
Loading ...
Loading ...
In order to use wall control as a handheld remote control,
cut each wire on wall control (that was not previously
used)--use wire cutters to cut off each wire as close to
the wall control as possible. [Refer to diagram 2.]
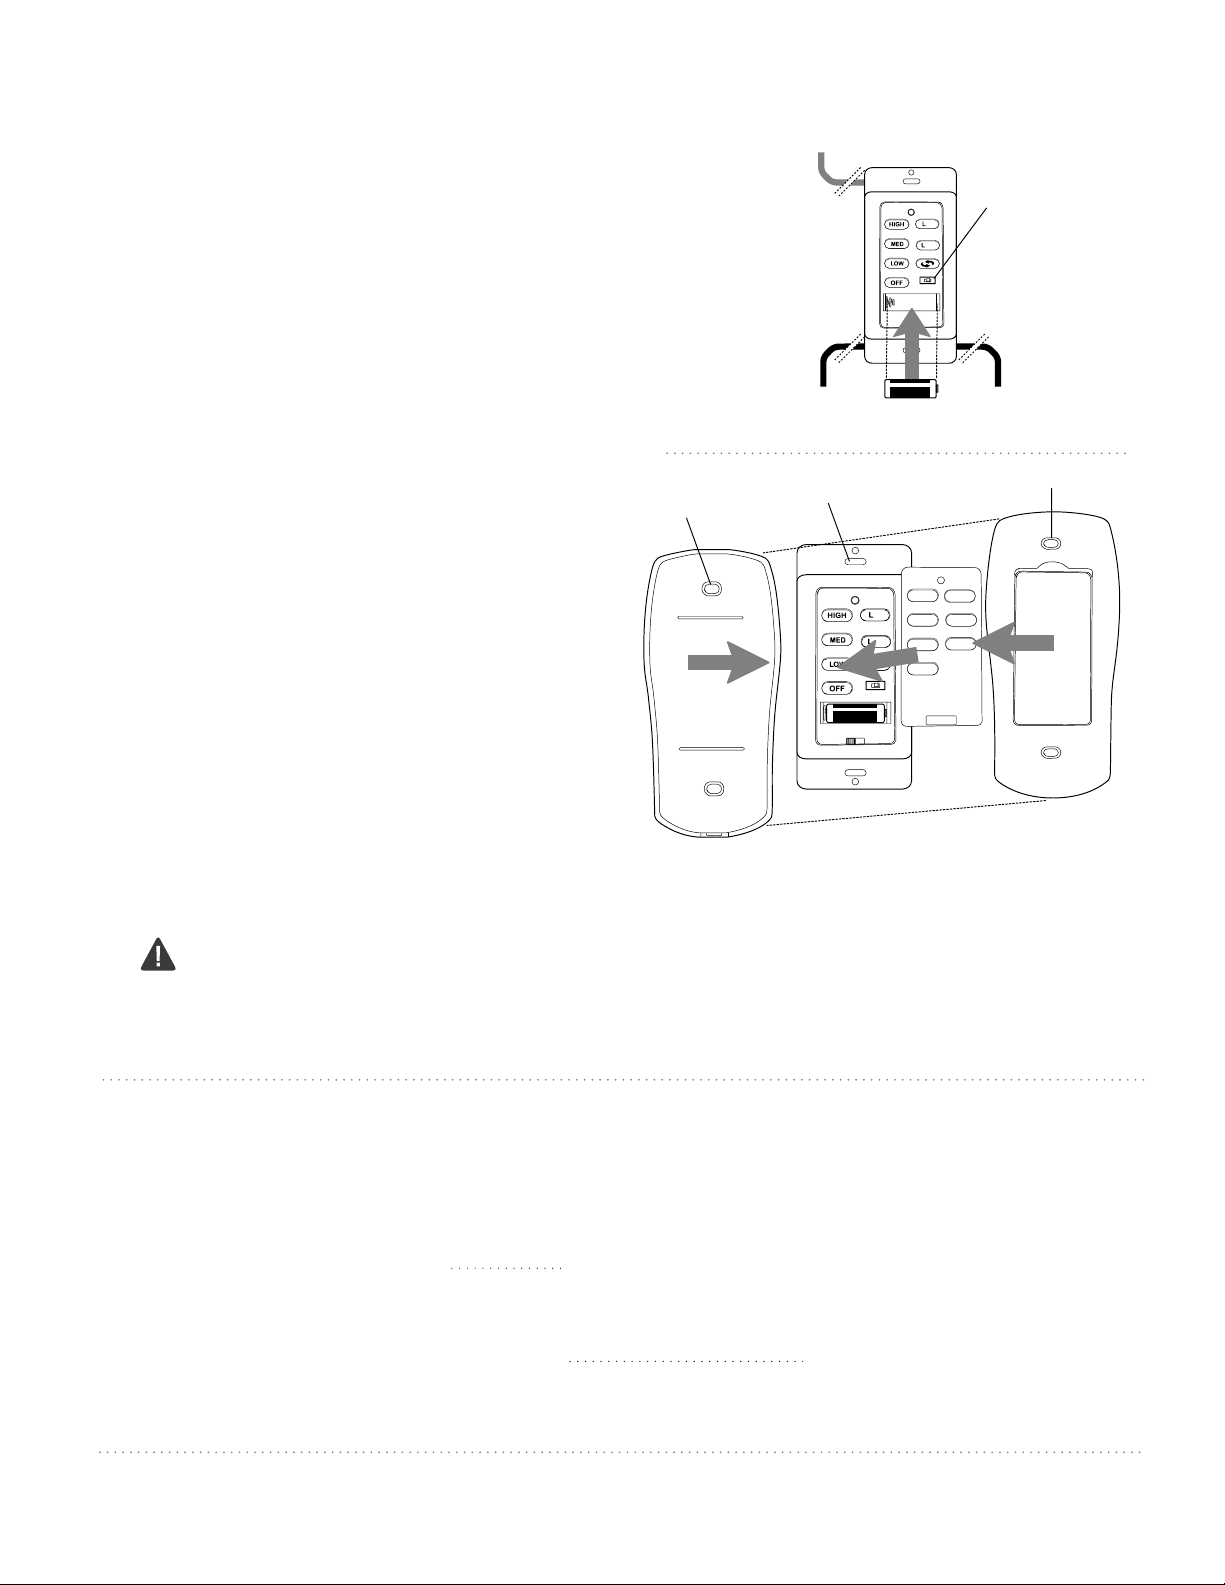
Install one 12-volt battery (included) in wall control.
[Refer to diagram 2.]
The bulbs provided with this fan are not compatible with
dimmer controls; therefore, the dimmer switch (labeled
DIM and ON) has been pre-set to the "OFF" position
(ON). If you wish to have dimming capability, you will
need to use a different type of bulb (sold separately) and
the switch must be moved to the "ON" position (DIM).
Attach black faceplate to front of wall control; press
down firmly. [Refer to diagram 3.]
Align holes in wall control with posts located on inside of
TOP part of remote control cover and press together
firmly. Place wall control into BOTTOM part of remote
control cover, aligning posts in top of remote control
cover with post holes in the bottom. [Refer to diagram 3.]
(NOTE: Make sure to align narrower ends of remote
control cover before closing.) Squeeze top and bottom
of remote control cover together until you hear a click at
each end, indicating that the remote control cover has
closed completely.
IMPORTANT: Store the remote control away from excess
heat or humidity. To prevent damage to remote control,
remove the battery if remote control will not be used for
long periods.
page 9
dimmer switch
wall control
wire
wire
wire
12V battery
10. Assembly of Handheld Remote Control. (cont.)
wall
control
face-
plate
remote control
cover, BOTTOM
post
hole
diagram 2
diagram 3
post
hole
remote control
cover, TOP
DIM ON
11
-
22
-
DIM ON
11
-
22
-
CAUTION: The wall and/or handheld remote control can be programmed to multiple receivers or fans. If this is not
desired, turn wall switch off to any other programmable receiver or fan.
Restore electrical power and then, if using wall control, set slider switch on wall control to the ON position.
Within 60 seconds of turning on the wall control, press and hold the fan OFF button on the wall control for 5
seconds (or until light blinks twice or fan blades begin to turn.)
Turn power off again for at least 5 seconds and then turn power back on. Within 60 seconds of restoring the
power, press and hold the fan OFF button on the handheld remote control for 5 seconds (or until light blinks
twice or fan blades begin to turn.)
Test the light and fan functions to confirm the learning process is complete--see Section 13 on the following page.
11. Automated Learning Process./Activating Code.
CAUTION: “DO NOT DISPOSE OF BATTERIES IN FIRE, BATTERIES MAY EXPLODE OR LEAK.” -
When disposing of household alkaline batteries, it is best to check with your local and state recycling or
household hazardous waste coordinators concerning the specifics of the program in your area. You may also
locate a recycling center by calling 1-800-8-BATTERY or 1-877-2-RECYCLE or visit
www.epa.gov/epawaste/index.htm or www.earth911.org for more information.
Loading ...
Loading ...
Loading ...