Loading ...
Loading ...
Loading ...
37
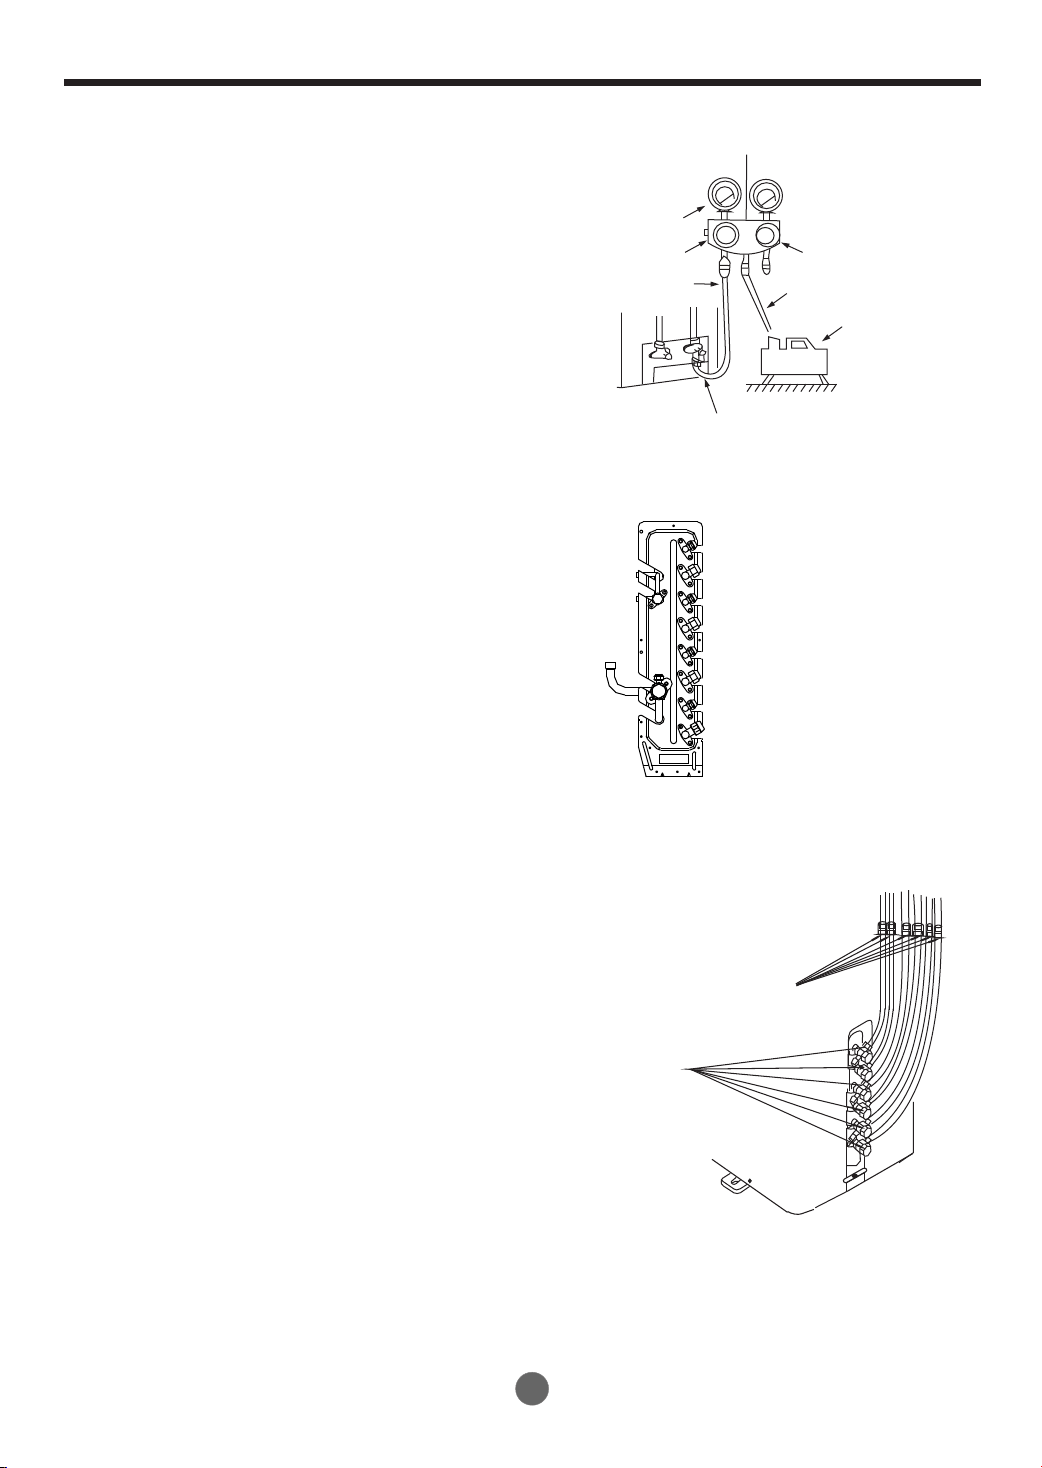
AIR PURGING
starting evacuation, slightly loose theflare nut
of the Lo valve on the gas pipe side and
check that the air is entering(Operation noise
of the vacuum pump changes and a
compound meter indicates 0 instead of minus)
5. After the evacuation is complete, fully close
the handle Lo of the manifold valve and stop
the operation of the vacuum pump. Make
evacuation for 15 minutes or more and check
that the compound meter indicates
5
-76cmHg (-1x10 Pa).
6. Turn the stem of the packed valve B about
o
45 counterclockwise for 6~7 seconds after
the gas coming out, then tighten the flare nut
again. Make sure the pressure display in the
pressure indicator is a little higher than the
atmosphere pressure.
7. Remove the charge hose from the Low
pressure charge hose.
8. Fully open the packed valve stems B and A.
9. Securely tighten the cap of the packed valve.
10. If the outdoor unit uses all vacuum valves,
and the vacuum position is at the main valve,
the system is not connected with the indoor
unit must be tightened with a screw nut.
Checking the gas leakage before operation
to prevent leakage.
4. Operate the vacuum pump to evacuate. After
Manifold valve
Compound meter
-76cmHg
Handle Lo
Handle Hi
Charge hose
Charge hose
Vacuum pump
Pressure gauge
Low pressure valve
Fig.67
Fig.68
Perform the electric safe check after
completing installation:
1. Insulated resistance
The insulated resistance must be more than 2MΩ.
2. Grounding work
After finishing grounding work, measure the
grounding resistance by visual detection and
grounding resistance tester. Make sure the
grounding resistance is less than 4Ω.
3. Electrical leakage check (performing during
test running)
During test operation after finishing installation,
the serviceman can use the electroprobe and
multimeter to perform the electrical leakage
check. Turn off the unit immediately if leakage
happens. Check and find out the solution
ways till the unit operate properly.
● Electrical safety check
Safety and leakage check
Indoor unit
check point
Outdoor unit
check point
n
m
k
j
i
h
C
C
C
D
D
B
B
B
A
A
A
a
c
b
d
e
f
Fig.69
Loading ...
Loading ...