Loading ...
Loading ...
Loading ...
11
INSTALLATION INSTRUCTIONS
Installation is possible with a ceiling dimension
of 600 mm / 23.62in(marked with * ) . However,
to achieve a ceiling-panel overlapping dimension
of 15 mm / 0.59in, the spacing between the
ceiling and the unit should be 20 mm / 0.79in
or less.If the spacing between ceiling and the
unit is over 20 mm / 0.79in, attach sealing
material in the part or recover the ceiling.
NOTE:
- Create the ceiling opening required for installation.
From the side of the opening to the casing outlet,
implement the refrigerant and drain piping and
wiring for remote controller (unnecessary for
wireless type). Refer to each piping or wiring
section.
- After making an opening in the ceiling, it may be
necessary to reinforce ceiling beams to keep the
ceiling level and to prevent it from vibrating.
Consult the builder for details.
Use expansible hooks, sunken anchors or other field
supplied parts to reinforce the ceiling in order to bear
the weight of the unit. Adjust clearance from the
ceiling before proceeding further. Installation
example see figure below.
2) Make the ceiling opening needed for
installation where applicable. (For existing
ceilings.)
3) Install the installation hooks. (Use either a
M8 or M10 size bolt. )
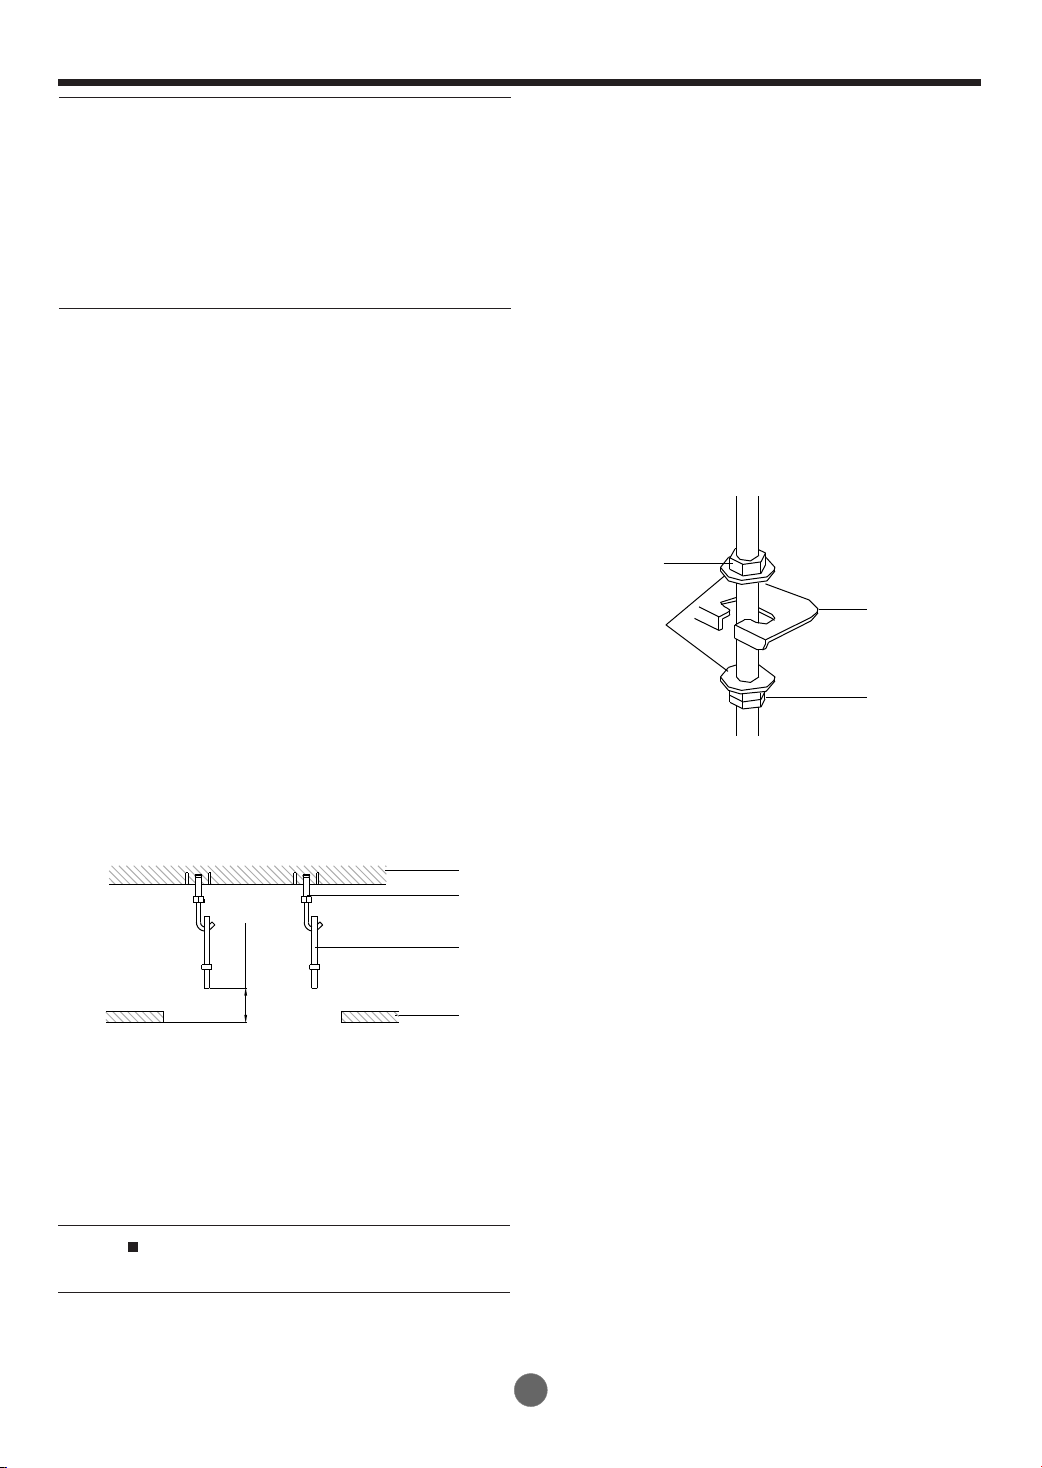
1 Ceiling slab
2 Expansible hook (optional)
3 Installation hook (optional)
4 False ceiling
installation, contact your dealer for details.
For other installation than standard NOTE
30~35mm
1
2
3
4
- Attach the hanger bracket to the suspension bolt.
Be sure to fix it securely by using a nut and
washer from the upper and lower sides of the
hanger bracket.
- Securing the hanger bracket see figure below.
2) Fix the paper pattern for installation. (For new
ceilings only)
1) Install the indoor unit temporarily.
1 Nut (field supply)
2 Washer (field supply)
3 Hanger bracket
4 Double nuts (field supply, tighten)
2.3 Indoor unit installation
When installing optional accessories, read also the
installation manual of the optional accessories.
Depending on the field conditions, it may be easier to
install optional accessories before the indoor unit is
installed (except for the decoration panel).However,
for existing ceiling, install fresh air inlet component kit
and branch duct before installing the unit.
- The paper pattern for installation corresponds
with the measurements of the ceiling opening.
Consult the builder for details.
- The centre of the ceiling opening is indicated on
the paper pattern for installation.
- After removing the packaging material from the
paper patten for installation, attach the paper
pattern for installation to the unit with the
attached screws as shown in figure below.
1
2
3
4
Fig.19
Fig.18
1.18~1.38in
Loading ...
Loading ...
Loading ...